Posted on Leave a comment

Easter Advent Day 7 – Easter Eggs

Hey there, yarn-loving friend! 🧶
It’s that time of year when spring starts to bloom, the chocolate bunnies come out to play, and we start spotting those colorful little Easter eggs popping up everywhere. But today, I’m not just talking about the kind you dye and hide in the backyard. Today we have a mixture of Easter eggs to crochet and egg cozy patterns along with an Easter egg dishcloth pattern.
Mr. Eggerton Amigurumi


Egg Characters Plush Toy Crochet Pattern


Simple Easter Egg Pattern from Pocket Yarnlings 

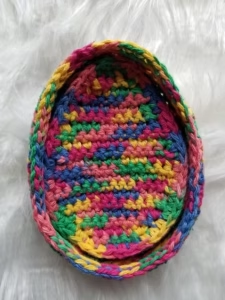
Chunky Woven Easter Eggs from Concrete Gems Crochet 

Easter Dish Cloth from Marsha YarnDoodles


Easter Egg Coaster from Marsha YarnDoodles


Rainbow Egg Cozy from My Fingers Fly


Today’s free download is Happy Easter Egg Mindful Coloring Page

In parts of Germany, especially in regions like Bavaria, there’s a lesser-known Easter tradition involving the Easter Fox 🦊🥚

Before the Easter Bunny became the dominant symbol, different regions in Germany had various animals delivering Easter eggs—and one of them was the fox!

  • In some areas, people believed the fox hid Easter eggs for children to find
  • The fox was likely chosen because it was common in rural areas and known for being clever and sneaky—perfect for hiding eggs


🦊 The Easter Fox (Osterfuchs) Egg Cozy Crochet Pattern

Materials:

I Love This Cotton worsted weight yarn:

50 yards Antique Gold

20 yards Ivory

Size E (3.5 mm) crochet hook

8-mm black safety eyes

8-mm black safety nose


Fox measures approximately 5” tall and fits standard plastic Easter egg.

Gauge: 10 sc = 2”, 11 rows = 2”

 STITCHES:

Invisible decrease: https://youtube.com/shorts/0NC5nXyDvwI?feature=share

Ultimate finish:  https://youtu.be/jVpTr8mId3I

 DIRECTIONS:

BODY:

Rnd 1: With Antique Gold yarn, ch 30, join to form a ring being careful not to twist chs. Ch 1, sc in each st (30 sc). Do not join. Work in continuous rnds unless otherwise specified.

Rnds 2-7: Sc in each st.

Rnd 8: *Inv dec, sc in next 3 sts,* repeat around (24 sc).

Rnds 9-10: Sc in each st.

Rnd 11: *Inv dec, sc in next 2 sts,* repeat around (18 sc).

Rnd 12: Sc in each st.

Rnd 13: *Inv dec, sc in next st,* repeat around (12 sc). Join with sl st. Close body with ult fin.

NECK:

Row 1: With Ivory yarn, ch 5, sc in 2nd ch from hook, sc in next 3 ch (4 sc).

Row 2: Ch 1, turn, inc in first st, sc in next 2 sts, inc in next st (6 sc).

Rows 3-6: Ch 1, turn, sc in each st.

Row 7: Ch 1, turn, dec, sc in next 2 sts, dec (4 sc).

Row 8: Ch 1, turn, dec twice (2 sc). Fasten off leaving 12” length for sewing. Sew to Rnds 6-13 of front of body.

HEAD:

Rnd 1: With Ivory yarn, ch 2, (or magic circle), 6 sc in 2nd ch from hook (6 sc). Do not join. Work in continuous rnds unless otherwise specified.

Rnd 2: 2 sc in each st (12 sc).

Rnd 3: *Sc in sc, 2 sc in next sc,* repeat around (18 sc).

Rnd 4: *Sc in next 2 sc, 2 sc in next sc,* repeat around (24 sc).

Rnd 5: *Sc in next 3 sc, 2 sc in next sc,* repeat around (30 sc).

Rnd 6: Sc in each st. Join with sl st. Fasten off Ivory.

Rnds 7-10: With Antique Gold, sc in each st.

Rnd 11: *Inv dec, sc in next 3 sts,* repeat around (24 sc).

Rnd 12: *Inv dec, sc in next 2 sts,* repeat around (18 sc). Insert eyes at Rnd 8, 4 sts apart. Stuff head.

Rnd 13: *Inv dec, sc in next st,* repeat around (12 sc).

Rnd 14: Inv dec 6 times. Join with sl st. Stuff. Close with ult fin.

Sew head to top of body.

SNOUT:

Rnd 1: With Ivory yarn, ch 2 (or magic circle), 2 sc in 2nd ch from hook, 2 Antique Gold sc in same ch. Do not join.

Rnd 2: With Ivory yarn, sc in next st, inc in next st. With Antique Gold yarn, sc in next st, inc in next st (6 sc).

Rnd 3: With Ivory yarn, sc in next 2 sts, inc in next st. With Antique Gold yarn, sc in next 2 sts, inc in next st (8 sc).

Rnd 4: *Sc in next st, inc in next st,* 2 times with Ivory then 2 times with Antique Gold (12 sc). Join with sl st. Fasten off leaving 6” length of each yarn for sewing.

Insert safety nose in Rnd 1. Sew snout to front of head with Ivory on top, Antique Gold on bottom. Match the color change on snout to color change on head.

TAIL:

Rnd 1: With Ivory, ch 2 (or magic circle), 4 sc in 2nd ch from hook. Do not join.

Rnd 2: *Sc in next st, inc in next st,* twice (6 sc).

Rnd 3: *Sc in next st, inc in next st,* 3 times (9 sc). Join with sl st. Fasten off Ivory.

Rnds 4-9: With Antique Gold, sc in each st. Join with sl st at end of Rnd 9. Fasten off with 9” length. Sew to back with Rnd 9 at Rnd 1 of body.

EARS: (Make 2)

Rnd 1: With Ivory, ch 2, (or magic circle), 6 sc in 2nd ch from hook (6 sc). Do not join.

Rnd 2: Sc in next st, 2 sc in next st (9 sc). Join with sl st. Fasten off Ivory.

Rnds 3-4: With Antique Gold, sc in each st. Join with sl st at end of Rnd 4. Fasten off leaving 9” length for sewing.

Sew ears to top of head at Rnds 3-6.

PDF available at Fox Egg Cozy Crochet Pattern

Free download only on March 27, 2026

NOTE: Downloading this pattern adds you to my email list where I share new patterns, exclusive discounts, and crochet inspiration. You can unsubscribe anytime—no hard feelings!


Fox Easter gift tag, free download

More Easter Patterns

free easter crochet pattern

Easter Patterns

ICYMI (In Case You Missed It)

Day 1 – Bunnies

Day 2 – Chicks

Day 3 – Ducks

Day 4 – Lambs and Goats


Day 5 – Donkey

Day 6 – Baskets 


Day 8 – Clothing


Day 9 – Accessories


Day 10 – Crochet for Children

Day 11 – Crochet for Baby

Day 12 – Home Decor

Day 13 – Flowers


Day 14 – Miscellaneous

Affiliate Links

This post contains affiliate links. This means I may earn a commission should you chose to sign up for a program or make a purchase using my link. It’s okay – I love all of these companies anyways, and you will too!


Amazon affiliate: https://amzn.to/4hkS5Zd
Easter Eggs prefilled with Colorful Wind-Up Jumping Bunnies and Chicks


Happy Easter Mouse! book (from the author of If You Give a Mouse a Cookie)


Posted on 2 Comments

Easter Advent Day 1 – Bunnies

Celebrate Easter with an adorable crocheted Bunny!

Easter is the perfect time to get busy crocheting, and what better way to celebrate than with a handmade Easter Bunny? Whether you’re looking for a charming gift, festive decor, or just a fun project to enjoy, crocheting your own Easter Bunny is a delightful choice.

Today’s feature is bunnies of all types – from tiny amigurumi to a bunny bobblehead to an adorable sling bag. Each bunny is more adorable than the next, and all patterns are free to view on the designers’ blogs.

Share Your Bunny Creations. We’d love to see your Easter bunnies! Tag your photos on social media using #EasterBunnyCraft and inspire others to get creative.

Bunny Worry Worm from Start Crochet

Free Bunny Crochet Pattern from Pocket Yarnlings

Bunny Butt Coasters from Marsha YarnDoodles 

bunny dish scrubby
Bunny Dish Scrubby, My Fingers Fly
Bunny Bath Pouf, My Fingers Fly


Easter bunny bobblehead crochet pattern

Bunny Bobblehead Crochet Pattern


Easter Egg Cozy from Start Crochet

Easter Bunny Find the Differences Game – Free download

Bunny Sling Bag Crochet Pattern

Materials:

Worsted weight yarn:

100 yards MC

5 yards CC

Size H (5.0 mm) crochet hook

Yarn needle

7” zipper

20-mm safety eye

½” pink pompom for nose

2-3” white pompom for tail

Buckle and strap set with polyester webbing (https://amzn.to/4774ZYe)

Gauge: 7 sc = 2”, 8 rows = 2”

Bunny measures 11.5” tall by 6” wide. Bag with strap measures 20-30” (depending on length of strap).

DIRECTIONS:

BUNNY: (Make 2)

Row 1: With MC, ch 19, sc in 2nd ch from hook and in next 17 ch (18 sc).

Row 2: Ch 1, turn, inc in first st, sc in next 16 sts, inc in last st (20 sc).

Row 3: Ch 1, turn, sc in each st.

Row 4: Ch 1, turn, dec, sc across remaining sts (19 sc).

Row 5: Ch 1, turn, sc in 17 sts, dec (18 sc).

Row 6: Ch 1, turn, sc in each st.

Row 7: Ch 1, turn, sc in 16 sts, dec (17 sc).

Rows 8-10: Ch 1, turn, sc in each st.

Row 11: Ch 1, turn, sc in 15 sts, dec (16 sc).

Row 12: Ch 1, turn, sc in each st.

Row 13: Ch 1, turn, dec, sc in next 13 sts, inc (16 sc).

Row 14: Ch 1, turn, sc in each st.

Row 15: Ch 1, turn, dec, sc in next 13 sts, inc (16 sc).

Row 16: Ch 1, turn, sc in each st.

Row 17: Ch 1, turn, dec, sc in next 13 sts, inc (16 sc).

Row 18: Ch 1, turn, sc in each st.

Row 19: Ch 1, turn, dec, sc in next 12 sts, dec (14 sc).

Row 20: Ch 1, turn, sc in each st.

Row 21: Ch 1, turn, dec, sc in next 12 sts (13 sc).

Row 22: Ch 1, turn, inc in first st, sc in next 10 sts, dec (13 sc).

Row 23: Ch 1, turn, dec, sc in next 10 sts, inc (13 sc).

Row 24: Ch 1, turn, sc in each st.

Row 25: Ch 1, turn, dec, sc in next 10 sts, inc (13 sc).

Row 26: Ch 1, turn, sc in each st.

Row 27: Ch 1, turn, dec, sc in next 10 sts, inc (13 sc).

Row 28: Ch 1, turn, sc in 11 sts, dec (12 sc).

Row 29: Ch 1, turn, inc in first st, sc in next 10 sts, inc in next st (14 sc).

Row 30: Ch 1, turn, sc in 12 sts, dec (13 sc).

Row 31: Ch 1, turn, dec, sc in next 9 sts, dec (11 sc).

Row 32: Ch 1, turn, sc in each st.

Row 33: Ch 1, turn, dec, sc in next 7 sts, dec (9 sc).

Row 34: Ch 1, turn, dec, sc in next 5 sts, dec (7 sc).

Row 35: Ch 1, turn, dec, sc in next 3 sts, dec (5 sc). Fasten off yarn.

If using a sewing machine, it’s easier to sew webbing to back of bunny before assembling the bag. Cut polyester webbing 52-60” long.

Sew with 5” of webbing extending off the top of the bunny.

Turn over and place other bunny piece on top. Pin together and mark Rows 4 & 30. The distance between markers should be approximately 7” to fit zipper.

Attach MC at Row 30, sc along edges of rows of top bunny piece to Row 5. At Row 4, sc through both layers from Row 4 to Row 1 with 2 sc in Row 1. Continue around bottom using unused lps of foundation ch with 2 sc in last lp. Continue up the front and head of bunny with 2 sc in any corner to help maintain the shape. Continue through both layers around head until you reach marker at Row 30. Join with sl st in first sc of rnd. On back bunny piece, sc through edges of Rows 5-29. Join with sl st at Row 4. Fasten off yarn.

EARS: (Make 2)

Row 1: With CC yarn, ch 8, sc in 2nd ch from hook, sc in next 5 ch, 3 sc in last ch. Working on opposite side of foundation ch, sc in next 6 chs. Fasten off CC.

Repeat Row 1 with MC yarn. Do not fasten off.

Row 2: Ch 1, turn, place CC ear on top of MC ear and work through both layers. Sc in 6 sts, 2 sc in next 3 sts, sc in next 6 sts, sl st in same sp as last sc. Fasten off leaving 9” length for sewing. Sew ears to top of head.

Sew ½” pompom at end of Row 30. Insert safety eye at Row 30, 6 sts from nose. Sew zipper to 7” slot in back of bunny. Sew white pompom below zipper.

Thread female clip on 5” piece of webbing above bunny and sew the end in place.

Insert slide clip on other end of webbing. Insert male clip on end and thread end of webbing back through slide clip.


Add-free PDF available at Bunny Sling Bag Crochet Pattern

Easter Advent Crochet Patterns

For 2 weeks leading up to Easter, we will feature free Easter patterns on the blog for your holiday crafting. Over 40 designs with a different theme every day. Be sure to visit every day to experience all the beautiful patterns from some of the best indie designers. There will also be a new free download each day with a different theme – coloring pages, gift tags, activities for children, and so many more.

Download a copy of the calendar so you can print it as your daily reminder. Each date on the calendar will contain a link to that day’s blog post.

Easter Advent Calendar


Day 2 – Chicks

Day 3 – Ducks

Day 4 – Lambs and Goats


Day 5 – Donkey

Day 6 – Baskets 

Day 7 – Easter Eggs

Day 8 – Clothing


Day 9 – Accessories


Day 10 – Crochet for Children

Day 11 – Crochet for Baby

Day 12 – Home Decor

Day 13 – Flowers


Day 14 – Miscellaneous

Affiliate Links

This post contains affiliate links. This means I may earn a commission should you chose to sign up for a program or make a purchase using my link. It’s okay – I love all of these companies anyways, and you will too!


Amazon affiliate: https://amzn.to/4hkS5Zd

Red Heart Crochet Kit


Posted on Leave a comment

National Plant a Flower Day in Crochet

For crocheters, National Plant a Flower Day is the perfect inspiration to “plant” a few flowers of our own—with yarn and a hook! 🌼 While gardeners dig in the soil, crocheters can grow colorful blooms that last forever. From delicate appliqués and cheerful granny squares to full crochet bouquets, handmade flowers add a touch of spring to hats, blankets, bags, and home décor. It’s a lovely reminder that creativity, like a garden, grows beautifully one stitch at a time.

Today we have a roundup of free flower crochet patterns to kick off your spring crafting.

Free Crochet Patterns

Floral purse
Floral Handbag
nosegay crochet pattern
Nosegay including YouTube Tutorial
sunflowers in snow scarf crochet pattern
Sunflowers in Snow Scarf Pattern
Van Gogh Sunflowers panel


Miss Tulip Amigurumi Crochet Pattern
Miss Tulip Amigurumi
texas flag ornament
Texas Flag Ornament
Flower Easter Basket Crochet Pattern


Mae’s Flowers from Jo’s Crafty Hook

The Mae’s Flowers can be made in solid or contrasting colors. This crochet pattern is a great way to use up your scrap yarn.

https://joscraftyhook.com/maes-flower-free-crochet-pattern/

Sunflower Applique from Jo’s Crafty Hook

The Sunflower Appliqué can added as an embellishment to headbands, purses, or even as a little something special to a gift.

Sunflower Applique Free Crochet Pattern

Blossom Flower from Pocket Yarnlings

If you have been looking for some spring themed or even summer themed flowers to crochet up quickly, either as small little gifts, or even as appliques to sew onto your clothes, here is a great example to whip up in a jiffy!

https://www.pocketyarnlings.com/blog/free-crochet-blossom-flower

Snowdrop from Concrete Gems Crochet 

The first flowers to poke their heads through after the long, cold winter are always the snowdrops. These crochet snowdrops provide an everlasting reminder of new beginnings and springtime

Snowdrop Crochet Pattern for Mother’s Day

Arche de fleurs planter holder from SaiASmi – Dreamz in Yarn

Arche de fleurs is a minimum sew crochet pattern, that’s quick to make and adds a lovely colorful design to your planters. This is my attempt is at ‘no join’ or ‘no sew’ patterns.

https://www.saiasmidreamzinyarn.com/post/arche-de-fleurs-planter-holder-crochet-pattern

Heart Flower Dishcloth from Marsha YarnDoodles

The Heart Flower Dish/Wash Cloth was designed in memory of my mother, who loved flowers. I used a heart as the flower to symbolize my love for her.

https://www.marshayarndoodles.com/post/heart-flower-dish-wash-cloth

Quick & Cute Small Flower from Start Crochet

Create beautiful crochet flowers effortlessly with this Cute Crochet Flower Pattern, featuring a simple, easy-to-follow diagram. Perfect for embellishing accessories, gifts, and home décor, this quick project is great for beginners.

This blog post also includes a printable Crochet Project Tracker from Start Crochet.

Quick & Cute Small Flower Crochet Applique (Free Pattern)

Peony Flower from Jo’s Crafty Hook

Add these great spring flowers to your home decor or add them as an embellishment to headbands, purses and more.

Peony Flower Free Crochet Pattern


Free Downloads

Happy Mother’s Day Coloring Page
made with love
Carnation Gift Tag
Flower Coloring Page
great day coloring page
Adult Coloring Pages
think positive coloring page
Think Positive Coloring Page

Paid Crochet Patterns

Yellow Rose of Texas Afghan Crochet Pattern
Yellow Rose of Texas Afghan
All the Roses Pillow
Poppy Pocket Shawl Crochet Pattern
Wild Roses Scarf

ICYMI (In Case You Missed It)

Heart Doll
Pigskin Amigurumi
Hot Dog Toddler Slippers
St. Patrick’s Day hat for Dogs


Affiliate Links

This post contains affiliate links. This means I may earn a commission should you chose to sign up for a program or make a purchase using my link. It’s okay – I love all of these companies anyways, and you will too!


Amazon affiliate: https://amzn.to/4hkS5Zd

Red Heart Crochet Kit


Posted on Leave a comment

St. Patrick’s Day Dog Hat Crochet Pattern

Get ready to sham-rock your pup’s world! St. Patrick’s Day is the perfect excuse to dress up your furry best friend in something festive, fun, and handmade. And what could be cuter than a lucky little leprechaun-inspired dog hat?

Whether you’re snapping photos for social media, heading to a pet-friendly parade, or just celebrating at home, this St. Patrick’s Day Dog Hat Crochet Pattern adds instant charm (and smiles).


Why Your Dog Needs a St. Paddy’s Hat

Let’s be honest—dogs already have personality. This hat just amplifies it. 🍀

Imagine your pup sporting a tiny green hat with festive flair. It’s perfect for:

  • St. Patrick’s Day photo shoots

  • Pet parades and parties

  • Social media content

  • Matching family outfits

  • Handmade gifts for dog lovers

Plus, handmade always wins.


About the Pattern

This crochet pattern is designed to be both adorable and practical. It includes step-by-step instructions to create a festive hat that stays comfortably in place while your pup struts their lucky stuff.

Use classic emerald green for a traditional leprechaun look, or mix in bright spring greens for a playful twist.

Materials:

Worsted weight yarn:

70 yards green

10 yards black

Size G (4.0 mm) crochet hook

1/8” elastic


Leprechaun hat measures approximately 5.5 interior diameter, 7”, diameter including brim, 2.75” tall.

Fits medium-sized dog (30-50 pounds).


Gauge: 9 sc = 2”, 9 rows = 2”


Directions:

HAT:

Rnd 1: With green yarn, ch 2 (or magic ring). Sc 6 in second ch from hook. Do not join. Work in continuous rnds unless otherwise specified.

Rnd 2: 2 sc in each sc (12 sc).

Rnd 3: *1 sc in next sc, 2 sc in next sc,* repeat around (18 sc).

Rnd 4: *1 sc in next 2 sc, 2 sc in next sc*, repeat around (24 sc).

Rnd 5: *1 sc in next 3 sc, 2 sc in next sc*, repeat around (30 sc).

Rnd 6: *1 sc in next 4 sc, 2 sc in next sc,* repeat around (36 sc).

Rnd 7: *1 sc in next 5 sc, 2 sc in next sc,* repeat around (42 sc).

Rnd 8: *1 sc in next 6 sc, 2 sc in next sc,* repeat around (48 sc).

Rnd 9: *1 sc in next 7 sc, 2 sc in next sc,* repeat around (54 sc).

Rnd 10: *1 sc in next 8 sc, 2 sc in next sc,* repeat around (60 sc).

Rnds 11-18: Sc in each st. Join with sl st at end of Rnd 18.

Rnd 19: Working in FLO, *sc in next 2 sts, 2 sc in next st,* repeat around (80 sc).

Rnd 20: Working in both lps, *sc in next 4 sts, 2 sc in next st,* repeat around (96 sc).

Rnds 21-23: Sc in each st. Join with sl st at end of Rnd 23. Fasten off green yarn.

HAT BAND:

Row 1: With black yarn, ch 4, sc in 2nd ch from hook and in next 2 chs.

Rows 2-66 (or to desired length): Ch 1, turn, sc in each st (3 sc).

When hat band reaches desired length (approximately 66 rows), fasten off black yarn. Sew first row to last row to form a circle. Place on hat and sew to Rnds 16-18.

SHAMROCK:

With green yarn, ch 4, dc in 2nd ch from hook, 2 tr, 1 dc, ch 3, sl st in ring, *ch 3, dc, 2 tr, dc, ch 3, sl st in ring,* twice. Fasten off leaving 9” length for sewing. Sew shamrock to center front of hat band.

Cut a piece of elastic approximately 12” and adjust length to fit your dog. Sew ends to inside of hat at Rnd 10.

PDF available at St. Patrick’s Day Dog Hat Crochet Pattern

More St. Patrick’s Day Projects

St. Patrick’s Day crochet patterns ebook 50% off through 3/15/2026
St. Patrick’s Day Turtle
Pot of Gold Kitchen Boa
Leprechaun Eyeglass Holder
Leprechaun Gift Bag crochet pattern

ICYMI (In Case You Missed It)

Puppy Love Slippers
Cupid’s Arrow Lip Balm Holder
Heart Doll
Pigskin Amigurumi
Hot Dog Toddler Slippers


Celebrating 500 patterns!!

Get 50% off any pattern or ebook in my Ravelry shop through 3/7/2026

Ravelry: Designs by Lisa Ferrel

March Maker Madness Blog Hop

Today’s free pattern in the March Maker Madness hop is the Plummeria Washcloth from Ambassador Crochet.

https://lisamff–carroway-crochet.thrivecart.com/march-maker-madness-2026-bundle/69a4863d03693/

There is also a bundle of all 27 patterns in the bundle plus the option for a bonus bundle of 5 patterns from Carroway Crochet.

You will be able to get all 27 of the  patterns in the March Maker Madness Pattern Bundle for only $9.99

https://lisamff–carroway-crochet.thrivecart.com/march-maker-madness-2026-bundle/

Weekly Featured Pattern

It’s a new week and a new #WeeklyFeaturedPattern this week Crochet Designer Community
Get the Welsh Braided Cowl Crochet Pattern for 50% off until March 8th (11:59p EST)
The cowl design has 3 sizes to choose from so there are so many people you can crochet this for: 4-10 years, Tween, and Adult.
The Triad Stitch and the Braided Puff Stitch created such a beautiful texture and thickness.
Copy and paste the link below or visit the Crochet Designer Community link in my Bio to get the Coupon Code needed to get 50% off!
Find more from me using the link below.

Affiliate Links

This post contains affiliate links. This means I may earn a commission should you chose to sign up for a program or make a purchase using my link. It’s okay – I love all of these companies anyways, and you will too!


Amazon affiliate: https://amzn.to/4hkS5Zd

Red Heart Crochet Kit


Posted on 1 Comment

Warm Your Slippers Blog Hop – Hot Dog Slippers for Toddlers

There’s nothing better than slipping your feet into something soft and handmade—especially when there’s still a chill in the air. That’s exactly why the Warm Your Slippers Blog Hop is here!

This cozy event brings together some of my favorite crochet designers to share slipper patterns that are perfect for lounging, gifting, and keeping those toes toasty warm. Whether you love classic styles, whimsical designs, or something with a little personality stitched in, you’ll find plenty of inspiration along the way.

Why Slippers?

Slippers are:

  • Quick to make

  • Practical and giftable

  • Perfect for using up stash yarn

  • A crowd-pleaser at craft fairs

  • Ideal for holiday gift planning (yes, already 😉)

They’re the kind of project that feels both thoughtful and useful—warmth wrapped in stitches.

My Featured Pattern – Hot Dog Slippers

I’m so excited to share my contribution to this hop! My slipper design combines comfort, charm, and just a touch of fun. Designed for warmth and everyday wear, these slippers are great for playtime, photos, and unforgettable handmade gifts. They work up quickly and are a joyful project for any crocheter.

Skill Level: Beginner to intermediate (basic stitches and simple shaping)

Sizes Included: Slippers fit 3-4-year-old (6.25″ long) or 5-6-year-old size (7.0″ long).

Materials Needed:
* Worsted weight yarn in bun, hot dog, and condiment colors
* Crochet hook H (5.0 mm)
* Yarn needle
* Scissors
* Fiberfill
* Optional non-slip sole material

🎁 Perfect For:

• Funny handmade gifts
• Toddler slippers
• Birthday presents
• Photo props
• Holiday or stocking stuffers

The Hot Dog Toddler Slippers crochet pattern is a fun and unique way to make something warm, silly, and totally memorable.

STITCHES:

Invisible decrease: https://youtube.com/shorts/0NC5nXyDvwI?feature=share

Ultimate finish:  https://youtu.be/jVpTr8mId3I

Directions:

HOT DOG:

Rnd 1: With red yarn, ch 2 (or magic circle), 6 sc in 2nd ch from hook (6 sc). Join with sl st.

Rnd 2: Ch 1, 2 sc in each st (12 sc). Join with sl st.

Rnd 3: Ch 1, *sc in sc, 2 sc in next sc,* repeat around (18 sc). Join with sl st.

Rnd 4: Ch 1, sc in each st. Join with sl st.

Rnd 5: Ch 1, *sc in 2 sc, 2 sc in next sc,* repeat around (24 sc). Join with sl st.

Rnd 6: Ch 1, sc in each st. Join with sl st.

Rnd 7 for size 3/4: Ch 1, *sc in 5 sc, 2 sc in next sc,* repeat around (28 sc). Join with sl st.

Rnd 7 for size 5/6: Ch 1, *sc in 3 sc, 2 sc in next sc,* repeat around (30 sc).

Rnds 8-13[15]: Ch 1, sc in each st. Join with sl st at end of Rnd 13 [15].

Rnd 14[16]: Ch 1, turn, dec, sc in next 19[21] sc, dec (21[23] sc). Leave remaining sts unworked.

Rnd 15[17]: Ch 1, turn, dec, sc in next 17[19 sc], dec (19[21] sc).

Rnds 16-26[18-30]: Ch 1, turn, sc in each st. Fasten off at end of Rnd 26[30] leaving 6” length. Fold Row 26[30] and sew tog for heel.

Cuff:

Rnd 1: Join red yarn at back seam. Ch 1, hdc across 12[16] row ends, dec at corner, hdc across front, dec at corner, hdc across 12 [16] rows on other side, join with sl st (30[34] hdc.

Rnd 2: Ch 1, *fpdc, bpdc,* repeat around. Join with sl st. Fasten off yarn.

BUN:

Rnd 1: With tan yarn, ch 2, 6 sc in 2nd ch from hook. Do not join. Work in continuous rnds throughout.

Rnd 2: Ch 1, 2 sc in each st (12 sc).

Rnd 3: Ch 1, *sc in sc, 2 sc in next sc,* repeat around (18 sc).

Rnd 4: Ch 1, *sc in next 2 sc, 2 sc in next sc,* repeat around (24 sc).

Rnd 5: Ch 1, *sc in next 3 sc, 2 sc in next sc,* repeat around (30 sc).

Rnd 6: Ch 1, *sc in next 4 sc, 2 sc in next sc,* repeat around (36 sc).

Rnd 7: Ch 1, *sc in next 5 sc, 2 sc in next sc,* repeat around (42 sc).

Rnd 8: Ch 1, *sc in next 6 sc, 2 sc in next sc,* repeat around (48 sc).

Rnd 9: (Size 5/6 only) Ch 1, *sc in next 7 sc, 2 sc in next sc,* repeat around (54 sc).

Rnds 9-22 [10-25]: Sc in each st.

Rnd 23[26]: (Size 5/6 only) *Inv dec, sc in next 7 sc,* repeat around (48 sc).

Rnd 24[27]: *Inv dec, sc in next 6 sc,* repeat around (42 sc).

Rnd 25[28]: *Inv dec, sc in next 5 sc,* repeat around (36 sc).

Rnd 26[29]: *Inv dec, sc in next 4 sc,* repeat around (30 sc).

Rnd 27[30]: *Inv dec, sc in next 3 sc,* repeat around (24 sc).

Rnd 28[31]: *Inv dec, sc in next 2 sc,* repeat around (18 sc).

Rnd 29[32]: *Inv dec, sc in next sc,* repeat around (12 sc).

Rnd 30[33]: Inv dec 6 times (6 sc). Close with ult fin.

Do not stuff bun. Lay flat and fold it around hot dog portion with top of slipper not covered by bun. Sew in place firmly.

Use yellow yarn to embroider mustard line across top of hot dog.


Hot Dog Toddler Slippers Crochet Pattern – free download for one day only on February 25

NOTE: Downloading this pattern adds you to my email list where I share new patterns, exclusive discounts, and crochet inspiration. You can unsubscribe anytime—no hard feelings!


ICYMI (In Case You Missed It)

Puppy Love Slippers
Cupid’s Arrow Lip Balm Holder
Heart Doll
Pigskin Amigurumi


Affiliate Links

This post contains affiliate links. This means I may earn a commission should you chose to sign up for a program or make a purchase using my link. It’s okay – I love all of these companies anyways, and you will too!


Amazon affiliate: https://amzn.to/4hkS5Zd

Red Heart Crochet Kit