Posted on 1 Comment

Meet Bumble Beaver: The Adorable Bee-Beaver Mashup You Never Knew You Needed

Sometimes the most fun crochet projects come from asking a simple question:

“What if I combined two completely different animals into one adorable amigurumi?”

That’s exactly how Bumble Beaver was born!

Part bumble bee, part beaver, and 100% cute, this whimsical crochet creation combines the best features of both animals into one unforgettable character.

Why Animal Mashups Are So Much Fun

Crocheters love creating the unexpected.

Animal mashups allow us to stretch our creativity and imagine creatures that could never exist in nature but somehow feel perfectly right in yarn form. Whether it’s a cat-unicorn, a dragon-duck, or a bee-beaver, these unique designs always bring smiles.

Bumble Beaver is no exception.

With fuzzy bee-inspired charm and hardworking beaver determination, this little friend is ready to buzz straight into your heart.

Sometimes the most fun crochet projects come from asking a simple question:

“What if I combined two completely different animals into one adorable amigurumi?”

That’s exactly how Bumble Beaver was born!

Part bumble bee, part beaver, and 100% cute, this whimsical crochet creation combines the best features of both animals into one unforgettable character.

Materials:

Bernat Blanket yarn:

75 yards Gold

35 yards Coal

50 yards Taupe

15 yards White

Size L (8.0-mm) crochet hook

Fiberfill

20-mm black safety eyes

18-mm black safety nose


Gauge: 9 sc = 4”, 8 rows = 4”

 Finished bumble beaver measures approximately 10” tall.

 Stitches:

Invisible decrease: https://youtube.com/shorts/0NC5nXyDvwI?feature=share

Ultimate finish:  https://youtu.be/jVpTr8mId3I


 Directions:

Rnd 1: With Gold yarn, ch 2, 12 sc in 2nd ch from hook (12 sc). Do not join. Work in continuous rnds throughout.

Rnd 2: *Sc in next st, 2 sc in next st,* repeat around (18 sc).

Rnd 3: *Sc in next 2 sts, 2 sc in next st,* repeat around (24 sc).

Rnd 4: *Sc in next 3 sts, 2 sc in next st,* repeat around (30 sc).

Rnd 5: *Sc in next 4 sts, 2 sc in next st,* repeat around (36 sc).

Rnd 6: Sc in each st.

Rnd 7: *Sc in next 5 sts, 2 sc in next st,* repeat around (42 sc). Join with sl st. Fasten off Gold yarn.

Rnd 8: Attach Coal yarn, sc in each st.

Rnd 9: *Sc in next 6 sts, 2 sc in next st,* repeat around (48 sc). Join with sl st. Fasten off Coal.

Rnds 10-11: With Gold yarn, sc in each st. Join with sl st at end of Rnd 11. Fasten off Gold.

Rnds 12-13: With Coal yarn, sc in each st. Join with sl st at end of Rnd 13. Fasten off Coal.

Rnd 14: With Gold yarn, sc in each st.

Rnd 15: *Inv dec over next 2 sts, sc in next 6 sts,* repeat around (42 sc).

Rnd 16: Sc in each st.

Rnd 17: *Inv dec over next 2 sts, sc in next 5 sts,* repeat around (36 sc).

Rnds 18-19: Sc in each st.

Rnd 20: *Inv dec over next 2 sts, sc in next 4 sts,* repeat around (30 sc).

Rnd 21: Sc in each st.

Insert eyes at Rnd 19, approximately 6 sts apart.

Rnd 22: *Inv dec over next 2 sts, sc in next 3 sts,* repeat around (24 sc).

Rnd 23: *Inv dec over next 2 sts, sc in next 2 sts,* repeat around (18 sc).

Rnd 24: *Inv dec over next 2 sts, sc in next st,* repeat around (12 sc).

Finish stuffing.  Close with ultimate finish.

SNOUT:
Rnd 1: With Taupe yarn, ch 4, sc in 2nd ch from hook, sc in next ch, 3 sc in last ch. Working on opposite side of starting ch, sc in next lp, 2 sc in last lp (8 sc). Do not join.

Rnd 2: 2 sc in first st, sc in next st, 2 sc in next 3 sts, sc in next st, 2 sc in next 2 sts (14 sc). Do not join.

Rnd 3: Sc in each st. Join with sl st. Fasten off yarn with 12” length for sewing. Insert safety nose in center of Rnd 1.

TEETH:

Attach White yarn at bottom of snout, ch 1, hdc, faste off. Sk 1 st and repeat for second tooth.

Stuff snout lightly and sew to front of body at Rnds 15-19 centered between eyes.

EARS: (Make 2)

Rnd 1: With Taupe yarn, ch 2, 5 sc in 2nd ch from hook (5 sc). Do not join.

Rnd 2: 2 sc in each st (10 sc). Do not join.

Rnd 3: Sc in each st. Join with sl st. Fasten off leaving 8” length for sewing. Curl ear and sew Rnd 3 of ear to head at Rnds 20-23.

FEET: (Make 4)

Rnd 1: With Coal yarn, ch 2, 5 sc in 2nd ch from hook (5 sc). Do not join.

Rnd 2: 2 sc in each st (10 sc). Do not join.

Rnd 3: Sc in each st. Join with sl st. Fasten off leaving 8” length for sewing. Stuff feet lightly and sew to front of body, 2 on top Coal stripe and 2 on bottom Coal stripe, approximately 6 sts apart.

TAIL:

Rnd 1: With Taupe yarn, ch 2, 6 sc in 2nd ch from hook (6 sc). Do not join. Work in continuous rnds throughout.

Rnd 2: 2 sc in each st (12 sc).

Rnd 3: *Sc in next st, 2 sc in next st,* repeat around (18 sc).

Rnd 4: Sc in each st.

Rnd 5: *Sc in next 2 sts, 2 sc in next st,* repeat around (24 sc).

Rnds 6-12: Sc in each st.

Rnd 13: *Inv dec, sc in next 2 sts,* repeat around (18 sc).

Rnds 14-15: Sc in each st. Join with sl st at end of Rnd 15. Fasten off leaving 12” length for sewing.

Flatten tail and sew Rnd 15 to back center of body at Rnd 5.

WINGS: (Make 2)

Row 1: With White yarn, ch 4, hdc in 2nd ch, hdc in next ch, 5 hdc in last ch. Working on opposite side of starting ch, hdc in next 2 lps (9 hdc).

Row 2: Ch 1, turn, hdc in 2 sts, 2 hdc in 5 sts, hdc in 2 sts (14 hdc).

Row 3: Ch 1, turn, hdc in 2 sts, *hdc in next st, 2 hdc in next st,* 5 times, hdc in last 2 sts (19 hdc).

Sew flat edges of wings to center back of body at Rnds 15-21 with wings touching each other. Allow rest of wings to swing freely.


PDF with color photos available at Bumble Beaver Amigurumi Crochet Pattern PDF

Get the PDF half price through 6/21/2026


Share your new creations in my Facebook group: https://www.facebook.com/share/g/1GcgVo8U6k/


Find more Beaver crochet patterns in the Zoo Animals Blog Hop

Zoo Blog Hop Day 18 – Beaver


ICYMI (In Case You Missed It)

Granny Square coloring page, free download
Bear Mobile Pet
Zoo Animals Gift Tag
June Crochet Planner


Pickle Kick Sack Crochet Pattern


Affiliate Links

This post contains affiliate links. If you use these links to buy something, we may earn a commission. Thanks for helping support my crochet blog. 

Lion Brand Yarn

20% off Parfait Yarn


Posted on Leave a comment

Easter Advent – Home Decor

Spring is here, and what better way to welcome the season than by adding some handmade charm to your Easter decor? Whether you’re hosting brunch, decorating your mantel, or just love the soft pastels of the season, this sweet crochet pattern will bring a cozy, festive vibe to your home.

bunny kitchen boa

Crochet this adorable bunny kitchen boa in cotton yarn, then sew two halves of a kitchen towel to the ends. No more searching for your kitchen towel or having it fall off your shoulder. The boa wraps around your neck to provide a kitchen towel for each hand.

Pattern includes instructions (and chart) to make the bunny boa in double crochet and attach it to a purchased kitchen towel.

Finished boa measures approximately: 4” wide by 68″ long (with instructions to lengthen or shorten).

Materials required:
I Love This Cotton worsted weight yarn:
150 yards aqua
75 yards white
10 yards pink
Crochet hook size G (4.00 mm)
Yarn needle
(4) 18-mm sew-on wiggle eyes
(2) ½” pink pompoms
8” x 20” kitchen towel
Needle and matching thread

Skill level: Easy to crochet, some sewing skills required.

Row 1: With white yarn, ch 18, dc in 2nd ch, dc in next 16 ch (17 dc).

Row 2: Ch 1, turn, dc in each st.

Row 3: Ch 1, turn, aqua dc in first st, white dc in next 15 sts, aqua dc in last st.

Row 4: Ch 1, turn, aqua dc in first 2 sts, white dc in next 13 sts, aqua dc in last 2 sts.

Row 5: Ch 1, turn, aqua dc in first 3 sts, white dc in next 11 sts, aqua dc in last 3 sts.

Row 6: Ch 1, turn, aqua dc in first 2 sts, white dc in next 4 sts, aqua dc in next 5 sts, white dc in next 4 sts, aqua dc in next 2 sts.

Row 7: Ch 1, turn, aqua dc in first 2 sts, white dc in next 4 sts, aqua dc in next 5 sts, white dc in next 6 sts, aqua dc in last st.

Row 8: Ch 1, turn, aqua dc in first st, white dc in next 2 sts, pink dc in next st, white dc in next 2 sts, aqua dc in next 5 sts, white dc in next 2 sts, pink dc in next st, white dc in next 2 sts, aqua dc in next st.

Row 9: Ch 1, turn, aqua dc in first st, white dc in next 2 sts, pink dc in next st, white dc in next 2 sts, aqua dc in next 5 sts, white dc in next 2 sts, pink dc in next st, white dc in next 2 sts, aqua dc in next st.

Row 10: Ch 1, turn, aqua dc in first st, white dc in next 2 sts, pink dc in next st, white dc in next 2 sts, aqua dc in next 5 sts, white dc in next 2 sts, pink dc in next st, white dc in next 2 sts, aqua dc in next st.

Row 11: Ch 1, turn, aqua dc in first st, white dc in next 2 sts, pink dc in next st, white dc in next st, aqua dc in next 7 sts, white dc in next st, pink dc in next st, white dc in next 2 sts, aqua dc in next st.

Row 12: Ch 1, turn, aqua dc in first 2 sts, white dc in next st, pink dc in next st, white dc in next st, aqua dc in next 7 sts, white dc in next st, pink dc in next st, white dc in next st, aqua dc in next 2 sts.

Row 13: Ch 1, turn, aqua dc in first 2 sts, white dc in next 3 sts, aqua dc in next 7 sts, white dc in next 3 sts, aqua dc in next 2 sts.

Row 14: Ch 1, turn, aqua dc in first 2 sts, white dc in next 2 sts, aqua dc in next 9 sts, white dc in next 2 sts, aqua dc in next 2 sts.

Row 15: Ch 1, turn, aqua dc in all 17 sts.

Repeat Row 15 until piece measures 19” [20”, 21”].

Repeat same steps for the other side. Then place last row of both pieces together and sl st or sew together.

BUNNY CHART:

Each square represents 1 dc.

A = Aqua

W = White

P = Pink

Sew on wiggle eyes on Row 3, 5 sts apart. Sew pink pompom to center of Row 1.

ASSEMBLY:

Cut towel in half and serge or zigzag raw edges. Fold edges to middle and sew edge.

Fold edges again to middle and sew in place. This will give you a width of approximately 4”.

Hand sew or machine sew this edge of towel to bottom of bunny head.

Weave in all ends.

bunny kitchen boaPDF is 50% off today only, available at Bunny Kitchen Boa Crochet Pattern

Easter Garland Crochet Pattern from Pocket Yarnlings

Try out this Easter garland pattern which showcases a bunny head alternating with easter eggs! They work up really quickly and seamlessly with no sewing involve. Change up the colors to get different variations and use them for your Easter home decoration this season!

https://www.pocketyarnlings.com/blog/free-crochet-easter-garland

Hearts Coaster from Jo’s Crafty Hook

This coaster makes a great decorative piece for your home where you want to add a little splash of Spring color.

https://joscraftyhook.com/8-of-hearts-coaster-crochet-pattern/

Spring Elegance Mandala from ViVaCrochet

A quick and easy floral mandala to enhance your spring decor.

Spring Elegance – Yarny Notes

Oyster Shell Napkin from Jo’s Crafty Hook

These napkins are great to add a splash of Spring color to your dinner table. You can even use them as coasters.

https://joscraftyhook.com/oyster-shell-napkin

Easter Bunny Egg Cozy from Start Crochet

Whip up this adorable 15-minute crochet Easter egg cozy with bunny ears using this free, beginner-friendly pattern—perfect for spring gifts, decor, or Easter baskets!

https://startcrochet.com/free-crochet-easter-egg-cosy-pattern-for-beginners/

If you’re going to make any of these designs as Easter gifts, you’ll also need a gift tag.

Happy Easter Gift Tag


free easter crochet pattern

More Easter Patterns 


ICYMI (In Case You Missed It)

Day 1 – Bunnies

Day 2 – Chicks

Day 3 – Ducks

Day 4 – Lambs and Goats


Day 5 – Donkey

Day 6 – Baskets 

Day 7 – Easter Eggs

Day 8 – Clothing


Day 9 – Accessories


Day 10 – Crochet for Children

Day 11 – Crochet for Baby


Day 12 – Home Decor

Day 13 – Flowers


Day 14 – Miscellaneous

Affiliate Links

This post contains affiliate links. This means I may earn a commission should you chose to sign up for a program or make a purchase using my link. It’s okay – I love all of these companies anyways, and you will too!


Amazon affiliate: https://amzn.to/4hkS5Zd
Easter Eggs prefilled with Colorful Wind-Up Jumping Bunnies and Chicks


Happy Easter Mouse! book (from the author of If You Give a Mouse a Cookie)


Posted on Leave a comment

Easter Advent – Crochet for Baby

🐣 Sweet Easter Crochet Ideas for Babies: Handmade Joy for the Little Ones 🧶

Easter is such a special time—full of pastel colors, fresh blooms, and little giggles from tiny ones discovering the world. If you love to crochet and have a baby (or know someone who does), why not add some handmade charm to their Easter basket this year?
Here are a few adorable Easter crochet ideas perfect for babies.

Tips for Crocheting for Babies:

  • Always use baby-safe yarn (hypoallergenic, non-toxic, and soft).

  • Avoid any loose parts (like buttons) that could be a choking hazard.

  • Pre-wash the finished item before gifting.

Easter is the perfect time to spread a little handmade love. Whether you’re making something for your own baby, a grandchild, or a friend’s little one, a crochet gift is always treasured.

Happy hooking, and Happy Easter! 🧶🌸


Sunshine Baby Hat

Measurements:

Size XXS (2-3 lbs)        11” circumference, 4” height

Size XS (4-5 lbs)           12.5” circumference, 5” height

Size NB (6-7 lbs)          13.5” circumference, 6” height

Size 3M                         15” circumference, 7” height

Gauge: E hook – 9 dc = 2”

G hook – 8 dc = 2”

Materials:

I Love This Cotton worsted weight yarn – 41 [56, 67] yards yellow

10 yards CC if using a separate color for shell sts

Size E [G, G] crochet hook

Yarn needle

YouTube Tutorial

XXS Directions:

Rnd 1: With E hook, ch 2, 12 dc in ring. Join with sl st.

Rnd 2: Ch 1, 2 dc in each st (24 dc). Join with sl st.

Rnd 3: Ch 1, *dc next st, 2 dc next st,* repeat around (36 dc). Join with sl st.

Rnd 4: Ch 1, *dc next 2 sts, 2 dc next st,* repeat around (48 dc). Join with sl st.

Rnds 5-9: Ch 1, dc in each dc. Join with sl st. Do not fasten off.

Lay flat, mark center of each side from Rnd 9 to center of Rnd 1. Ch 1, turn to work up side of hat, sc in side of dc of Rnd 9, 5 dc cluster in side of Rnd 8, *sc in side of dc of next rnd, 5 dc cluster in side of dc in next rnd,* repeat twice. Sc in dc of Rnd 1, 7 dc cluster in center of Rnd 1, repeat * to * down the other side ending with sc in dc of Rnd 9. Sl st in same st. Fasten off. Weave in all ends.

XS Directions:

Rnd 1: With G hook, ch 2, 12 dc in ring. Join with sl st.

Rnd 2: Ch 1, 2 dc in each st (24 dc). Join with sl st.

Rnd 3: Ch 1, *dc next st, 2 dc next st,* repeat around (36 dc). Join with sl st.

Rnd 4: Ch 1, *dc next 2 sts, 2 dc next st,* repeat around (48 dc). Join with sl st.

Rnds 5-11: Ch 1, dc in each dc. Join with sl st. Do not fasten off.

Lay flat, mark center of each side from Rnd 9 to center of Rnd 1. Ch 1, turn to work up side of hat, sc in side of dc of Rnd 11, 5 dc cluster in side of Rnd 10, *sc in side of dc of next rnd, 5 dc cluster in side of dc in next rnd,* repeat 3 times. Sc in dc of Rnd 1, 7 dc cluster in center of Rnd 1, repeat * to * down the other side ending with sc in dc of Rnd 11. Sl st in same st. Fasten off. Weave in all ends.

NB [3M] Directions:

Rnd 1: With G hook, ch 2, 12 dc in ring. Join with sl st.

Rnd 2: Ch 1, 2 dc in each st (24 dc). Join with sl st.

Rnd 3: Ch 1, *dc next st, 2 dc next st,* repeat around (36 dc). Join with sl st.

Rnd 4: Ch 1, *dc next 2 sts, 2 dc next st,* repeat around (48 dc). Join with sl st.

Rnd 5 for NB: Ch 1, *dc in next 7 sts, 2 dc next st,* repeat around (54 dc). Join with sl st.

[Rnd 5 for 3M: Ch 1, *dc in next 3 sts, 2 dc next st,* repeat around (60 dc). Join with sl st.]

Rnds 6-13 [15]: Ch 1, dc in each dc. Join with sl st. Do not fasten off.

Lay flat, mark center of each side from Rnd 13[15] to center of Rnd 1. Ch 1, turn to work up side of hat, sc in side of dc of Rnd 13[15], 5 dc cluster in side of Rnd 12[14], *sc in side of dc of next rnd, 5 dc cluster in side of dc in next rnd,* repeat 4[5] times. Sc in dc of Rnd 1, 7 dc cluster in center of Rnd 1, repeat * to * down the other side ending with sc in dc of Rnd 13[15]. Sl st in same st. Fasten off. Weave in all ends.

PDF including all sizes is available at Crochet Pattern Sunshine Baby Hat with Preemie Sizes

Unicorn Baby Lovey from Start Crochet

Create an adorable unicorn baby lovey with this easy crochet pattern—perfect for beginners and a thoughtful handmade gift for little ones! This blog post also includes a free Unicorn Gift Tag to download. 

https://startcrochet.com/easy-unicorn-baby-lovey-crochet-pattern-free/

Angel Baby Rattle
Angel Baby Rattle Crochet Pattern


Royal Baby Sweater Crochet Pattern, Newborn-3M, 6M or 9M sizes with Scepter Rattle
Royal Baby Sweater with Scepter Rattle


Today’s free download is Easter Bunny Letter

free easter crochet pattern

More Easter Patterns 


ICYMI (In Case You Missed It)

Day 1 – Bunnies

Day 2 – Chicks

Day 3 – Ducks

Day 4 – Lambs and Goats


Day 5 – Donkey

Day 6 – Baskets 

Day 7 – Easter Eggs

Day 8 – Clothing


Day 9 – Accessories


Day 10 – Crochet for Children


Day 11 – Crochet for Baby

Day 12 – Home Decor

Day 13 – Flowers


Day 14 – Miscellaneous


Affiliate Links

This post contains affiliate links. This means I may earn a commission should you chose to sign up for a program or make a purchase using my link. It’s okay – I love all of these companies anyways, and you will too!


Amazon affiliate: https://amzn.to/4hkS5Zd
Easter Eggs prefilled with Colorful Wind-Up Jumping Bunnies and Chicks


Happy Easter Mouse! book (from the author of If You Give a Mouse a Cookie)


Posted on 4 Comments

Easter Advent – Crochet for Children

🐣 Easter Crochet Ideas for Children: Cute, Colorful, and Creative!

Easter is the perfect time to bring out your hooks and get crafty! Whether you’re looking to fill Easter baskets with handmade goodies or create adorable keepsakes, crochet offers endless opportunities for fun and festive projects that children will love.

Here are some sweet and simple Easter crochet ideas that are perfect for little ones.

Ready to get stitching? Grab your favorite spring-colored yarns, pick a project or two, and fill this Easter with handmade joy. 💖

Do you have a favorite Easter crochet pattern? Share it in the comments below—we’d love to see what you’re making!

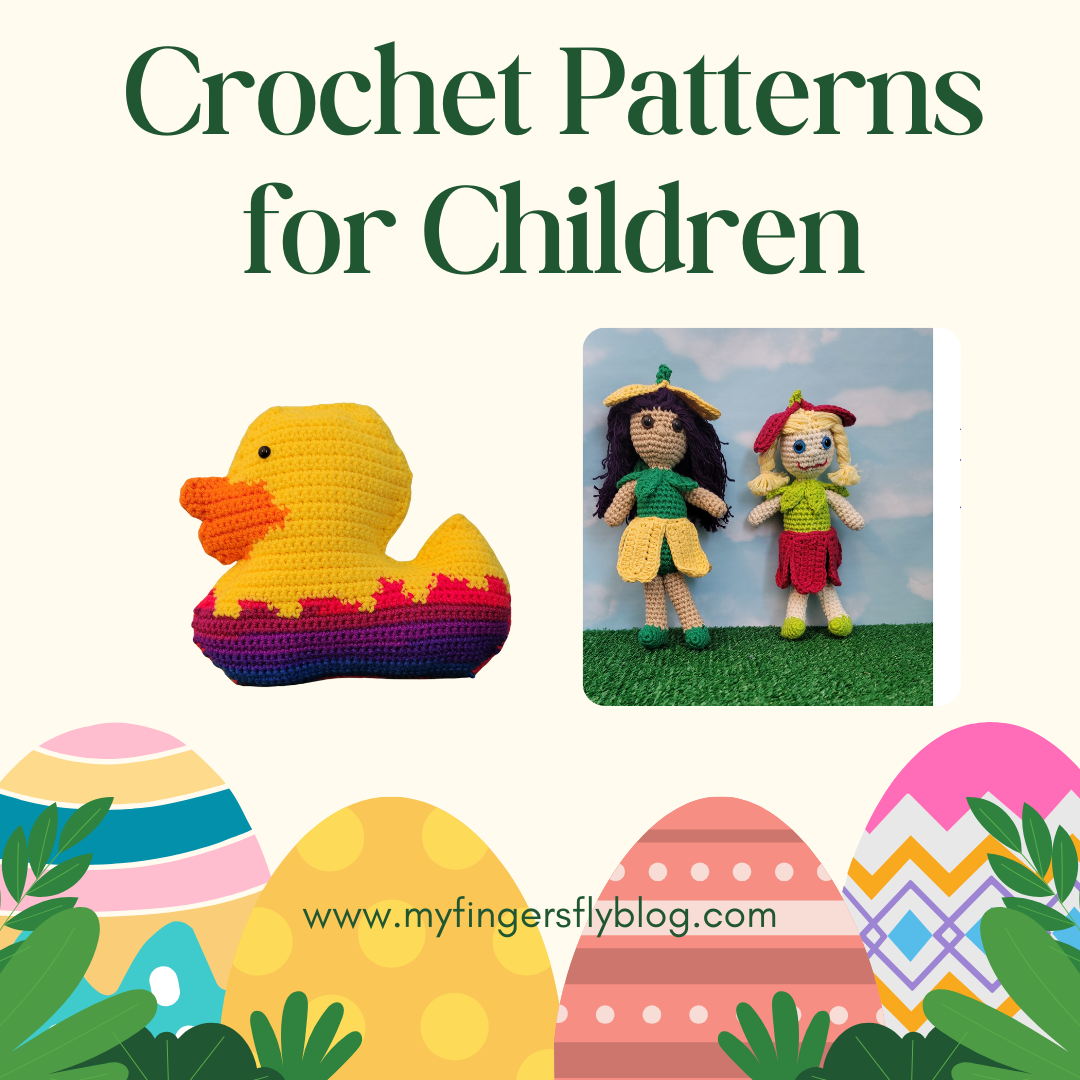
Duck in Easter Egg Cuddler Crochet Pattern

Duck in Easter Egg Cuddler Crochet Pattern

Finished toy measures approximately 9” tall x 11” wide

 Materials:

Worsted weight yarn:

1.5 oz. self-striping yarn (MC)

1.3 oz. yellow (Y)

0.3 oz. orange (O)

Size G (4.00 mm) crochet hook

Fiberfil

Yarn needle

Black plastic safety eyes 10 mm

 Directions:

Make 2:

Working according to chart, odd rows from the left and even rows from the right. Sides will be mirror images, so one side will have even rows as right side, and the other will have odd rows as the right side.

EGG:

Row 1: With MC yarn, ch 37, sc in 2nd ch from hook and each ch across (36 sc).

Row 2: Ch 1, turn, inc 1 st at each end (38 sc).

Rows 3-5: Repeat Row 2 (44 sc at end of Row 5).

Row 6: Ch 1, turn, 2 sc in first st, sc in remaining sts across (45 sc).

Row 7: Repeat Row 6 (46 sc).

Row 8: Ch 1, turn, inc 1 st at each end (48 sc).

Rows 9-12: Ch 1, turn, sc in each st.

Row 13: Ch 1, turn, MC dec, MC sc in next 3 sts, Y sc in next 4 sts, MC sc in next 5 sts, Y sc in next 3 sts, MC sc in next 7 sts, Y sc in next 2 sts, MC sc in next 5 sts, Y sc in next 2 sts, MC sc in next 15 sts (47 sc).

Row 14: Ch 1, turn, MC sc in next 14 sts, Y sc in next 4 sts, MC sc in next 4 sts, Y sc in next 4 sts, MC sc in next 5 sts, Y sc in next 4 sts, MC sc in next 4 sts, Y sc in next 4 sts, MC sc in next 2 sts, MC dec (46 sc).

Row 15: Ch 1, turn, MC dec, MC sc in next st, Y sc in next 22 sts, MC sc in next 3 sts, Y sc in next 5 sts, MC sc in next 4 sts, Y sc in next 3 sts, MC sc in next 4 sts, Y sc in next 2 sts (45 sc).

Row 16: Ch 1, turn, Y dec, MC sc in next 4 sts, Y sc in next 5 sts, MC sc in next 2 sts, Y sc in next 7 sts, MC sc in next st, Y sc in next 22 sts, Y dec (43 sc). Fasten off MC yarn.

Row 17: Ch 1, turn, Y dec, Y sc in next 41 sts (42 sc).

Row 18: Ch 1, turn, Y dec 1 st at each end (40 sc).

Row 19: Repeat Row 18 (38 sc).

TAIL:

Row 20: Ch 1, turn, Y sc in next 11 sts.

Row 21: Ch 1, turn, Y dec 1 st at each end (9 sc).

Rows 22-24: Repeat Row 21 (3 sc at end of Row 24).

Row 25: Ch 1, turn, sc last 3 sts tog.

HEAD:

Row 20: Return to Row 20, sk 3 sts. Attach yellow, sc in next 22 sts, dec (23 sc).

Row 21: Turn. Use orange yarn, fsc 3x, O sc in first 2 sc, Y sc in next 18 sts, Y dec. Leave last st unworked (24 sc).

Row 22: Ch 1, turn, Y inc in first st, Y sc in next 17 sts, O sc in next 5 sts, O inc (26 sc).

Row 23: Ch 1, turn, O inc, O sc in next 8 sts, Y sc in next 16 sts, Y inc (28 sc).

Row 24: Ch 1, turn, Y sc in next 15 sts, O sc in next 13 sts.

Row 25: Ch 1, turn, O dec, O sc in next 11 sts, Y sc in next 14 sts, Y inc (28 sc).

Row 26: Ch 1, turn, Y sc in next 17 sts, O sc in next 9 sts, O dec, O ch 3 (27 sc).

Row 27: O sc in 2nd and 3rd chs, ( sc in next 9 sts, Y sc in next 17 sts, Y inc (30 sc).

Row 28: Ch 1, turn, Y sc in next 19 sts, O sc in next 10 sts, O inc (31 sc).

Row 29: Ch 1, turn, O sc in next 11 sts, Y sc in next 20 sts (31 sc).

Row 30: Ch 1, turn, Y sc in next 22 sts, O sc in next 7 sts, O dec (30 sc). Fasten off orange yarn.

Row 31: Sk 1st 5 sts, Y sc in next 25 sts (25 sc).

Row 32: Ch 1, turn, Y sc in next 25 sts.

Row 33: Ch 1, turn, Y dec 1 st at each end (23 sc).

Row 34: Ch 1, turn, Y sc in each st.

Row 35: Ch 1, turn, Y dec 1 st at each end (21 sc).

Row 36: Repeat Row 35 (19 sc).

Row 37: Ch 1, turn, sc in each st.

Rows 38-40: Repeat Row 35 (13 sc at end of Row 40). Fasten off yellow yarn.

ASSEMBLY:

Insert black safety eyes into both sides of duck at Row 33, 4 sts from edge.

With wrong sides together, sc through both thicknesses, changing colors as needed to maintain color scheme. Make 3 sc in tip of tail and 2 sc in bottom corners of egg. Sl st in center of duck’s bill at Row 26. Continue around entire duck (stuffing as you go) and join with sl st in first st of edging. Weave in all ends.

FUN IDEA: I added a squeaker inside the bill portion to make a baby toy that quacks.


PDF is 50% off today only: Duck in Easter Egg Cuddler Crochet Pattern

Miss Tulip Amigurumi Crochet Pattern
Miss Tulip Amigurumi
snorkeling pig
Snorkeling Pig Amigurumi


Today’s free download – Happy Easter Children’s Coloring Book


free easter crochet pattern

More Easter Patterns 


ICYMI (In Case You Missed It)

Day 1 – Bunnies

Day 2 – Chicks

Day 3 – Ducks

Day 4 – Lambs and Goats


Day 5 – Donkey

Day 6 – Baskets 

Day 7 – Easter Eggs

Day 8 – Clothing


Day 9 – Accessories


Day 9 – Accessories


Day 10 – Crochet for Children

Day 11 – Crochet for Baby

Day 12 – Home Decor

Day 13 – Flowers


Day 14 – Miscellaneous

Affiliate Links

This post contains affiliate links. This means I may earn a commission should you chose to sign up for a program or make a purchase using my link. It’s okay – I love all of these companies anyways, and you will too!


Amazon affiliate: https://amzn.to/4hkS5Zd
Easter Eggs prefilled with Colorful Wind-Up Jumping Bunnies and Chicks


Happy Easter Mouse! book (from the author of If You Give a Mouse a Cookie)


Posted on Leave a comment

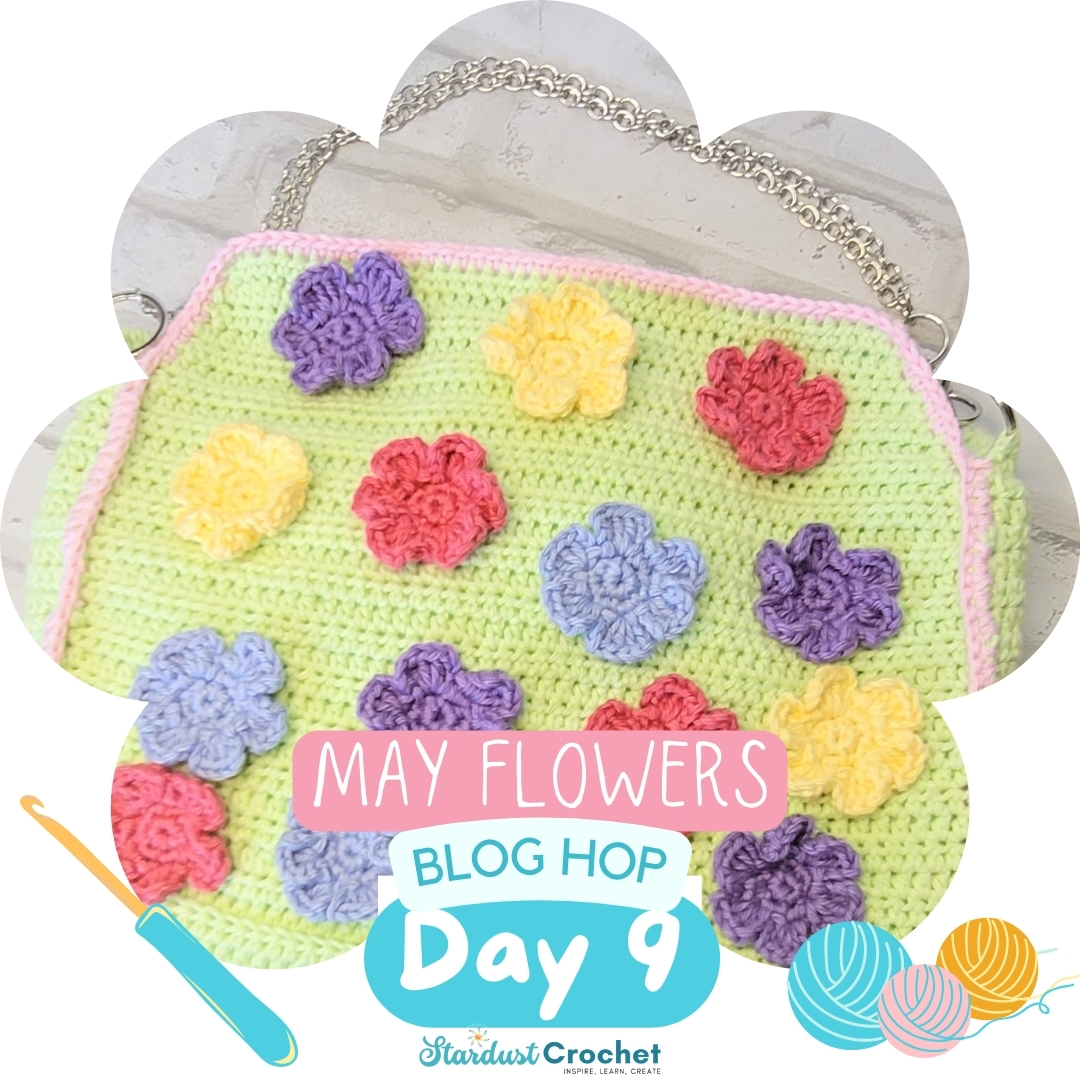
May Flowers Blog Hop – Floral Handbag

Today is my feature day in the May Flowers Blog Hop. The Floral Handbag crochet pattern is 50% off today.

Recently an ad for a designer purse came across my feed. It was on sale for $1500, so I went to the craft store and bought the materials to make it for only $50. Now I have a new designer bag for Mother’s Day! Make one for your Mom or one for yourself.

Last year the Floral Handbag was featured at the Gathering Threads Festival fashion show.

Download your copy today for only $2.49.

https://stardustgoldcrochet.com/31-flower-crochet-patterns-may-flowers-crochet-pattern-blog-hop/


Use this link for a special offer – 10 floral crochet patterns for only $10.00.

https://www.ravelry.com/redeem/my-fingers-fly-designs?code=FLORAL


Don’t forget about My Favorite Design $2 Sale –

14 great patterns will be on sale for only $2 through May 19.

My Favorite Design $2 Pattern Sale

Affiliate Links

This post contains affiliate links. This means I may earn a commission should you chose to sign up for a program or make a purchase using my link. It’s okay – I love all of these companies anyways, and you will too!


Get a $10 credit at Stickermule.

etsy logo

Thinking of opening an Etsy shop? Use this link to get 40 free listings. https://etsy.me/3F3kxwc


Money Saving Offers


Check out this free app that gets you cash back on gas and other errands! Click this link or use promo code 46ZCG to get an extra 15¢/gal bonus the first time you make a purchase. https://upside.app.link/46ZCG

Get $20 off your first Uber Eats order of $25 or more at http://Hungry? Get $20 off your first Uber Eats order of $25 or more. Terms apply. Use my code at checkout: eats-lisaf21461ue https://ubereats.com/feed?promoCode=eats-lisaf21461ue

Hey! Thought you’d like to try Ibotta, a cash back rewards app that I use to make real money every time I shop for groceries, online purchases, and more! Just use my referral code “eugysjd” at registration. Sign up at → https://ibotta.onelink.me/iUfE/8cc13c64?friend_code=eugysjd

Join Rakuten and get $30 cash back. Plus earn money on online purchases.

https://www.rakuten.com/r/LGT111?eeid=28187