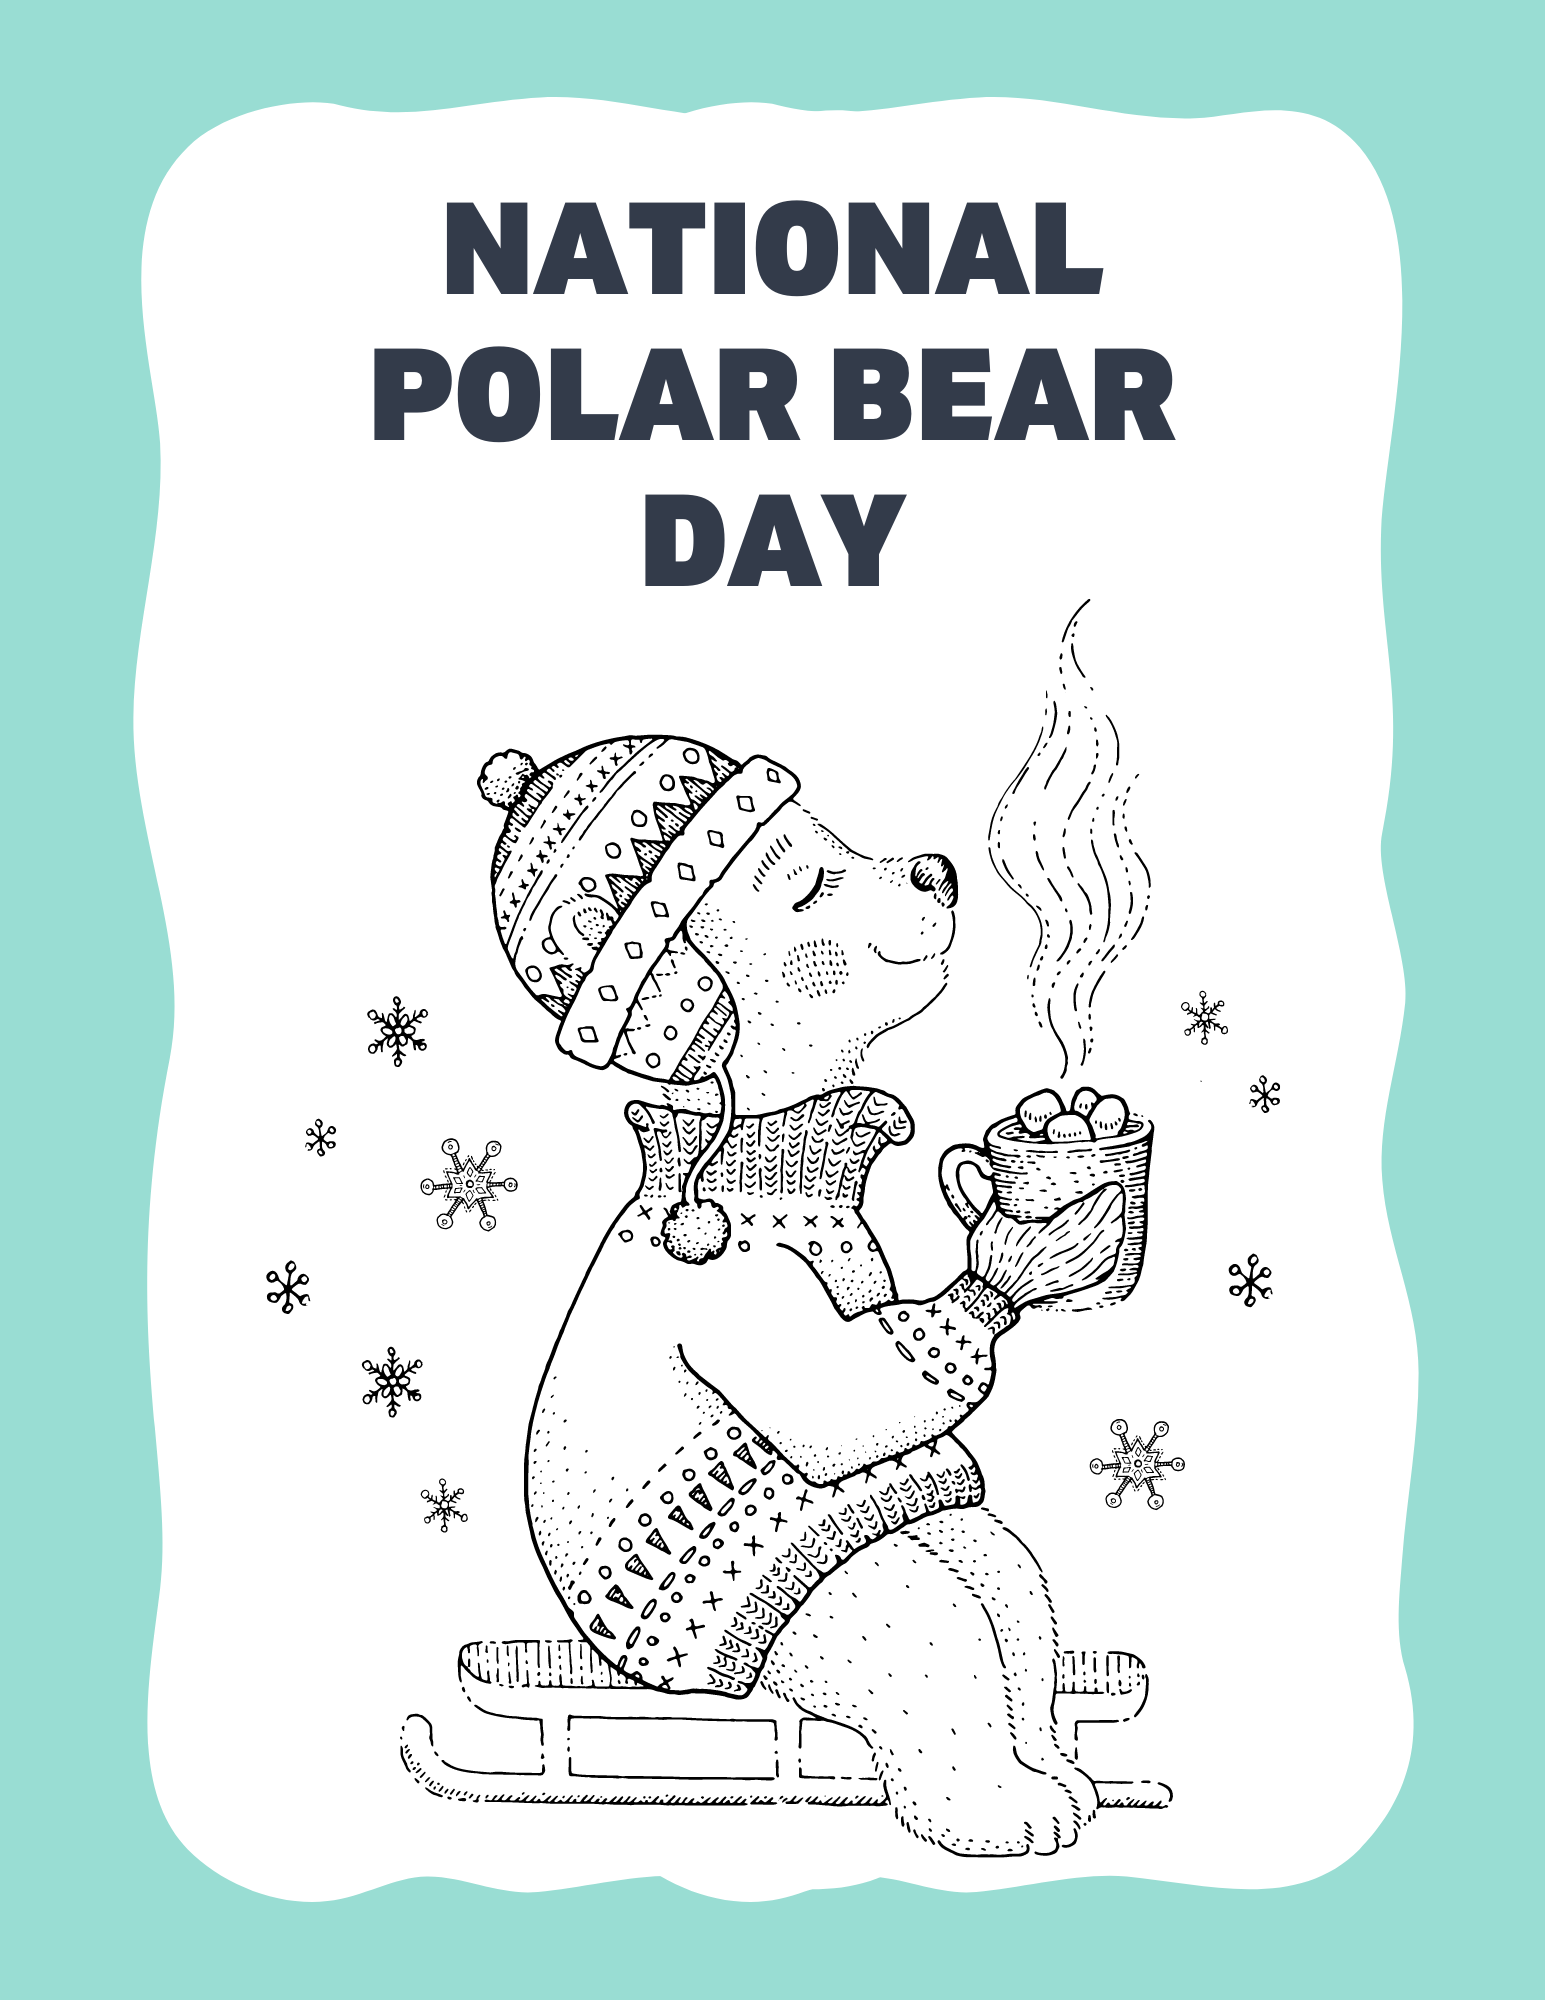
Polar bears have long been a favorite theme for crafters, especially when it comes to amigurumi. Just Google “polar bear crochet” and see all the lovely patterns that come up in the search results. My search shows 1,240,000 results. Here are a few free Polar Bear patterns for your crocheting pleasure!
With St Patrick’s Day coming up Blarney, Leprechaun Gnome from Malynda’s Crafts is excited to be the weekly featured pattern for Crochet Designer Community
Thinking of opening an Etsy shop? Use this link to get 40 free listings. https://etsy.me/3F3kxwc
Money Saving Offers
Check out this free app that gets you cash back on gas and other errands! Click this link or use promo code 46ZCG to get an extra 15¢/gal bonus the first time you make a purchase. https://upside.app.link/46ZCG
Hey! Thought you’d like to try Ibotta, a cash back rewards app that I use to make real money every time I shop for groceries, online purchases, and more! Just use my referral code “eugysjd” at registration. Sign up at → https://ibotta.onelink.me/iUfE/8cc13c64?friend_code=eugysjd
Join Rakuten and get $30 cash back. Plus earn money on online purchases.
Last month my husband had a business trip to Colorado Springs, and he asked me if I would like to go with him. I quickly googled “local yarn shop Colorado Springs” and found Ewe & Me Yarn Boutique, so of course I decided to go with him.
On our first day, it was cold with a light snow falling. I’m a Texas girl, and I don’t enjoy the cold weather! The next day was still cold but a beautiful sunny day, so I got out to explore.
The desk clerk suggested that I visit Garden of the Gods. I had visited it on a family trip as a teenager, but my memories were vague.
The three main features of the park are Steamboat Rock, the Three Graces, and Balanced Rock. They were formed by sedimentary beds of red, pink and white sandstone and limestone that were deposited horizontally but have now been tilted vertically by the mountain building forces caused by the uplift of the Rocky Mountains and Pikes Peak. The following Pleistocene Ice Age resulted in erosion and glaciation of the rock, creating the present rock formations. Mother Nature is truly amazing!!
Next stop – Ewe & Me, A Yarn Boutique on Garden of the Gods Road. It’s a fiber artist paradise! So many beautiful colors and textures! This shop has everything a crocheter or knitter could ever want. I explained that I was looking for a locally made yarn, and I was ushered to a wall of beautiful hand-dyed Aran yarn by Haus of Ewe. What luck! There’s a reddish-brown colorway called Balanced Rock. I had to have it! My only regret is that I only brought one suitcase, so I had to leave behind so many of the beautiful colorways.
After we got back home, I started playing with the yarn to find out what shape it wanted to take. I’m very pleased with the results. I hope you will be too. Check out the All About Fall Blog Hop for the Balanced Rock Beanie pattern free for 24 hours.
Popcorn st: Work 5 dc in the same st. Pull up lp in 5th dc slightly and remove hook. Insert hook into top of first dc and pull up lp from 5th dc. Pull through to tighten.
Ultimate Finish: Fasten off yarn leaving 6” length. Thread length through yarn needle and pick up outer lp of each st around. Pull tight to close.
Row 1: With H hook, leave 9” length of yarn and ch 11, sc in 2nd ch, sc in next 9 ch (10 dc).
Row 2: Ch 1, turn, working in BLO, sc in each st.
Repeat Row 2 until you have 72 [78] rows. (This will give you 12 [13] repeats of the balanced rock pattern.) Ribbing will measure approximately 18” [19.5”].
Fold ribbing end to end and sew tog with 9” length left at beginning.
Turn ribbing to work along edges with I hook.
Rnd 1: Ch 1, sc in first st and each st around (72 [78] sc).
Rnds 2-3: Ch 1, stacked sc in first st (counts as first dc), dc in each st around. Join with sl st in top of stacked sc.
Rnd 4: Ch 1, sc in first st, *sk 2 sts, 5 dc (shell) in next st, sk 2 sts, sc in next st,* repeat around. Join with sl st in top of first sc.
Rnd 5: Ch 3 (counts as dc), 4 dc in first st, *sk 2 sts, sc in BLO of center dc of shell, sk 2 sts, shell in sc between shells,* repeat around. Join with sl st in BLO of top of ch-3.
Rnd 6: Working in BLO, ch 1, stacked sc in ch-3 of first shell, dc in next 4 sts of shell, *dc in sc, dc in 5 dc of shell,* repeat around. Join with sl st in stacked st.
Rnd 7: Ch 1, stacked sc in first st (counts as first dc), dc in each st around. Join with sl st in top of stacked sc.
Rnd 8: Ch 1, stacked sc, dc in next 2 sts, *tr bp 3 times, dc 3 times,* repeat around. Join with sl st in top of stacked sc.
Rnd 9: Ch 1, stacked sc in first st, dc in next 2 sts, *ch 1, triple cluster, ch 1, dc in next 3 sts,*, repeat around. Join with sl st in top of stacked sc.
Rnd 10: Ch 1, stacked sc, dc in next 2 sts, *dc in ch-1 (not around ch-1), dc in top of triple cluster, popcorn in ch-1, dc in next 3 dc,* repeat around. Join with sl st in top of stacked sc.
Rnd 11: Ch 1, stacked sc, dc in each st (72 [78] dc). Join with sl st.
Rnd 12: Ch 1, stacked sc, dc in next 6 sts, *dec over next 2 sts, dc in next 7 sts,* repeat around (64 [70] dc).
Rnd 13: Ch 1, stacked sc, dc in next 5 sts, *dec over next 2 sts, dc in next 6 sts,* repeat around (56 [62] dc).
Rnd 14: Ch 1, stacked sc, dc in next 4 sts, *dec over next 2 sts, dc in next 5 sts,* repeat around (48 [54] dc).
Rnd 15: Ch 1, stacked sc, dc in next 3 sts, *dec over next 2 sts, dc in next 4 sts,* repeat around (40 [46] dc).
Rnd 16: Ch 1, stacked sc, dc in next 2 sts, *dec over next 2 sts, dc in next 3 sts,* repeat around (32 [38] dc).
Rnd 17: Ch 1, stacked sc, dc in next st, *dec over next 2 sts, dc in next 2 sts,* repeat around (24 [30] dc).
Close with Ultimate Finish technique.
Weave in all ends. Attach pompom to top of hat.
Fold brim up for beanie. Leave brim unfolded for slouchie hat.
Thinking of opening an Etsy shop? Use this link to get 40 free listings. https://etsy.me/3F3kxwc
Money Saving Offers
Check out this free app that gets you cash back on gas and other errands! Click this link or use promo code 46ZCG to get an extra 15¢/gal bonus the first time you make a purchase. https://upside.app.link/46ZCG
Hey! Thought you’d like to try Ibotta, a cash back rewards app that I use to make real money every time I shop for groceries, online purchases, and more! Just use my referral code “eugysjd” at registration. Sign up at → https://ibotta.onelink.me/iUfE/8cc13c64?friend_code=eugysjd
Join Rakuten and get $30 cash back. Plus earn money on online purchases.
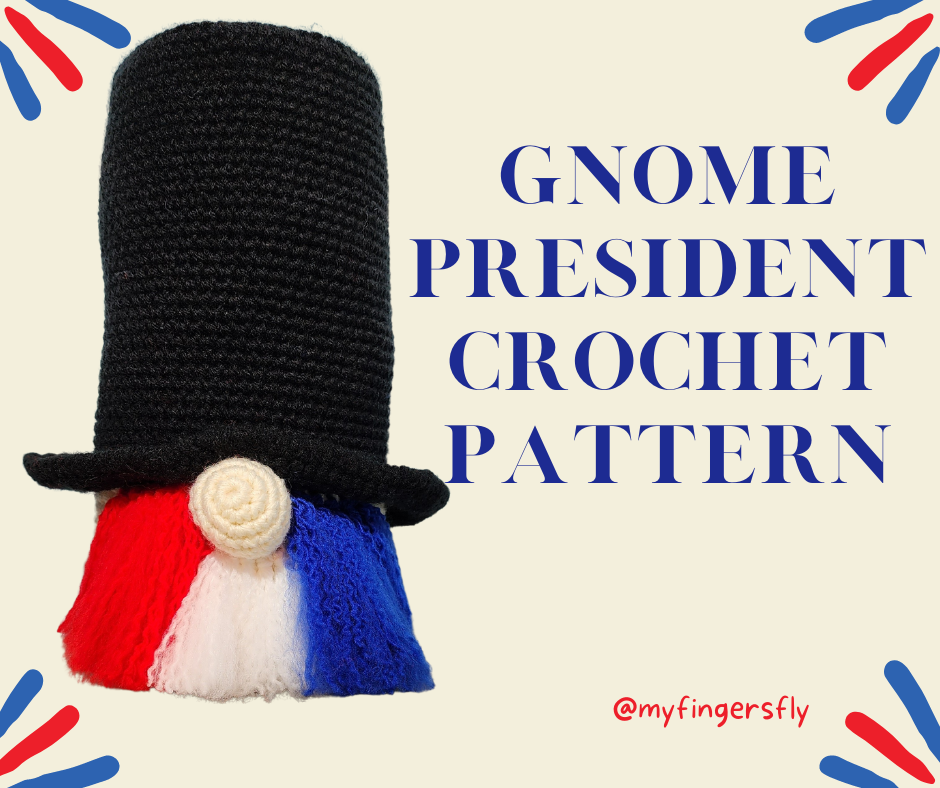
It’s the beginning of the President’s Day weekend. Will you have the day off on Monday? A day off means extra crochet time!
My husband wanted something for his office to signify President’s Day, and I love gnomes, so I came up with Lincoln, the Gnome President. He’s so cute and easy to make! The only sewing involved is attaching his nose to his face.
Gnome measures approximately 11” tall.
Materials:
Worsted weight yarn –
170 yards black
75 yards ivory
5 yards each red, white, blue
Size H (5.0 mm) crochet hook
Yarn needle
Fiberfil
Cardboard
Directions:
HEAD:
Rnd 1: With ivory yarn, ch 2 (or magic ring), 6 sc in 2nd ch from hook. Do not join. Work in continuous rnds throughout unless otherwise specified.
Rnd 2: 2 sc in each st (12 sc).
Rnd 3: *Sc in next st, 2 sc in next st, repeat around (18 sc).
Rnd 4: *Sc in each of next 2 sts, 2 sc in next st, * repeat around (24 sc).
Rnd 5: *Sc in each of next 3 sc, 2 sc in next st,* repeat around (30 sc).
Rnd 6: *Sc in each of next 4 sts, 2 sc in next st,* repeat around (36 sc).
Rnd 7: *Sc in each of next 5 sc, 2 sc in next st,* repeat around (42 sc).
Rnd 8: *Sc in each of next 6 sts, 2 sc in next st,* repeat around (48 sc).
Rnd 9: *Sc in each of next 7 sts, 2 sc in next st,* repeat around (54 sc).
Rnd 10: *Sc in each of next 8 sts, 2 sc in next st,* repeat around (60 sc). Join with sl st. Ch 1.
Rnd 11: Working in back loops only, sc in each sc.
Rnd 12: Working in both loops, sc in each sc.
Rnds 13-24: Sc in each sc around. Join at end of Rnd 24 and fasten off ivory.
Rnd 25: With wrong side facing you, attach black yarn and work in back loops only. *Sc in next 4 sts, 2 sc in next st,* repeat around (72 sc). Do not join. Work in continuous rnds for remainder of hat brim.
Rnd 26: *Sc in next 5 sts, 2 sc in next st,* repeat around (84 sc).
Rnd 27: *Sc in next 6 sts, 2 sc in next st,* repeat around (96 sc).
Rnd 28: Sc in each sc. Fasten off black.
HAT:
Rnd 1: With black yarn, ch 2 (or magic ring), 6 sc in 2nd ch from hook. Do not join. Work in continuous rnds throughout unless otherwise specified.
Rnd 2: 2 sc in each st (12 sc).
Rnd 3: *Sc in next st, 2 sc in next st, repeat around (18 sc).
Rnd 4: *Sc in each of next 2 sts, 2 sc in next st, * repeat around (24 sc).
Rnd 5: *Sc in each of next 3 sc, 2 sc in next st,* repeat around (30 sc).
Rnd 6: *Sc in each of next 4 sts, 2 sc in next st,* repeat around (36 sc).
Rnd 7: *Sc in each of next 5 sc, 2 sc in next st,* repeat around (42 sc).
Rnd 8: *Sc in each of next 6 sts, 2 sc in next st,* repeat around (48 sc).
Rnd 9: *Sc in each of next 7 sts, 2 sc in next st,* repeat around (54 sc).
Rnd 10: *Sc in each of next 8 sts, 2 sc in next st,* repeat around (60 sc). Join with sl st.
Place top of hat on cardboard (or fusible foam) and mark. Cut out circle and set aside.
Rnd 11: Working in BLO, ch 1, sc in same st and in each sc around. Join with sl st.
Rnds 12-40: Working in both loops, ch 1, sc in each st around. Do not join.
Rnd 41: For brim, work in front loops only. *Sc in next 4 sts, 2 sc in next st,* repeat around (72 sc). Do not join. Work in continuous rnds for remainder of hat brim.
Rnd 42: *Sc in next 5 sts, 2 sc in next st,* repeat around (84 sc).
Rnd 43: *Sc in next 6 sts, 2 sc in next st,* repeat around (96 sc).
Rnd 44: Sc in each sc. Do not fasten off black yarn.
Insert cardboard into top of hat. Stuff head firmly. Pin head and hat together and sew Rnd 25 of head to Rnd 41 of hat.
Rnd 45: Pick up black yarn and work 1 rnd of reverse sc (crab st) through both thicknesses. Join with sl st. Fasten off.
NOSE:
Rnd 1: With ivory yarn, ch 2 (or magic ring), 6 sc in 2nd ch from hook. Do not join. Work in continuous rnds throughout unless otherwise specified.
Rnd 2: 2 sc in each st (12 sc).
Rnd 3: *Sc in next st, 2 sc in next st, repeat around (18 sc).
Rnds 4-6: Sc in each st.
Rnd 7: *Sc in next st, dec over next 2 sts,* repeat around (12 sc). Join with sl st. Fasten off ivory yarn leaving 12” length for sewing. Stuff nose and sew to face just beneath brim of hat.
BEARD:
Cut 7” lengths of white yarn. Pull 2 strands through each st at bottom of nose (approximately 6-7 spaces). Measure across white beard so you can make the red and white portions the same width.
Cut 10” lengths of red and blue yarn. Pull 2 strands through each st at top of face from trunk to ears (approximately 6-7 spaces each side) with red on one side of nose and blue on the other side of nose.
Use a yarn needle to split yarn into separate strands. Trim bottom (if desired).
If a fluffier beard is desired, pull a dog brush through the beard several times, being careful to clean the brush after each color so you don’t transfer the colors.
Thinking of opening an Etsy shop? Use this link to get 40 free listings. https://etsy.me/3F3kxwc
Money Saving Offers
Check out this free app that gets you cash back on gas and other errands! Click this link or use promo code 46ZCG to get an extra 15¢/gal bonus the first time you make a purchase. https://upside.app.link/46ZCG
Hey! Thought you’d like to try Ibotta, a cash back rewards app that I use to make real money every time I shop for groceries, online purchases, and more! Just use my referral code “eugysjd” at registration. Sign up at → https://ibotta.onelink.me/iUfE/8cc13c64?friend_code=eugysjd
Join Rakuten and get $30 cash back. Plus earn money on online purchases.
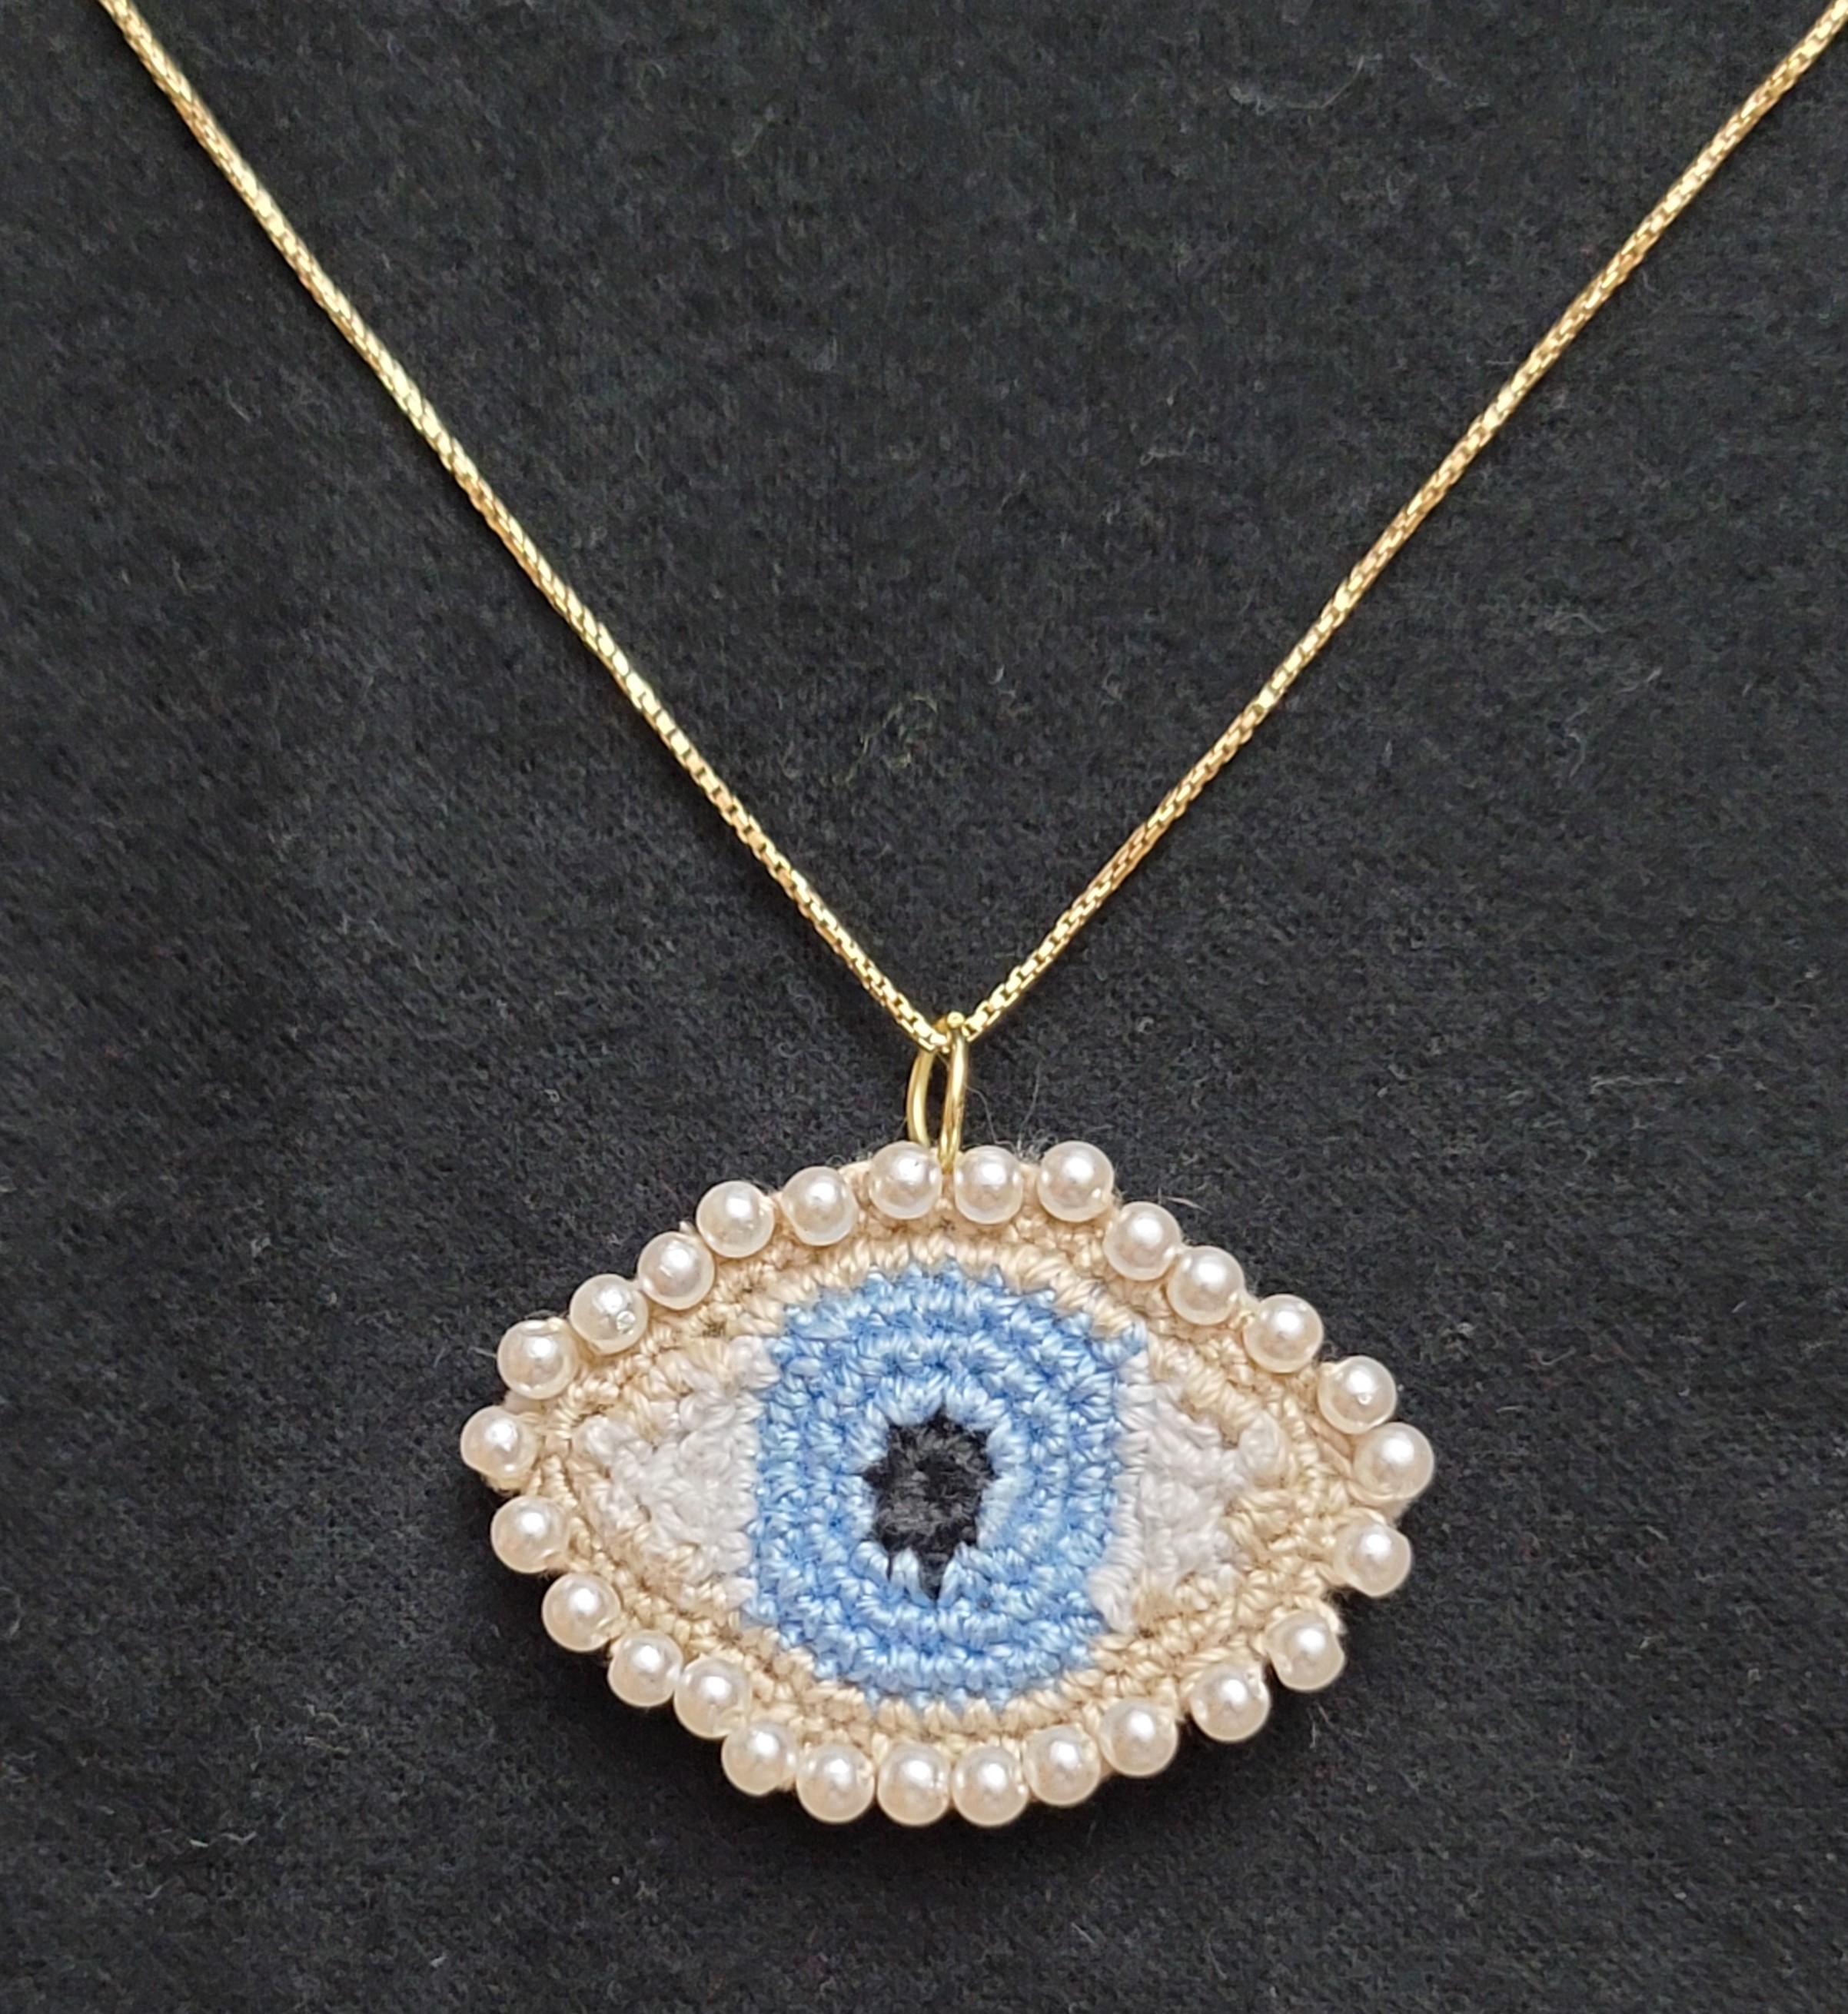
In 1785, Prince George or Wales commissioned a tiny portrait of his eye and sent it to his beloved, Maria Anne Fitzherbert, to convince her to marry him. It worked, and they were married shortly thereafter. The Prince then commissioned a portrait of Fitzherbert’s eye so that he might have her with him all the time. The tiny portraits became popular in England in the late 18th century. Some commissioned them as a token of affection for their lover, and others used them as a memento of a departed family member.
These necklaces have gained a new popularity with the show Bridgerton. If you follow the show, you have likely noticed that Marina wears a lover’s eye necklace on a strand of pearls.
You can crochet your own lover’s eye for a necklace or brooch. This simple pattern takes only an evening to complete and measures approximately 2” wide by 1.25” tall.
Materials:
#10 crochet cotton yarn
4 yards tan
2 yards white
3 yards blue (or desired eye color)
1 yard black
Size 7 steel crochet hook
Crewel needle
28, 4-mm pearl beads
Small piece of tan felt
Jump ring and chain for necklace or pin for brooch
Rnd 1: With black thread, ch 2 (or magic circle), 8 sc in 2nd ch from hook (8 sc). Join with sl st. Fasten off black.
Rnd 2: With blue thread, ch 1, 2 sc in each st (16 sc). Join with sl st.
Rnd 3: Ch 1, *sc in next st, 2 sc in next st,* repeat around. Join with sl st. (24 sc).
Rnd 4: Ch 1, *sc in next 2 sts, 2 sc in next st,* repeat around. Join with sl st. (32 sc). Fasten off blue.
Row 5: Attach white thread, ch 1, sc in same sts, sc in next 6 sts. (7 sc).
Row 6: Ch 1, turn, sc in next 2 sts, work 3 sc tog, sc in next 2 sts (5 sc).
Row 7: Ch 1, turn, sc in next st, work 3 sc tog, sc in next st (3 sc).
Row 8: Ch 1, turn, sc last 3 sts tog. Fasten off white.
Return to Rnd 4, sk 9 sts, and rep Rows 5-8 on the other side of the iris.
Before beginning Rnd 9, thread about 30 beads onto tan thread.
Rnd 9: Attach tan thread at bottom of eye of edge of Row 8 (marked by arrow). Ch 1, sc in same st, sc in ends of Rows 7, 6, and 5. *Working across iris, sc in next 2 sts, 2 sc in next st, sc in next 3 sts, 2 sc in next st, sc in next 2 sts, sc in ends of Rows 5, 6, and 7, 2 sc in end of Row 8.* On top of eye, sc in ends of Rows 8, 7, 6, and 5, rep * to *. Join with sl st (40 sc).
Rnd 10: Ch 1, *2 sc in next st, sc in next 4 sts,* repeat around (48 sc). Join with sl st.
Rnd 11: Ch 1, turn, *sl st in next st including one bead in st, sl st in next st,* repeat around. Join with sl st. Fasten off tan leaving 12” tail. Thread tail through needle and sew in place any beads that are out of line.
The “Born Cowl/Infinity Scarf” is this week’s Featured Pattern, which is brought to you by Marsha YarnDoodles.
The “Born Collection” also has matching Beanie & Wristers!
All 3 pieces of this unisex collection are very easy to adjust the size, so you can make one for everyone in the family. They look stunning in any colorway – solid, ombre, stripes, variegated – the options are endless! And the versatility of these beauty make them perfect for donating to a worthy cause, giving to someone special, and even selling them in your favorite market outlet.
This week you can get the “Born Cowl/Infinity Scarf pattern for 50% OFF!
For more info and details visit this group from the link below:
Thinking of opening an Etsy shop? Use this link to get 40 free listings. https://etsy.me/3F3kxwc
Money Saving Offers
Check out this free app that gets you cash back on gas and other errands! Click this link or use promo code 46ZCG to get an extra 15¢/gal bonus the first time you make a purchase. https://upside.app.link/46ZCG
Hey! Thought you’d like to try Ibotta, a cash back rewards app that I use to make real money every time I shop for groceries, online purchases, and more! Just use my referral code “eugysjd” at registration. Sign up at → https://ibotta.onelink.me/iUfE/8cc13c64?friend_code=eugysjd
Join Rakuten and get $30 cash back. Plus earn money on online purchases.
Do you like to crochet toys for your fur babies? Bruno loves squeaky toys, and I love making him new toys. This week I made a dog-shaped toy out of different sizes of crocheted hearts. It’s an easy pattern using cotton worsted yarn, and it won’t take you long to make it.
Please be aware that all dogs are different; some will eat a toy within a day. Bruno will chew on a toy for about 3-4 months before it’s ready for the trash. Regardless of how long it takes them to finish the toy, cotton yarn and cotton stuffing are best because they can be digested by the dog.
Materials:
Cotton worsted weight yarn:
90 yards Pink
25 yards Red
2 yards White
1 yard Black
Size G (4.0 mm) crochet hook
Yarn needle
Cotton stuffing
Squeakers
Dog toy measures approximately 6” tall by 6.5” wide.
Gauge: 5 sc = 1”, 5 rows = 1”
Directions:
FACE: (Make 2)
Rnd 1: With pink yarn, ch 22, 2 sc in 2nd ch from hook, sc in next 9 ch, 3 sc in next ch (2nd sc is center top), sc in next 9 ch, 3 sc in last ch. Working on opposite side of starting ch, sc in next 8 ch, sk 1 ch, sc in next ch (center bottom), sk 1 ch, sc in next 8 ch, sc in last ch (same lp as first ch with 2 sc). Join with sl st. (44 sc)
Rnd 2: Ch 1, 2 sc in first 2 sts, sc in next 8 sts, 3 sc in next st (2nd sc is center), sc in next 8 sts, 2 sc in each of next 3 sts, sc in next 7 sts, sk 1 st, sc in next st (center), sk 1 st, sc in next 7 sts, 2 sc in last st. Join with sl st. (50 sc)
Rnd 3: Ch 1, *sc in next st, 2 sc in next st,* repeat once, sc in next 9 sts, 3 sc in next st (2nd sc is center), sc in next 9 sts, repeat * to * 3 times, sc in next 6 sts, sk 1 st, sc in next st (center), sk 1 st, sc in next 6 sts, repeat * to * once. Join with sl st. (56 sc)
Rnd 4: Ch 1, *sc in next 2 sts, 2 sc in next st,* repeat once, sc in next 10 sts, 3 sc in next st (2nd sc is center), sc in next 10 sts, repeat * to * 3 times, sc in next 5 sts, sk 1 st, sc in next st (center), sk 1 st, sc in next 5 sts, repeat * to * once. Join with sl st. (62 sc)
Rnd 5: Ch 1, *sc in next 3 sts, 2 sc in next st,* repeat once, sc in next 11 sts, 3 sc in next st (2nd sc is center top), sc in next 11 sts, repeat * to * 3 times, sc in next 4 sts, sk 1 st, sc in next st (center), sk 1 st, sc in next 4 sts, repeat * to * once. Join with sl st. (68 sc)
Rnd 6: Ch 1, *sc in next 4 sts, 2 sc in next st,* repeat once, sc in next 12 sts, 3 sc in next st (2nd sc is center), sc in next 12 sts, repeat * to * 3 times, sc in next 3 sts, sk 1 st, sc in next st (center), sk 1 st, sc in next 3 sts, repeat * to * once. Join with sl st. (74 sc)
Rnd 7: Ch 1, *sc in next 5 sts, 2 sc in next st,* repeat once, sc in next 13 sts, 3 sc in next st (2nd sc is center), sc in next 13 sts, repeat * to * 3 times, sc in next 2 sts, sk 1 st, sc in next st (center), sk 1 st, sc in next 2 sts, repeat * to * once. Join with sl st. (80 sc)
Rnd 8: Ch 1, *sc in next 6 sts, 2 sc in next st,* repeat once, sc in next 14 sts, 3 sc in next st (2nd sc is center), sc in next 14 sts, repeat * to * 3 times, sc in next st, sk 1 st, sc in next st (center), sk 1 st, sc in next st, repeat * to * once. Join with sl st. (86 sc)
Rnd 9: Ch 1, *sc in next 7 sts, 2 sc in next st,* repeat once, sc in next 15 sts, 3 sc in next st (2nd sc is center), sc in next 15 sts, repeat * to * 3 times, sk 1 st, sc in next st (center), sk 1 st, repeat * to * once. Join with sl st. (94 sc)
Fasten off pink.
MUZZLE:
Rnd 1: With red yarn, ch 14, 2 sc in 2nd ch from hook, sc in next 5 ch, 3 sc in next ch (2nd sc is center), sc in next 5 ch, 3 sc in last ch. Working on opposite side of starting ch, sc in next 4 ch, sk 1 ch, sc in next ch (center), sk 1 ch, sc in next 4 ch, sc in last ch (same lp as first ch with 2 sc). Join with sl st. (28 sc)
Rnd 2: Ch 1, 2 sc in next 2 sts, sc in next 6 sts, 3 sc in next st (2nd sc is center), sc in next 6 sts, 2 sc in next 3 sts, sc in next 3 sts, sk 1 st, sc in next st (center), sk 1 st, sc in next 3 sts, sc in last st (same as first sc with 2 sc). Join with sl st. (34 sc)
Rnd 3: Ch 1, *sc in next st, 2 sc in next st,* twice, sc in next 7 sts, 3 sc in next st (2nd sc is center), sc in next 7 sts, repeat * to * 3 times, sc in next 2 sts, sk 1 st, sc in next st (center), sk 1 st, sc in next 2 sts, repeat * to * once. Join with sl st. (40 sc)
Rnd 4: Ch 1, *sc in next 2 sts, 2 sc in next st,* twice, sc in next 8 sts, 3 sc in next st (2nd sc is center), sc in next 8 sts, repeat * to * 3 times, sc in next st, sk 1 st, sc in next st (center), sk 1 st, sc in next st, repeat * to * once. Join with sl st. (46 sc)
Rnd 5: Ch 1, *sc in next 3 sts, 2 sc in next st,* twice, sc in next 9 sts, 3 sc in next st (2nd sc is center), sc in next 9 sts, repeat * to * 3 times, sk 1 st, sc in next st (center), sk 1 st, repeat * to * once. Join with sl st. (52 sc)
Fasten off red.
EARS: (Make 2)
Rnd 1: With red yarn, ch 8, 2 sc in 2nd ch from hook, sc in next 2 ch, 3 sc in next ch (2nd sc is center), sc in next 2 ch, 3 sc in last ch. Working on opposite side of starting ch, sc in next ch, sk 1 ch, sc in next ch (center), sk 1 ch, sc in next ch, sc in last ch (same lp as first ch with 2 sc). Join with sl st. (16 sc)
Rnd 2: Ch 1, 2 sc in next 2 sts, sc in next 3 sts, 3 sc in next st, sc in next 3 sts, 2 sc in next 3 sts, sk next st, sc in next st, sk next st, 2 sc in next st. (22 sc) Fasten off red.
NOSE:
Rnd 1: With black yarn, ch 6, 2 sc in 2nd ch from hook, sc in next ch, 3 sc in next ch (2nd sc is center), sc in next ch, 3 sc in last ch. Working on opposite side of starting ch, sk 1 ch, sc in next ch (center), sk 1 ch, sc in last ch (same lp as first ch with 2 sc). Join with sl st. (12 sc). Fasten off black leaving 9” length for sewing.
EYES: (Make 2)
With white yarn, ch 2 (or magic ring), 6 sc in 2nd ch from hook. Join with sl st. Fasten off yarn leaving 6” length for sewing.
Use black yarn to make French knot in center of each eye.
Sew red heart (upside down) centered on the pink heart (right side up). Sew black heart (right side up) centered on top of red heart. Sew eyes above muzzle. Sew ears to top of head approximately 10 sts from center.
EDGING:
Place both large hearts wrong sides together, matching curves and point. Pin in place with one pin marking the center bottom.
Using Pink yarn, insert hook at st after bottom center marker (through both thicknesses). Sc in this st, sc in next 20 sts, *sc in next st, sc in next 5 sts,* 3 times, sc in next 5 sts, sk 1 st, sc in next st (center top), sk next st, sc in next 5 sts, (sc in next 5 sts, 2 sc in next st,* 3 times. Begin stuffing pillow.
Sc in each remaining st with 3 sc in marked st (center bottom), stuffing as you go. Add in 1-2 squeakers with the stuffing. Join with sl st.
Fasten off yarn. Weave in all ends.
This week’s featured designer in the Crochet Designer Community group is and my Mahoor Design with her Shabnam Mosaic table runner pattern. The feature is for one week ending Sunday, January 29, and you can add it to your library with a 50% discount.
For more info and details visit this group from the link below:
Thinking of opening an Etsy shop? Use this link to get 40 free listings. https://etsy.me/3F3kxwc
Money Saving Offers
Check out this free app that gets you cash back on gas and other errands! Click this link or use promo code 46ZCG to get an extra 15¢/gal bonus the first time you make a purchase. https://upside.app.link/46ZCG
Hey! Thought you’d like to try Ibotta, a cash back rewards app that I use to make real money every time I shop for groceries, online purchases, and more! Just use my referral code “eugysjd” at registration. Sign up at → https://ibotta.onelink.me/iUfE/8cc13c64?friend_code=eugysjd
Join Rakuten and get $30 cash back. Plus earn money on online purchases.