Posted on 1 Comment

Join the Crochet-Along, Pink Camo Sweater for Girls


This CAL will run exclusively in the MFF Crochet Family Group in August.

August 9 – Back

August 11 – Right Front

August 14 – Left Front

August 16 – Sleeves

August 18 – Assembly & Zipper

August 21 – Pockets & Fringe

Materials needed:

Red Heart Super Saver worsted weight yarn:

14 [15, 16] oz. Pink Camo

2 oz. Petal Pink

1 oz. Pretty ‘n Pink

Size H (5.0 mm) crochet hook (or size needed to obtain gauge) Yarn needle

13” [14”, 15”] pink sweater zipper


Click here to join the group:

https://www.facebook.com/groups/875538646117910


water color month

There are still a few days left in the Water Color Bundle Sale (through July 31). You will get 24 designs from some of the best indie designers, plus a page of 8 different gift tags for your handmade items. Retail value is over $90 if purchased individually; this month only you can get all 24 designs with an 85% savings. Wow!!


handmade gift tags


Do you ever make a gift, then put it away and forget about it? I like to wrap my items when they’re finished and put them all in the same closet so I know where they are when I need them.

As a special bonus, the Water Color Bundle also includes a sheet of 8 different handmade gift tags.


https://myfingersfly.thrivecart.com/water-color-crochet-pattern-bundle/


(ICYMI) In Case You Missed It


Toddler Pinstripe Sweater Crochet Pattern


elephant gift tag


Elephant Birthday Gift Tag


 Lamb Birthday Gift Tag


Affiliate Links

This page contains affiliate links. If you choose to purchase after clicking a link, I may receive a commission at no extra cost to you.

Best Selling Knitting & Crochet Supplies on Amazon


Posted on 1 Comment

Teddy Bear Crochet Pattern

teddy bear

Hug Me, I’m Handmade: Crochet Your Own Teddy Bear! 🧸💕

There’s something timeless and heartwarming about a teddy bear. Whether it’s for a baby shower, a birthday gift, or just a cozy companion, a handmade teddy bear is a gift that says “you’re loved” in every stitch.

If you’re looking for your next adorable project using blanket yarn, this Teddy Bear Crochet Pattern might just steal your heart.

Why Crochet a Teddy Bear?

Teddy bears aren’t just for kids—they’re for anyone who could use a little extra comfort. Crocheting one lets you:

🧶 Use Up Yarn Stash – A perfect project for leftover yarn in browns, creams, pastels, or even bright, whimsical colors.

💖 Make It Personal – Add a bowtie, a little heart patch, or embroider the recipient’s initials. Each bear becomes one-of-a-kind.

🎁 Create a Heirloom – Handmade gifts are cherished for years. Your teddy bear could become someone’s childhood favorite!


What to Expect from the Pattern

Our teddy bear pattern is beginner-friendly with clear instructions and helpful photos, but it also includes a few options to customize your creation:

✔️ Step-by-step instructions (US terms)
✔️ Use safety eyes for older children, crochet eyes for children under 3 years of age
✔️ Approximately finished size: 26 inches tall using super bulky yarn

This pattern is perfect for confident beginners and experienced crocheters alike. If you’ve mastered the magic ring and simple shaping, you’re ready to get started!


Make It a Memory

Whether you keep it, gift it, or sell it at your next craft fair, this teddy bear will bring smiles wherever it goes.

So grab your hook, pick your super bulky or jumbo weight yarn, and start stitching the bear hugs! 🧸✨


Blanket Yarn Teddy Bear

Materials:

2 skeins Bernat Blanket Stripes

Few yards black bulky

Size M (9.00 mm) crochet hook

Yarn needle

Fiberfill

Safety eyes and safety nose (optional)


Finished bear measures approximately 26” tall.

DIRECTIONS:

HEAD:

Rnd 1: Ch 2 (or magic circle), 10 sc in 2nd ch from hook. Do not join. Work in continuous rnds throughout.

Rnd 2: 2 sc in each st (20 sc).

Rnd 3: *Sc in next st, 2 sc in next st,* repeat around (30 sc).

Rnd 4: *Sc in next 2 sts, 2 sc in next st,* repeat around (40 sc).

Rnd 5: Sc in each st.

Rnd 6: *Sc in next 3 sts, 2 sc in next st,* repeat around (50 sc).

Rnds 7-12: Sc in each st.

Rnd 13: *Dec over next 2 sts, sc in next 8 sts,* repeat around (45 sc).

Rnd 14: *Dec over next 2 sts, sc in next 7 sts,* repeat around (40 sc).

Rnd 15: *Dec over next 2 sts, sc in next 6 sts,* repeat around (35 sc).

Rnd 16: *Dec over next 2 sts, sc in next 5 sts,* repeat around (30 sc).

Rnd 17: *Dec over next 2 sts, sc in next 4 sts,* repeat around (25 sc). Stuff head.

Rnd 18: *Dec over next 2 sts, sc in next 3 sts,* repeat around (20 sc).

Rnd 19: *Dec over next 2 sts, sc in next 2 sts,* repeat around (15 sc).

Rnd 20: *Dec over next 2 sts, sc in next st,* repeat around (10 sc). Join with sl st. Fasten off leaving 12” length for sewing. Finish stuffing.

EARS: (Make 2)

Rnd 1: Ch 2 (or magic circle), 10 sc in 2nd ch from hook. Do not join. Work in continuous rnds throughout.

Rnd 2: 2 sc in each st (20 sc).

Fold in half and work through both sides of ear, sc in each st (10 sc).

Sew ears to top of head using photo for placement.

SNOUT:

Rnd 1: Ch 5, sc in 2nd ch from hook and in next 2 ch, 3 sc in next ch. Working on opposite side of starting ch, sc in next 2 ch, 2 sc in last ch (10 sc). Do not join.

Rnd 2: 2 sc in each st (20 sc).

Rnd 3: *2 sc in next st, sc in next st,* repeat around (30 sc).

Rnds 4-5: Sc in each st. Join with sl st and fasten off at end of Rnd 5 leaving 12” length for sewing. Use black yarn to embroider a triangle for the nose, or use black plastic safety nose. Stuff snout and sew to face using photo for placement.

EYES: (Make 2)

With black bulky yarn (or 2 strands of black worsted held together), ch 2 (or magic circle), 6 sc in 2nd ch from hook. Join with sl st. Fasten off leaving 6” length for sewing. Sew eyes to face above the snout.

OPTIONAL:

Use plastic safety eyes for older children.

BODY:

Rnd 1: Ch 2 (or magic circle), 10 sc in 2nd ch from hook. Do not join. Work in continuous rnds throughout.

Rnd 2: 2 sc in each st (20 sc).

Rnd 3: *Sc in next st, 2 sc in next st,* repeat around (30 sc).

Rnd 4: *Sc in next 2 sts, 2 sc in next st,* repeat around (40 sc).

Rnd 5: Sc in each st.

Rnd 6: *Sc in next 3 sts, 2 sc in next st,* repeat around (50 sc).

Rnds 7: Sc in each st.

Rnd 8: *Sc in next 4 sts, 2 sc in next st,* repeat around (60 sc).

Rnd 9: Sc in each st.

Rnd 10: *Sc in next 5 sts, 2 sc in next st,* repeat around (70 sc).

Rnds 11-16: Sc in each st.

Rnd 17: *Dec over next 2 sts, sc in next 12 sts,* repeat around (65 sc).

Rnds 18-19: Sc in each st.

Rnd 20: *Dec over next 2 sts, sc in next 11 sts,* repeat around (60 sc).

Rnds 21-22: Sc in each st.

Rnd 23: *Dec over next 2 sts, sc in next 10 sts,* repeat around (55 sc).

Rnds 24-25: Sc in each st.

Rnd 26: *Dec over next 2 sts, sc in next 9 sts,* repeat around (50 sc).

Rnd 27: Sc in each st.

Rnd 28: *Dec over next 2 sts, sc in next 8 sts,* repeat around (45 sc).

Rnd 29: Sc in each st.

Rnd 30: *Dec over next 2 sts, sc in next 7 sts,* repeat around (40 sc).

Rnd 31: Sc in each st.

Rnd 32: *Dec over next 2 sts, sc in next 6 sts,* repeat around (35 sc).

Rnd 33: Sc in each st. Stuff body.

Rnd 34: *Dec over next 2 sts, sc in next 5 sts,* repeat around (30 sc).

Rnd 35: *Dec over next 2 sts, sc in next 4 sts,* repeat around (25 sc).

Rnd 36: *Dec over next 2 sts, sc in next 3 sts,* repeat around (20 sc). Join with sl st. Fasten off leaving 12” length for sewing. Finish stuffing. Sew head to body.

LEGS: (Make 2)

Rnd 1: Ch 2 (or magic circle), 10 sc in 2nd ch from hook. Do not join. Work in continuous rnds throughout.

Rnd 2: 2 sc in each st (20 sc).

Rnd 3: *Sc in next st, 2 sc in next st,* repeat around (30 sc).

Rnd 4: *Sc in next 5 sts, 2 sc in next st,* repeat around (35 sc).

Rnds 5-6: Sc in each st.

Rnd 7: Dec 5 times, sc around (30 sc).

Rnds 8-15: Sc in each st. At end of Rnd 16, join with sl st. Fasten off leaving 12” length for sewing. Sew legs to bottom of body.

ARMS:

Rnd 1: Ch 2 (or magic circle), 10 sc in 2nd ch from hook. Do not join. Work in continuous rnds throughout.

Rnd 2: 2 sc in each st (20 sc).

Rnds 3-9: Sc in each st. At end of Rnd 9, join with sl st. Fasten off leaving 12” length for sewing. Sew arms to sides of body.


PDF available at:

https://ravel.me/blanket-yarn-teddy-bear


(ICYMI) In Case You Missed It


Toddler Pinstripe Sweater Crochet Pattern


elephant gift tag


Elephant Birthday Gift Tag


 Lamb Birthday Gift Tag


Affiliate Links

This page contains affiliate links. If you choose to purchase after clicking a link, I may receive a commission at no extra cost to you.

Best Selling Knitting & Crochet Supplies on Amazon


Posted on 1 Comment

Rainbow Power Ornament Crochet Pattern


What better way to start off Water Color Month than with all the colors of the rainbow!

Capture the power of the rainbow in this quick and easy crochet pattern. Crochet a rainbow as a hand or a fist to use as a keychain, hanging ornament, backpack decoration, or a rearview mirror ornament. What will you use yours for?

They are easy and quick to make and can be decorated with any embellishments you desire.


Materials:

Worsted or sport weight yarn:

6 yards purple

5 yards blue

6 yards green

6 yards yellow

6 yards orange

6 yards red

Size E (3.5 mm) crochet hook for sport weight yarn, G (4.0 mm) hook for worsted weight yarn

Yarn needle

Fiberfill

10” piece of ribbon for hanging OR

Key ring and lobster claw for backpack

Measurements:

  Approximately 4” wide by 4” tall (worsted)

Approximately 3” wide by 3” tall (sport)

Special Stitches:

YouTube Tutorial: Invisible Decrease

Ultimate Finish: Fasten off yarn leaving 6” length. Thread length through yarn needle and pick up outer lp of each st around. Pull tight to close.

Ultimate Finish tutorial: https://youtu.be/jVpTr8mId3I

Directions:

HAND:

Rnd 1: With purple, ch 9, sc in 2nd ch from hook, sc in next 6 ch, 3 sc in last ch. Working on opposite side of starting ch, sc in next 6 ch, 2 sc in last ch (18 sc). Do not join. Work in continuous rnds throughout unless otherwise specified.

Rnd 2: 2 sc in first st, sc in next 6 sts, 2 sc in each of next 3 sts, sc in next 6 sts, 2 sc in last 2 sts (24 sc).

Rnd 3: Working in BLO, sc in each st.

Rnds 4-6: Sc in each st. Join with sl st at end of Rnd 6. Fasten off purple.

Rnd 7: Attach blue yarn, sc in each st.

Rnd 8: 2 sc in 1st st, sc in next 9 sts, 2 sc in next 3 sts, sc in next 9 sts, 2 sc in next 2 sts (30 sc). It may be necessary to adjust the count slightly so that the increases fall at the sides of the hand.

Rnd 9: *Sc in next st, 2 sc in next st,* sc in next 9 sts, repeat * to * 3 times, sc in next 9 sts, repeat * to * 2 times (36 sc).

Rnd 10: Sc in each st. Join with sl st. Fasten off blue.

Rnds 11-14: Attach green yarn. Sc in each st. Join with sl st at end of Rnd 14. Fasten off green.

THUMB:

Rnd 1: Attach yellow yarn, 2 sc in 1st st, sc in next st, sk 30 sts, sc in next st, 2 sc in next 3 sts (10 sc).

Rnd 2: Sc in each st. Join with sl st. Fasten off yellow.

Rnds 3-5: Attach orange yarn, sc in each st. Join with sl st at end of Rnd 5. Fasten off orange.

Rnd 6: Attach red yarn, sc in each st.

Rnd 7: Dec around (5 sc). Join with sl st. Close with ultimate finish. Stuff thumb very lightly.

Return to unworked sts of Rnd 14 of hand.

Rnd 15: Attach yellow yarn, ch 1, sc in each st (30 sc). Do not join.

Rnds 16-17: Sc in each st. Fasten off yellow. Stuff hand lightly.

INDEX FINGER:

Rnd 1: Attach orange yarn, sc in next 4 sts, sk 22 sts, sc in next 4 sts (8 sc).

Rnds 2-3: Sc in each st. Join with sl st at end of Rnd 3. Fasten off orange.

Rnds 4-6: Attach red yarn, sc in each st.

Rnd 7: Dec around (4 sc). Join with sl st. Close with ultimate finish. Stuff finger very lightly.

MIDDLE FINGER:

Rnd 1: Attach orange yarn, sc in next 4 sts, sk 14 sts, sc in next 4 sts (8 sc).

Rnds 2-3: Sc in each st. Join at end of Rnd 3. Fasten off orange.

Rnds 4-8: Attach red yarn, sc in each st.

Rnd 9: Dec around (4 sc). Join with sl st. Close with ultimate finish. Stuff finger very lightly. If this finger will be extended, stuff a little more than the other fingers.

RING FINGER:

Rnd 1: Attach orange yarn, sc in next 4 sts, sk 6 sts, sc in next 4 sts (8 sc).

Rnds 2-3: Sc in each st. Join with sl st at end of Rnd 3. Fasten off orange.

Rnds 4-6: Attach red yarn, sc in each st.

Rnd 7: Dec around (4 sc). Join with sl st. Close with ultimate finish. Stuff very finger lightly.

PINKY:

Rnd 1: Attach orange yarn, sc in remaining 6 sts (6 sc).

Rnds 2-3: Sc in each st. Fasten off orange yarn at end of Rnd 3.

Rnd 4: Attach red yarn, sc in each st.

Rnd 5: Dec around (3 sc). Join with sl st. Close with ultimate finish. Stuff finger very lightly.

Using photo as a guide, sew fingers to fist with thumb over the index finger. Pull ribbon through top of hand and tie for a hanger.

Fist Directions:

To make the hand in a fist shape, use the following colors:

Rnds 1-4: Purple

Rnds 5-7: Blue

Rnds 8-10: Green

Rnds 11-13: Yellow

Rnds 14-16: Orange

Thumb: Orange

Rnd 17: Red

Fingers: Rnds 1-4: Red

Rnds 5-8: Orange

PDF download is available at: Rainbow Power Backback Buddy Crochet Pattern


A New Ornament Every Day

One of the best parts is the daily excitement—revealing a new mini treasure to crochet. It could be:

  • A cute crocheted animal

  • A classic winter icon like a snowflake or mitten

  • A silly character that makes everyone laugh

  • A colorful bauble or tiny wreath

As the days pass, your tree slowly fills with color, personality, and charm.

Download the calendar which contains links to each day’s pattern. Ornament Advent Calendar

Each day in December, I will post a different ornament pattern in my Facebook group. https://www.facebook.com/share/g/1FGmsbZ3jM/

Purchase the bundle of all 24 ornaments

https://www.ravelry.com/redeem/my-fingers-fly-designs?sale=410562


More Rainbow Designs


rainbow towel holder
Rainbow Towel Holder
Rainbow Triceratops Baby


(ICYMI) In Case You Missed It


Toddler Pinstripe Sweater Crochet Pattern


Cow Bookmark


elephant gift tag


Elephant Birthday Gift Tag


Sheep Crochet Patterns & Lamb Birthday Gift Tag


Affiliate Links

This page contains affiliate links. If you choose to purchase after clicking a link, I may receive a commission at no extra cost to you.

Best Selling Knitting & Crochet Supplies on Amazon


Posted on 23 Comments

Toddler Pinstripe Sweater Crochet Pattern

Recently I went on a tour of Winterstrom Ranch to find out how yarn is made. If you’re in South Texas or planning to visit, please contact Sarah about a tour of the mill. They also offer felting classes. Such fun!

How Yarn is Made: https://youtu.be/HFuUHmJ-To0

After seeing what it takes to create yarn from wool, I will never again complain about the price of yarn. While there, I purchased some beautiful alpaca yarn to make a sweater.

Toddler Pinstripe Sweater

Size 2 (Sizes 4 & 5 are available in paid PDF download Toddler Pinstripe Sweater Crochet Pattern)
Measurements:
Chest circumference: 22”
Neckline to hem: 8”
Sleeve: 10.5”

Materials:
Alpaca yarn from Winterstrom Ranch or any worsted weight yarn:
MC 460 yards
CC 125 yards
½” buttons
Yarn needle

Size G (4.0 mm) & H (5.0 mm) crochet hooks (or size needed to obtain gauge)

Gauge with H hook: 16 hdc = 4”, 4 pinstripe pattern plus 1 row hdc (13 rows) = 4”

Pinstripe Pattern:
Row 1: (Right side) Ch 1, MC hdc in each st.
Row 2: (Wrong side) Ch 1, turn, MC hdc in each st.
Row 3: (Right side) Ch 1, turn, CC sc in each st. Do not turn.

Directions:
RIBBING:
Row 1: With MC yarn and G hook, ch 9. Sc in 2nd ch from hook and next 7 ch. Ch1, turn (8 sc).
Row 2: Sc in back loop of each sc. Ch 1, turn.
Repeat Row 2 until piece measures 80 rows. Turn piece to work along ends of rows.
BODY:
Row 1: (Right side) With H hook, ch 1, work 1 hdc in each row end (80 hdc).
Row 2: (Wrong side) Ch 1, turn, hdc in each hdc across.
Row 3: (Right side) Turn, attach CC yarn. Ch 1, sc in each st across. Fasten off CC.
Row 4: (Right side) Do not turn. Return to beg of Row 3 and attach MC yarn. Ch 1, hdc in each st across (80 hdc).
Row 5: (Wrong side) Ch 1, turn, hdc in each hdc across.
Row 6: (Right side) Turn, attach CC yarn. Ch 1, sc in each st across. Fasten off CC.
Repeat Rows 4-5 until you have 8 stripes.
ARMHOLE SHAPING:
With MC, hdc in first 18 sts, ch 1, turn. Leave remaining sts unworked.
Right front: Work even in *2 rows MC hdc, 1 row CC sc* until there are 3 stripes.
NECK SHAPING:
Row 1: Sl st first 3 st, ch 1, hdc remaining sts. Ch 1, turn (15 hdc).
Row 2: Ch 1, turn, hdc across to last 2 sts, dec in last 2 sts (14 hdc).
Row 3: Attach CC yarn, ch 1, sc 1 st 2 sts tog, sc across (13 sc).
Row 4: Do not turn, attach MC, dec, hdc across (12 hdc).
Row 5: Ch 1, turn, sl st in next 5 sts, ch 1, hdc across to last 2 sts, dec (6 hdc). Fasten off MC.
BACK:
Return to unworked stitches on body. Skip 2 sts. Attach MC yarn in 3rd st, ch 1, hdc in same st. Hdc in each of next 39 sts. Work even in 2 rows hdc, 1 row sc pattern until there are 4 stripes. (40 hdc)
Next row: Do not turn. Hdc across using MC.
Last row: Ch 1, turn, sl st in first 5 sts, ch 1, hdc across to last 6 sts, sl st next st, leave remaining 5 sts unworked (29 hdc). Fasten off.
LEFT FRONT:
NOTE: Left Front will be mirror image of Right Front.
Return to body, skip 2 st from back section. Attach yarn in 3rd st, ch 1, hdc in same st and in each st across. (18 hdc)
Work even in 2 rows MC hdc, 1 row CC sc until there are 3 stripes.
NECK SHAPING:
Row 1: Ch 1, hdc across with MC, leaving last 3 sts unworked (15 hdc).
Row 2: Ch 1, turn, dec, hdc across (14 hdc).
Row 3: Turn, attach CC yarn, ch 1, sc across, dec over last 2 sts (13 hdc).
Row 4: Do not turn. Attach MC, hdc across, dec over last 2 sts(12 hdc).
Row 5: Ch 1, turn, dec 1st 2 st, hdc in next 4 st, sl st in next st. Leave remaining sts unworked (5 hdc).
Fasten off MC.

SLEEVES: (Make 2)
Row 1:With MC yarn and G hook, ch 9. Sc in 2nd ch from hook and each ch across (8 sc).
Row 2: Ch 1, turn, sc in back loop of each sc across.
Repeat Row 2 until piece measures 24 rows. Turn to work across ends of rows.
Row 1: (Right side) With MC yarn and H hook, hdc in each row end (24 hdc).
Row 2: (Wrong side) Ch 1, turn, hdc in each hdc across.
Row 3: (Right side) Attach CC yarn, turn, sc in each st. Fasten off CC yarn.
Row 4: (Right side) Do not turn. Attach MC yarn in first st of Row 3, 2 hdc in 1st st, hdc across to last st, 2 hdc in last st. (26 hdc.
Row 5: (Wrong side) Ch 1, turn, hdc in each hdc across.
Row 6: Attach CC yarn, turn, sc in each st. Fasten off CC yarn.
Repeat Rows 4-6 until there are 6 stripes.
ASSEMBLY:
With right sides facing, match shoulder seams and sew together. With right sides facing, sew sleeve seam. Then sew sleeves to body, easing to fit. Match shoulder seam to top middle of sleeve.
COLLAR:
With right side facing, skip 1st 3 sts on right front, attach CC yarn with H hook, ch 1, hdc around collar, leaving last 3 sts on left front unworked. Ch1, turn. Make sure you have equal numbers of stitches on right and left sides.
Rows 2-8: Hdc in each st across, ch 1, turn. Fasten off.
EDGING (buttonhole side):
With G hook, attach MC yarn to top left opening with right side facing.
Row 1: Ch 1, sc in same st. Work sc evenly spaced up front of body (approximately 3 sc for each 2 vertical hdc). Lay on a flat surface to ensure edging remains flat. Ch 1, turn.
Row 2: Sc in each st. Ch 1, turn.
Row 3: Mark buttonholes – one 2 sts from right end, one 2 sts from left end, 2nd, 3rd, and 4th
buttonholes evenly spaced between 1st and 5th.
Working sc across Row 3, *ch 1, skip 1 st* at each marker for buttonhole. Fasten off. Turn piece to work edging on opposite side (button side). With wrong side facing and G hook, attach MC yarn at top of right side opening. Sc across right side, making sure you have the same number of sc as on the left side.
Row 4: Ch 1, turn, sc in each sc and each ch.
Row 5: Ch 1, turn, sc in each st. At end of Row 5, do not fasten off. Work 3 sc in last st of Row
5, turn to work in sc across end of edging, sc around collar working 3 sc in each corner. Work sc across top of left edging, 3 sc in corner, sc down left front. Fasten off MC.
Weave in all ends. Sew on buttons to correspond to buttonholes.

To gain access to the free PDF, please join My Fingers Fly Crochet Family on Facebook.

https://www.facebook.com/groups/875538646117910


February 4 is National Sweater Day

Get this bundle of 10 adorable children’s sweater crochet patterns

https://www.ravelry.com/redeem/my-fingers-fly-designs?sale=402068


The last day of the Zoo Blog Hop is all about birds. I hope you have enjoyed this month of animal crochet patterns and will join us next month for World Water Color Month.

Final Day of Zoo Blog Hop – Birds

(ICYMI) In Case You Missed It


Cow Bookmark


elephant gift tag


Elephant Birthday Gift Tag


Sheep Crochet Patterns & Lamb Birthday Gift Tag


monkey bookmark


Monkey Crochet Patterns & Monkey Phone Wallpaper


Seahorse Coloring Page


Zoo Blog Hop 

Affiliate Links

This page contains affiliate links. If you choose to purchase after clicking a link, I may receive a commission at no extra cost to you.

Best Selling Knitting & Crochet Supplies on Amazon


Posted on Leave a comment

Cow Crochet Patterns & Cow Bookmark

cow amigurumi


Moo-ve Over Boring Projects: Cow Crochet Patterns You’ll Love!

If you’re looking for a crochet project that’s equal parts adorable and fun, it’s time to stitch up a crochet cow! With their sweet faces, big eyes, and signature spots, cows make the udderly perfect subject for amigurumi, appliqués, and more. Whether you’re crafting for a farm-themed nursery, a baby shower, or just for fun, cow crochet patterns are sure to make you smile.


🧶 Why Crochet a Cow?

Cows are calm, cute, and full of charm — and their features are perfect for creative crafting. From floppy ears to patchy spots and curly tails, you’ll have a blast customizing your cow’s look with different yarns, colors, and accessories.

They’re great for:

  • Baby gifts and nursery décor

  • Farm animal sets

  • Fun seasonal décor (hello, cow in a Santa hat!)

  • Handmade market items and plushies

Create Your Own Moo-dy Masterpiece

Cow crochet patterns bring charm, personality, and playfulness to your crafting time. They’re a joy to make and even more fun to gift (or keep for yourself!).

Have you crocheted a cow? I’d love to see your herd! Tag your creations with #CrochetCowCrew and show off your spotted cuties.

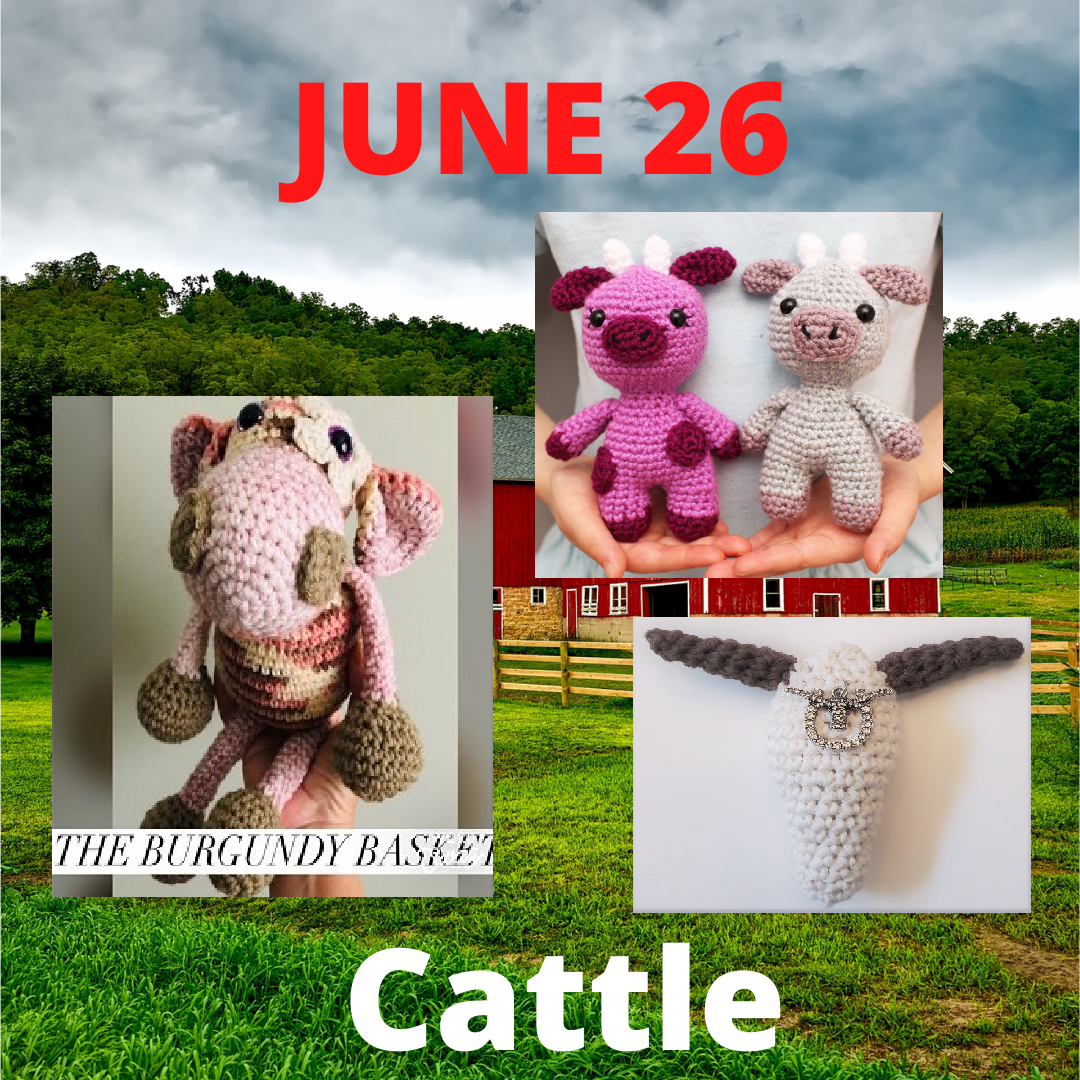
C is for Cow from The Burgundy Basket
cow amigurumi
Mini Cow and Ox Amigurumi from Loops and Love Crochet 


steer skull ornament
Steer Skull Ornament


Cow Bookmark


More Cow Patterns (paid PDFs)

Cow’nt Dracula Amigurumi
Little Red Bull Eyeglass Holder Crochet Pattern
Little Red Bull Eyeglass Holder
Highland Cow Stocking


(ICYMI) In Case You Missed It

elephant gift tag


Elephant Birthday Gift Tag


Sheep Crochet Patterns & Lamb Birthday Gift Tag


monkey bookmark


Monkey Crochet Patterns & Monkey Phone Wallpaper


Seahorse Coloring Page


Zoo Blog Hop 

Affiliate Links

This page contains affiliate links. If you choose to purchase after clicking a link, I may receive a commission at no extra cost to you.

Best Selling Knitting & Crochet Supplies on Amazon


Lion Brand Yarn


If you are looking for some of your favorite Lion Brand® yarns that were found in JOANN stores, we’ve got you covered right here! Shop your favorite yarns and colors, and maybe even discover some more color inspiration in our endless aisles.


Get 40% off 10 balls or 20% off 5 balls with code BALLS