Every year, National Daughter’s Day gives us the chance to pause and celebrate the joy, love, and laughter that daughters bring into our lives. Whether she’s a little one just learning about the world, a teenager discovering her dreams, or an adult building her own path, today is all about recognizing how special she truly is.
🌸 Why We Celebrate
Daughters hold a unique place in families. They are often our confidants, our giggling partners, and our daily reminders of hope and resilience. National Daughter’s Day is an opportunity to show gratitude, strengthen bonds, and let our daughters know just how deeply they’re loved.
Free Crochet Patterns to Celebrate National Daughter’s Day
Looking for thoughtful ways to make the day special? Here are a few ideas:
While National Daughter’s Day is a wonderful occasion, the truth is, daughters deserve to be celebrated every day. A kind word, a hug, or a simple “I’m proud of you” can mean the world.
So today—and every day—take a moment to let your daughter know just how loved she is. 💕Here are some free crochet patterns to spark your creativity.
Get ready to stitch up some spooky fun with Wickedly Cute Crochet! This digital eBook is packed with 12 Halloween-inspired amigurumi patterns that are more adorable than alarming. From playful pumpkins and charming ghosts to creepy-cute critters, each design is perfect for bringing handmade magic to your spooky season.
This ebook is on sale just in time for Halloween – only $9.99 for 12 spooky amigurumi patterns. (Expires 9/30/2025)
This post contains affiliate links. This means I may earn a commission should you chose to sign up for a program or make a purchase using my link. It’s okay – I love all of these companies anyways, and you will too!
The October issue of I Like Crochet is now available, and it includes one of my designs – Modern Bowtie Dress.
Subscribe to get a one-year membership to I Like Crochet for only $5
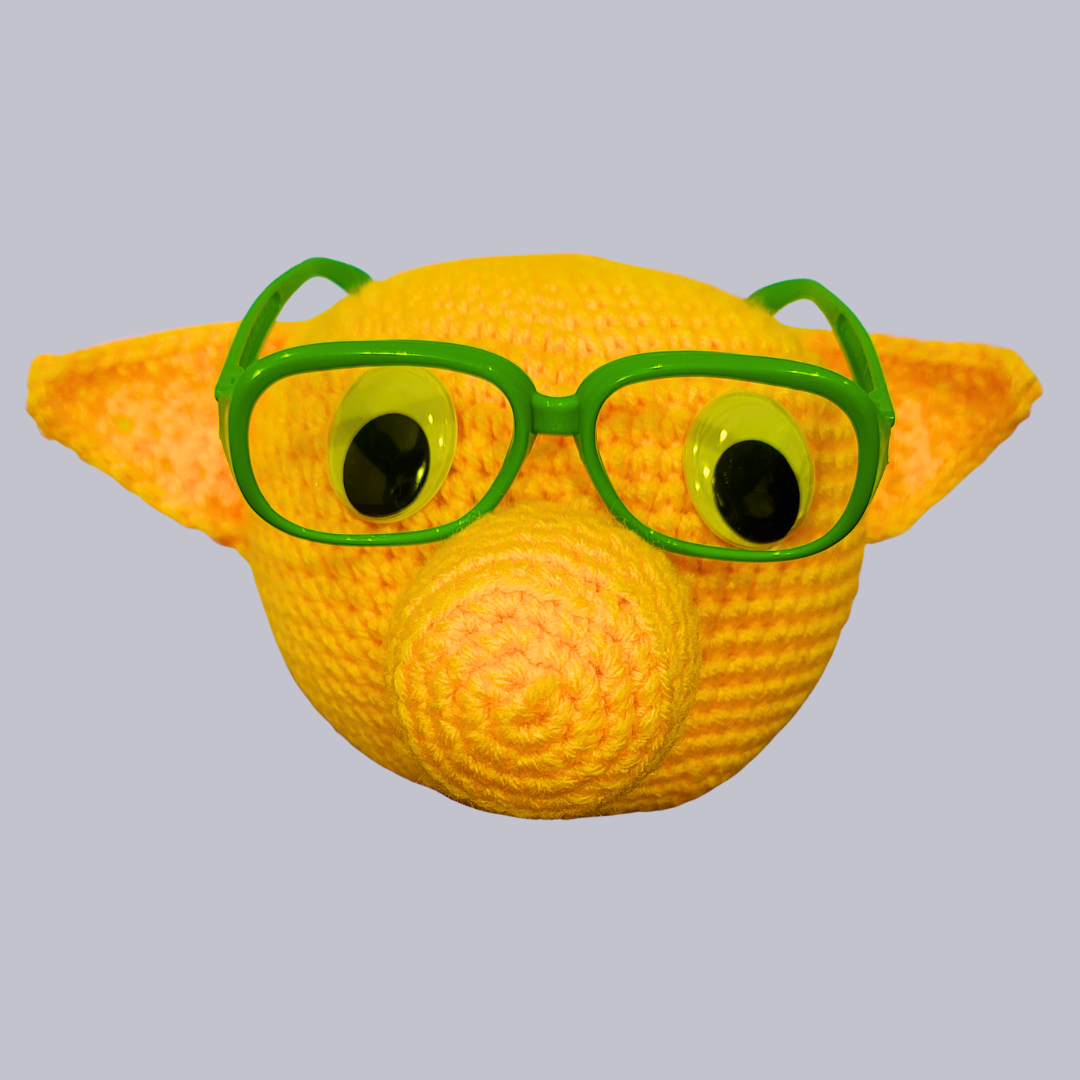
Every July 17th, math lovers and fans of the wonderfully weird come together to celebrate National Yellow Pig Day — a day devoted to the number 17, mathematical curiosities, and yes… a legendary yellow pig!
Born from the imagination of two Princeton mathematicians in the 1960s, this unusual holiday honors the many mathematical properties of the number 17 — from 17-sided polygons to 17-letter words — all wrapped in a pig-shaped package of fun.
🧠 Why Celebrate?
17 is a prime number
It’s the number of syllables in a haiku (5-7-5)
There are 17 moves needed to solve a Rubik’s Cube
And of course… the mythical yellow pig has 17 eyelashes!
So how do you celebrate Yellow Pig Day?
🧶 With Yarn, Of Course!
Why not crochet a yellow pig in honor of the day? Whether it’s a tiny amigurumi, a pig-themed rattle, or even a pig eyeglass holder (double-theme alert!), this is a perfect opportunity to get playful with your projects.
Sea turtles are some of the most beautiful and graceful creatures on Earth. They are also an important part of our oceans, playing a vital role in the ecosystem. If you love sea turtles, you’ll love this crochet pattern for a sea turtle wall hanging. This project is perfect for all skill levels, and it’s a great way to add a touch of the ocean to your home.
This post contains affiliate links. This means I may earn a commission should you chose to sign up for a program or make a purchase using my link. It’s okay – I love all of these companies anyways, and you will too!
Subscribe to get a one-year membership to I Like Crochet for only $5
I’m so proud to have my designs featured on Lion Brand Yarn Pattern Marketplace. Not only can you purchase great designs, but you can also purchase the yarn and supplies you need to make them.
July 16th is National Personal Chef Day, a perfect time to honor those culinary heroes who whip up gourmet meals with love and flair. Whether it’s a professional chef or the designated dinner-maker in your home, today we tip our hats (or toques!) to those who keep our plates full and our hearts happy.
And what better way to celebrate than with a bit of handmade cuteness?
Chef Baby Sweater Crochet Pattern – a playful and cozy design perfect for the tiniest future foodies. Complete with little double-breasted buttons, this sweater turns your little one into the star of the kitchen – or at least the high chair.
Whether you’re gifting it to a chef parent, preparing for a baby shower, or just love themed crochet makes, this pattern is a recipe for smiles.
Why You’ll Love It:
👨🍳 Easy-to-follow instructions 👶 Sized perfectly for babies 🎁 Makes a unique handmade gift
So grab your hook and cook up some crochet magic! And don’t forget to share your finished makes – we love seeing your mini master chefs in action.
Happy National Personal Chef Day – may your yarn be tangle-free and your stitches deliciously even!
Chef Uniform Infant Sweater Crochet Pattern
Size Newborn-3 months
Measurements:
Chest circumference: 19”
Neckline to hem: 8 ½”
Materials:
Baby (or sport) yarn – 2 oz. White
1 oz. Black
Size F (3.75 mm) and G (4.0 mm) crochet hooks (or size needed to obtain gauge)
Yarn needle
8, 7/16” (11 mm) shank style white buttons
Gauge (G hook) 9 hdc = 2”, 6 rows hdc = 2”
Pattern is for newborn-3 month size.
BODY:
Row 1: With white yarn and G hook, ch 110. Hdc in 3rd ch from hook and each ch across, ch 1, turn (108 hdc).
Rows 2: Hdc in each hdc across. Ch 1, turn.
Repeat row 2 and work even in hdc until piece measures 5 1/2”.
ARMHOLE SHAPING: Hdc in first 27 sts, ch 1, turn. Leave remaining sts unworked.
Right front: Work even in hdc until armhole measures 2 inches. End on wrong side.
NECK SHAPING: Row 1: Sl st first 12 st, ch 1, hdc remaining sts. Ch 1, turn (15 hdc).
Row 2: Hdc across to last 2 sts, dec in last 2 sts (14 hdc).
Row 3: Dec 1st 2 st, hdc across (13 hdc).
Row 4: Repeat Row 2 (12 hdc).
Row 5: Dec 1st 2 st, hdc in next 4 st, sl st in next st. Leave remaining sts unworked.
BACK: Return to unworked stitches on body. Skip 8 sts. Attach yarn in 9th st, ch 1, hdc in same st. Hdc in each of next 37 sts. Work even in hdc until piece measures one row less than length of right front.
Last row: Sl st in first 7 sts, sc in next 7 sts, hdc next 10 sts, sc next 7 sts, sl st next st, leave remaining sts unworked. Fasten off.
LEFT FRONT: Return to body, skip 8 st from back section. Attach yarn in 9th st, ch 1, hdc in same st and in each st across. (27 hdc). Ch 1, turn. Work even in hdc until left front measures 2 inches.
Row 3: Hdc across to last 2 st, dec last 2 st (13 hdc).
Row 4: Repeat Row 2 (12 hdc).
Row 5: Sl st next 6 sts, hdc next 4 sts, dec next 2 sts. Fasten off.
SLEEVES: (Make 2)
Row 1: With white yarn and G hook, ch 28. Hdc in 2nd ch from hook and each ch across (26 hdc). Ch 1, turn.
Rows 2-8: Hdc in each hdc across. Ch 1, turn.
Row 9: 2 hdc in 1st st, hdc across to last st, 2 hdc in last st. (28 hdc).
Rows 10-12: Hdc in each hdc across. Ch1, turn.
Repeat Rows 9-12, 2 times (34 hdc). Work even in hdc until piece measures 7 inches. Fasten off.
ASSEMBLY: With right sides facing, match shoulder seams and sew together. With wrong sides together, sew first 1” of sleeves together. This will be the sleeve cuff. Then turn with right sides together and sew remainder of sleeve seams. Then sew sleeves to body, easing to fit. Match shoulder seam to top middle of sleeve.
COLLAR:
With right side facing, skip 10 sc on right front. Attach yarn in next st. Ch 1, hdc in same st. Hdc up side of right neck opening, hdc across back neck sts, hdc down left side of neck, leaving last 10 sts on left front unworked. Ch 1, turn.
Row 2-6: Hdc in each st across, ch 1, turn. Do not fasten off.
EDGING: Continuing with white yarn and G hook, ch 1, turn. Sc in each st across collar. Work 3 sc in corner. Work sc evenly spaced down front of body (approximately 3 sc for each 2 vertical hdc). Lay on a flat surface to ensure edging remains flat. Work 3 sc in corner, continue in sc in remaining loops of beginning chain at bottom of jacket. Work 2 sc in right bottom corner and sc up right front opening. Count stitches on left and right front openings to ensure both sides are even. Fasten off. Weave in all ends.
Buttons: Fold left front over right front. With contrasting color yarn, mark ½” from edge on left front. Measure from this line to side and mark another row the same distance on the opposite side of front. Sew 4 buttons evenly spaced on each side. If buttons are 7/16” or smaller, they will fit through stitches within needing to make buttonholes.
Weave in all ends.
PDF includes sizes 6-9 months and 9-12 months along with skillet baby rattle pattern, and it’s 50% off through 7/20/2025.
This week the Maisie Market Bag is being featured on the Crochet Designer Community. Stop by the Crochet Designer Community and view this pinned post to get the code to use for 50% off this easy pattern on Ravelry until July 20th.
This post contains affiliate links. This means I may earn a commission should you chose to sign up for a program or make a purchase using my link. It’s okay – I love all of these companies anyways, and you will too!
Subscribe to get a one-year membership to I Like Crochet for only $5
I’m so proud to have my designs featured on Lion Brand Yarn Pattern Marketplace. Not only can you purchase great designs, but you can also purchase the yarn and supplies you need to make them.
July is National Blueberry Month, and there’s no better way to celebrate than with a batch of warm, homemade blueberry muffins! These tiny blue gems are not only sweet and tangy but also packed with antioxidants, making them a delicious and nutritious treat.
Whether you pick your blueberries fresh from a local farm or buy them from your favorite grocery store, this recipe will bring out the best in every bite. This is a recipe I have been making for my children for many, many years. They love them!!
🫐 Fun Facts About Blueberries
Blueberries are native to North America and have been enjoyed for thousands of years.
They’re one of the few naturally blue foods.
A single blueberry bush can produce as many as 6,000 berries in a year!
Now, let’s get baking! This recipe makes 6 large muffins or 12 cupcake-size muffins.
🍽️ Easy Blueberry Muffins
Ingredients:
2 cups Bisquick baking mix
1 cup granulated sugar
1 large egg
1 cup milk (plus more if needed)
1 cup fresh or frozen blueberries
Optional: 2 tablespoons coarse sugar for topping
Instructions:
Preheat your oven to 400°F (200°C). Line a muffin tin with paper liners or grease well.
In a large bowl, whisk together baking mix and sugar.
In a separate bowl or large measuring cup, combine beaten egg and milk.
Stir the wet ingredients into the dry until just combined. Do not overmix. Be sure to break up clumps of Bisquick.
Gently fold in the blueberries.
Fill each muffin cup about ¾ full. If desired, sprinkle the tops with coarse sugar for a sweet crunch.
Bake for 20–25 minutes, or until a toothpick inserted in the center comes out clean.
Cool for a few minutes in the pan before transferring to a wire rack.
💙 Tips & Tricks:
Frozen blueberries can be used straight from the freezer—no need to thaw!
Toss blueberries in a little flour before adding to the batter to prevent sinking.
Add a dash of lemon zest to the batter for a citrusy twist.
Whether you enjoy them for breakfast, a midday snack, or a sweet dessert, these blueberry muffins are sure to bring a smile to your face. So grab a basket of blueberries and celebrate this beautiful berry all month long!
This post contains affiliate links. This means I may earn a commission should you chose to sign up for a program or make a purchase using my link. It’s okay – I love all of these companies anyways, and you will too!
I’m so proud to have my designs featured on Lion Brand Yarn Pattern Marketplace. Not only can you purchase great designs, but you can also purchase the yarn and supplies you need to make them.
When we think of military heroes, we often picture distant battlefields or dramatic air rescues. But many of the bravest souls serve much closer to home, keeping our coasts safe and our waters secure. Among them, Coast Guard heroes stand tall—often unrecognized, but never unremarkable.
Over the July 4th weekend—a time when most Americans were celebrating freedom and fireworks—one U.S. Coast Guard rescue swimmer was fighting rising waters and saving lives.
As devastating floods swept through parts of Texas, claiming homes and stranding families, one brave servicemember sprang into action. Amid the chaos, this rescue swimmer has now been hailed as a true American hero after saving over 200 people from the deadly flooding.
So today, let’s take a moment to honor these everyday heroes—the silent guardians who protect our shores and save lives, often without headlines or fanfare. Because heroism doesn’t always wear a cape. Sometimes, it wears a life vest and stands at the helm.
To this Coast Guard rescue swimmer and all the brave men and women who serve: thank you. You don’t just protect our coastlines—you inspire a nation.
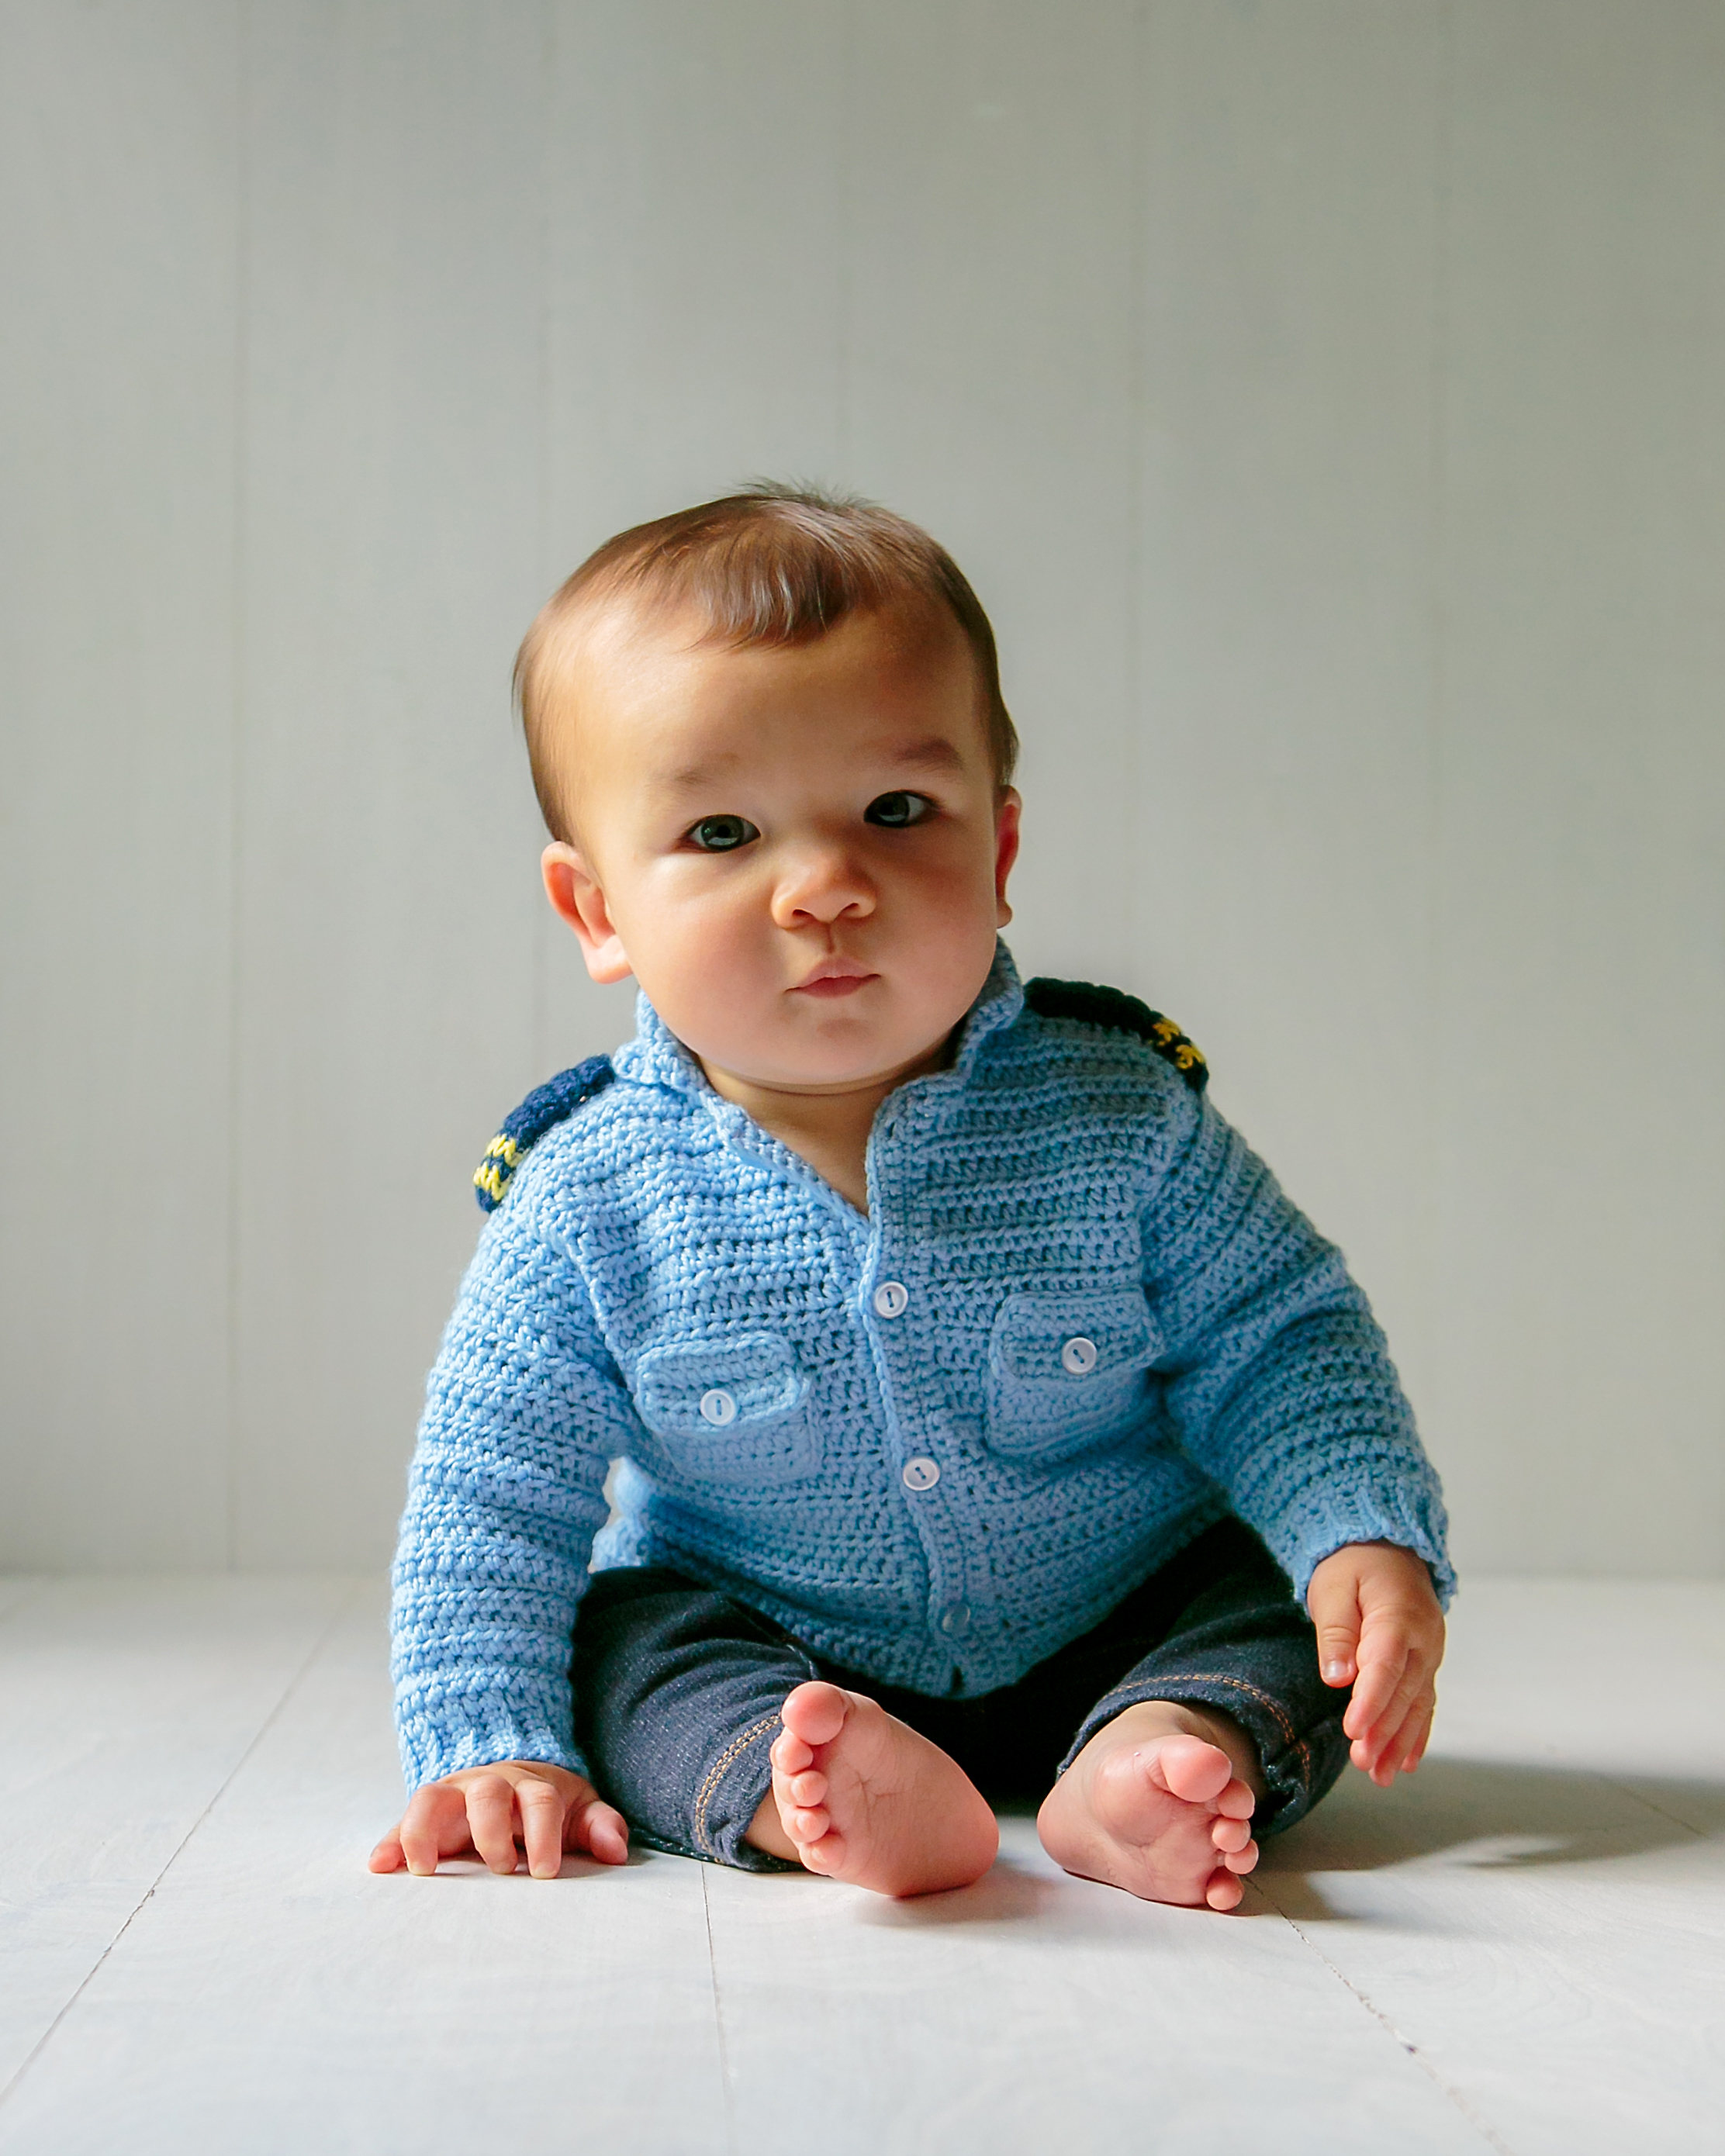
Coastal Military Baby Sweater Crochet Pattern
Size Newborn-3 months
Measurements:
Chest circumference: 19”
Neckline to hem: 7 ½”
Materials:
Baby weight or sport weight yarn:
1 skein Baby Blue
¼ oz Yellow
Few yards Navy Blue
Size F (3.75 mm) & G (4.0 mm) crochet hooks (or size needed to obtain gauge)
6 – ½” or 5/8” blue buttons
Gauge (G hook) 9 hdc = 2”, 6 rows hdc = 2”
BODY:
Row 1: With Baby Blue yarn and F hook, ch 7. Sc in 2nd ch from hook and next 5 ch. Ch1, turn (6 sc).
Row 2: Sc in back loop of each sc. Ch 1, turn. Repeat Row 2 until piece measures 84 rows. Turn piece to work along ends of rows.
Row 1: With G hook, ch 1, work 1 hdc in each row end, ch 1, turn (84 hdc).
Row 2: Hdc in each hdc across. Ch 1, turn. Work even in hdc until piece measures 5 ½ inches. Ch 1, turn.
ARMHOLE SHAPING: Hdc in first 16 sts, ch 1, turn. Leave remaining sts unworked.
Right front: Work even in hdc until armhole measures 2 inches. End at neck edge.
NECK SHAPING: Row 1: Sl st first 3 st, ch 1, hdc remaining sts. Ch 1, turn (13 hdc).
Row 2: Hdc across to last 2 sts, dec in last 2 sts (12 hdc).
Row 3: Dec 1st 2 st, hdc across (11 hdc).
Row 4: Repeat Row 2 (10 hdc).
Row 5: Dec 1st 2 st, hdc in next 4 st, sl st in next st. Leave remaining sts unworked. Fasten off.
BACK: Return to unworked stitches on body. Skip 8 sts. Attach yarn in 9th st, ch 1, hdc in same st. Hdc in each of next 35 sts (36 hdc). Work even in hdc until piece measures one row less than length of right front.
Last row: Sl st in first 7 sts, sc in each of next 7 sts, hdc across to last 14 sts, sc in each of next 7 sts, sl st next st, leave remaining sts unworked. Fasten off.
LEFT FRONT:
Return to body, skip 8 st from back section. Attach yarn in 9th st, ch 1, hdc in same st and in each st across. (16 hdc) Ch 1, turn. Work even in hdc until left front measures 2 inches.
NECK SHAPING:
Row 1: Hdc in 13 hdc. Leave remaining st unworked. Ch 1, turn.
Row 2: Dec 1st 2 st, hdc across (12 hdc).
Row 3: Hdc across to last 2 st, dec last 2 st (11 hdc).
Row 4: Repeat Row 2 (10 hdc).
Row 5: Sl st next 4 st, hdc next 4 st, dec next 2 st. Fasten off.
SLEEVES: (Make 2)
Row 1: With Baby Blue yarn and F hook, ch 7. Sc in 2nd ch from hook and each ch across (6 sc). Ch 1, turn.
Row 2: Sc in back loop of each sc across. Ch 1, turn. Repeat Row 2 until piece measures 24 rows. Switch to G hook. Turn to work across ends of rows.
Row 1: Hdc in each row end (24 hdc). Ch 1, turn.
Rows 2-3: Hdc in each hdc across. Ch 1, turn.
Row 4: 2 hdc in 1st st, hdc across to last st, 2 hdc in last st. Ch 1, turn. (26 [28, 28] hdc.
Rows 5-7: Hdc in each hdc across. Ch 1, turn.
Row 8: Repeat Row 4 (28 hdc).
Repeat Rows 5-8, 1 time (30 hdc). Work even in hdc until piece measures 6 ½ inches. Fasten off.
ASSEMBLY:
With right sides facing, match shoulder seams and sew together. With right sides facing, sew sleeve seam. Then sew sleeves to body, easing to fit. Match shoulder seam to top middle of sleeve.
COLLAR:
With right side facing, skip 1st 3 sts on right front, attach Baby Blue yarn, ch 1, hdc around collar, leaving last 3 sts on left front unworked. Ch1, turn. Make sure you have equal numbers of stitches on right and left sides.
Rows 2-6: Hdc in each st across, ch 1, turn. Fasten off.
EDGING (buttonhole side):
With F hook, attach Baby Blue yarn to bottom left opening with wrong side facing.
Row 1: Ch 1, sc in same st. Sc in next 5 sc of ribbing. Work sc evenly spaced up front of body (approximately 3 sc for each 2 vertical hdc). Lay on a flat surface to ensure edging remains flat.
At top of right side, ch 1, turn.
Row 2: Work even in sc.
Row 3: Mark buttonholes – one 2 sts from right end, one 2 sts from left end, 2nd and 3rd buttonholes evenly spaced between 1st and 4th. Working sc across Row 3, *ch 1, skip 1 st* at each marker for buttonhole. Fasten off.
Turn piece to work edging on opposite side (button side). With wrong side facing and F hook, attach Baby Blue yarn at top of right side opening. Sc across right side, making sure you have the same number of sc as on the left side.
Rows 2-4: Work even in sc. At end of Row 4, do not fasten off. Work 3 sc in last st of Row 4, turn to work inn sc across end of edging, sc around collar working 3 sc in each corner. Work sc across top of let edging, 3 sc in corner, sc down left front including sc in each ch-1 space for buttonholes.
POCKET (Make 2):
Row 1: With Baby Blue yarn and G hook, ch 10. Work hdc in 3rd ch from hook and in each of next 7 ch (8 hdc).
Rows 2-4: Work even in hdc. At end of Row 4, ch 1, turn to work down side of pocket. Sc down side, work 3 sc in corner, sc in remaining loops of beginning ch, work 3 sc in corner, sc up side of pocket. Fasten off leaving 12” length for sewing.
POCKET FLAPS (Make 2):
Row 1: Repeat Row 1 of pocket.
Row 2: Hdc in each of 1st 3 sts, dc next st, ch 1 (buttonhole), dc next st, hdc in each of next 3 sts. Ch 1, turn and work sc around outer edges with 2 sc in each corner and 3 sc in ch-1 space.
Center pockets on front with bottoms at Row 6 of sweater. Sew flaps above pocket, overlapping so buttonhole is over top row of pocket.
Weave in all ends.
SHOULDER BOARD:
Row 1: With Navy Blue yarn and F hook, ch 15, sc in 2nd ch from hook and in each ch across (14 sc). Ch 1, turn.
Row 2: With Yellow yarn, sc in each sc, ch 1, turn.
Row 3: With Navy Blue yarn, sc across, ch 1, turn.
Row 4: Repeat Row 3.
Row 5: Repeat row 3. Continue in sc rows until piece measures long enough to span shoulder seam from collar to top of sleeve (approximately 4” [2 ¼”, 2 ½”). Fasten off leaving length for sewing.
Place piece right side up. Fold long edges toward center so they meet in the middle.
Stitch ends closed. Turn right side out and sew back seam.
This post contains affiliate links. This means I may earn a commission should you chose to sign up for a program or make a purchase using my link. It’s okay – I love all of these companies anyways, and you will too!
I’m so proud to have my designs featured on Lion Brand Yarn Pattern Marketplace. Not only can you purchase great designs, but you can also purchase the yarn and supplies you need to make them.
Contains information related to marketing campaigns of the user. These are shared with Google AdWords / Google Ads when the Google Ads and Google Analytics accounts are linked together.
90 days
__utma
ID used to identify users and sessions
2 years after last activity
__utmt
Used to monitor number of Google Analytics server requests
10 minutes
__utmb
Used to distinguish new sessions and visits. This cookie is set when the GA.js javascript library is loaded and there is no existing __utmb cookie. The cookie is updated every time data is sent to the Google Analytics server.
30 minutes after last activity
__utmc
Used only with old Urchin versions of Google Analytics and not with GA.js. Was used to distinguish between new sessions and visits at the end of a session.
End of session (browser)
__utmz
Contains information about the traffic source or campaign that directed user to the website. The cookie is set when the GA.js javascript is loaded and updated when data is sent to the Google Anaytics server
6 months after last activity
__utmv
Contains custom information set by the web developer via the _setCustomVar method in Google Analytics. This cookie is updated every time new data is sent to the Google Analytics server.
2 years after last activity
__utmx
Used to determine whether a user is included in an A / B or Multivariate test.
18 months
_ga
ID used to identify users
2 years
_gali
Used by Google Analytics to determine which links on a page are being clicked
30 seconds
_ga_
ID used to identify users
2 years
_gid
ID used to identify users for 24 hours after last activity
24 hours
_gat
Used to monitor number of Google Analytics server requests when using Google Tag Manager
1 minute
Marketing cookies are used to follow visitors to websites. The intention is to show ads that are relevant and engaging to the individual user.
Pinterest Tag is a web analytics service that tracks and reports website traffic.
Unique value with which users can be identified by X. Collected information is used to be personalize X services, including X trends, stories, ads and suggestions.
2 years
external_referer
Our Website uses X buttons to allow our visitors to follow our promotional X feeds, and sometimes embed feeds on our Website.
2 years
guest_id
This cookie is set by X to identify and track the website visitor. Registers if a users is signed in the X platform and collects information about ad preferences.