And just like that… our Christmas in July celebration is coming to a close! Whether you spent the month crafting, decorating, or just enjoying a little mid-year holiday cheer, today is the perfect time to reflect and wrap up the festivities. Before it’s over, here’s a quick ornament you can whip up tonight!
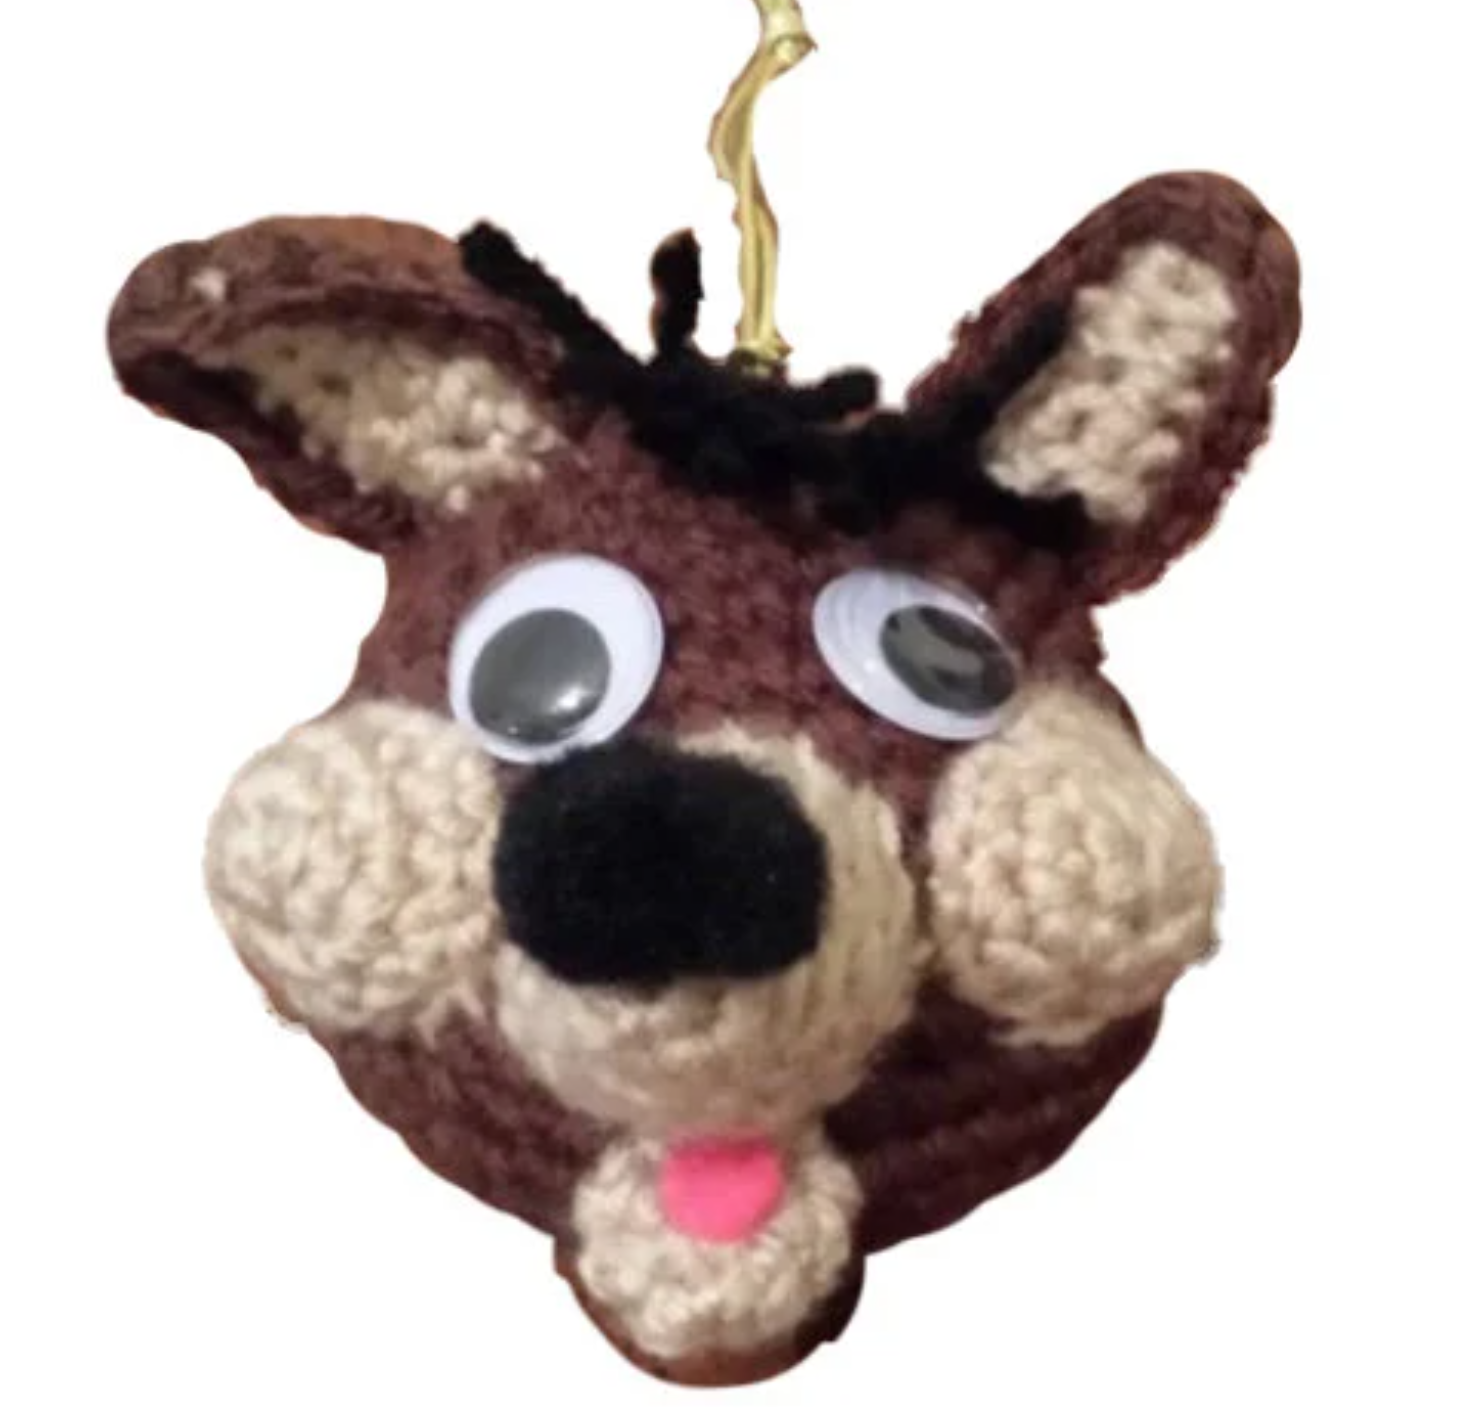
Move over reindeer — there’s a new howler in town! If you’re looking for a unique way to add some wild charm to your tree this year, the Coyote Christmas Ornament Crochet Pattern is the perfect project.
This little desert dweller brings a playful, rustic touch to your holiday décor. Imagine a tiny coyote howling at the moon, perched among the twinkling lights and tinsel — it’s the perfect ornament for wildlife lovers, southwestern décor fans, or anyone who wants a Christmas tree with character.
🧶 Why You’ll Love This Pattern
Quick & Fun Project – Works up in an evening, perfect for last-minute gifts or craft fairs.
Stash-Buster Friendly – Use leftover yarn to create a whole pack of festive coyotes!
Customizable – Add a Santa hat, scarf, or even a tiny jingle bell for extra holiday flair.
Finished size is just right for hanging on a tree, tying onto gift packages, or even turning into a keychain or car charm after the holidays.
🎁 Handmade Gifts with Personality
Crochet ornaments aren’t just decorations — they’re little keepsakes. Gifting a Coyote Christmas Ornamentis like giving a piece of handmade holiday cheer that will be treasured year after year.
So grab your hook, your softest yarn, and maybe hum a little “Jingle Howls” while you stitch. Your Christmas tree will thank you!
🧵 Ready to start?
Coyote Christmas Tree Ornament
Materials:
Small amounts of worsted weight yarn – brown, tan, and black
Size G (4.0 mm) crochet hook
Fiberfil, Yarn needle
Pink felt
Black pompom, Google eyes
Directions:
Head:
Rnd 1: With brown yarn, ch 2, 6 sc in 2nd ch from hook. Do not join.
Rnd 2: 2 sc in each ch (12 sc).
Rnd 3: Sc in next sc, 2 sc in next sc, repeat around (18 sc).
Rnd 4: Sc in next 2 sc, 2 sc in next sc, repeat around (24 sc).
Rnd 5: Sc in next 3 sc, 2 sc in next sc, repeat around (30 sc).
Rnd 6: Sc in next 4 sc, 2 sc in next sc, repeat around (36 sc).
Rnd 7: Sc in next 5 sc, 2 sc in next sc, repeat around (42 sc).
Rnds 8-13: Work even on 42 sc.
Rnd 14: Sc in next 5 sc, dec, repeat around (36 sc).
Rnd 15: Sc in next 4 sc, dec, repeat around (30 sc).
Rnd 16: Sc in next 3 sc, dec, repeat around (24 sc).
Rnd 17: Sc in next 2 sc, dec, repeat around (18 sc).
Rnd 19: Sc in next sc, dec, repeat around (12 sc). Stuff head.
Rnd 20: Dec around (6 sc). Fasten off and sew closed.
Cheeks: (Make 2)
With tan yarn, repeat Rnds 1-2 of head.
Rnd 3: Work even on 12 sc. Join. Fasten off leaving length for sewing..
Snout Top:
Rnd 1: With tan yarn, ch 2, 3 sc in 2nd ch from hook. Do not join.
Rnd 2: 2 sc in each st (6 sc).
Rnd 3: *Sc in next st, inc next st,* repeat twice (9 sc).
Rnd 4: *Sc in next 2 sts, inc next st,* repeat twice (12 sc).
Rnd 5: *Sc in next 3 sts, inc next st,* repeat twice (15 sc).
Rnd 6: Sc in each sc around. Join with sl st. Fasten off leaving length for sewing
Snout Bottom:
Rnd 1: With tan yarn, ch 2, 6 sc in 2nd ch from hook. Do not join.
Rnds 2-3: Sc in each sc around. Join with sl st. Fasten off leaving length for sewing. Using photo as a guide, sew snout top and bottom to center front of face. Cut a small tongue from pink felt and glue inside mouth. Sew one cheek on each side of top of snout. Glue (or sew) google eyes above snout.
Ears: (Make 2)
Rnd 1: With tan yarn, ch 7, hdc in 3rd ch, hdc next ch, sc in next 2 ch, 3 sc in last ch. Working on opposite side of starting ch, sc in next 2 ch, hdc in next 3 ch. Fasten off.
With brown yarn, repeat Rnd 1. Ch 1, turn. Place right sides together (1 tan and 1 brown) and sc through both thicknesses with 3 sc in tip of ear. Fasten off with length for sewing. Sew ears to top of head.
Cut a 10” piece of yarn and run it through the top of the head. Tie in a knot at the top and hang on your tree.
This post contains affiliate links. This means I may earn a commission should you chose to sign up for a program or make a purchase using my link. It’s okay – I love all of these companies anyways, and you will too!
Subscribe to get a one-year membership to I Like Crochet for only $5
Who says the holiday magic is limited to December? It’s Christmas in July — the perfect excuse to break out the festive yarn, crank up the carols (we see you, Mariah), and get a head start on handmade gifts without the winter rush!
Why Celebrate Christmas in July?
Aside from being delightfully out-of-season fun, Christmas in July is a great time to:
🎁 Plan and prep your holiday projects – Christmas List – Free PDF Download 🎁 Shop sales and stock up on supplies 🎁 Test out new holiday patterns or gift ideas – Christmas Patterns 🎁 Get festive without the stress
Plus, if you’re a maker, now’s the time to think about what you’ll offer during the real holiday rush — and maybe even launch a few early bird items!
Only 5 Months Until Christmas – Let the Crafting Begin! ✨🎄
Can you believe it? We’re officially just 5 months away from Christmas — and if you’re a maker, you know what that means…
It’s time to get those hooks moving and the yarn flying!
Whether you’re planning handmade gifts, prepping for holiday markets, or dreaming of cozy decor, now is the perfect time to start. No last-minute stress, no tangled lights at midnight—just joyful, intentional crafting.
🎁 5 Things You Can Start Crocheting Now:
Ornaments– Small, quick, and perfect for stocking stuffers or gift toppers
Drawstring: Using same color yarn as hat, make a chain 12″ long and knot both ends. Pull through loops made in Rnd 24 of hat.
Snout:
Rnd 1: With CC yarn, ch 2 (or magic circle). Sc 6 in second ch from hook. Do not join. Work in continuous rnds throughout unless otherwise specified.
Rnd 2: 2 sc in each sc (12 sc).
Rnd 3: *1 sc in next sc, 2 sc in next sc,* repeat around (18 sc).
Rnd 4: *1 sc in next 2 sc, 2 sc in next sc,* repeat around (24 sc). Join with sl st. Fasten off leaving 12” length for sewing.
Insert safety nose into Rnd 1.
Insert safety eyes in Rnd 3, 4 sts apart.
Trim or burn back of safety eyes and nose so they don’t stick through the body of the cat.
With pink (or black) yarn, embroider mouth in Rnd 3 and a line from the mouth up to the nose.
Whiskers:
Cut 2 pieces of CC (or MC) yarn 4” in length. Pull through 1 piece on each side of nose. Trim to 1”.
Ears: (Make 2)
Row 1: With CC yarn, ch 3, sc in 2nd ch from hook, sc in next ch (2 sc).
Row 2: Ch 1, turn, sc 2 sts tog (1 sc). Fasten off leaving 6” length for sewing.
Sew ears to hat at Rnd 17.
Weave in all ends.
Sew a pompom to each end of drawstring.
Decorate hat as you wish with pom poms, rick rack, etc. You can sc Rnd 14 of hat with eyelash or bulky yarn to make a fringe. For bulky or eyelash yarns, work from wrong side so the bulk of the “fringe” falls on the right side.
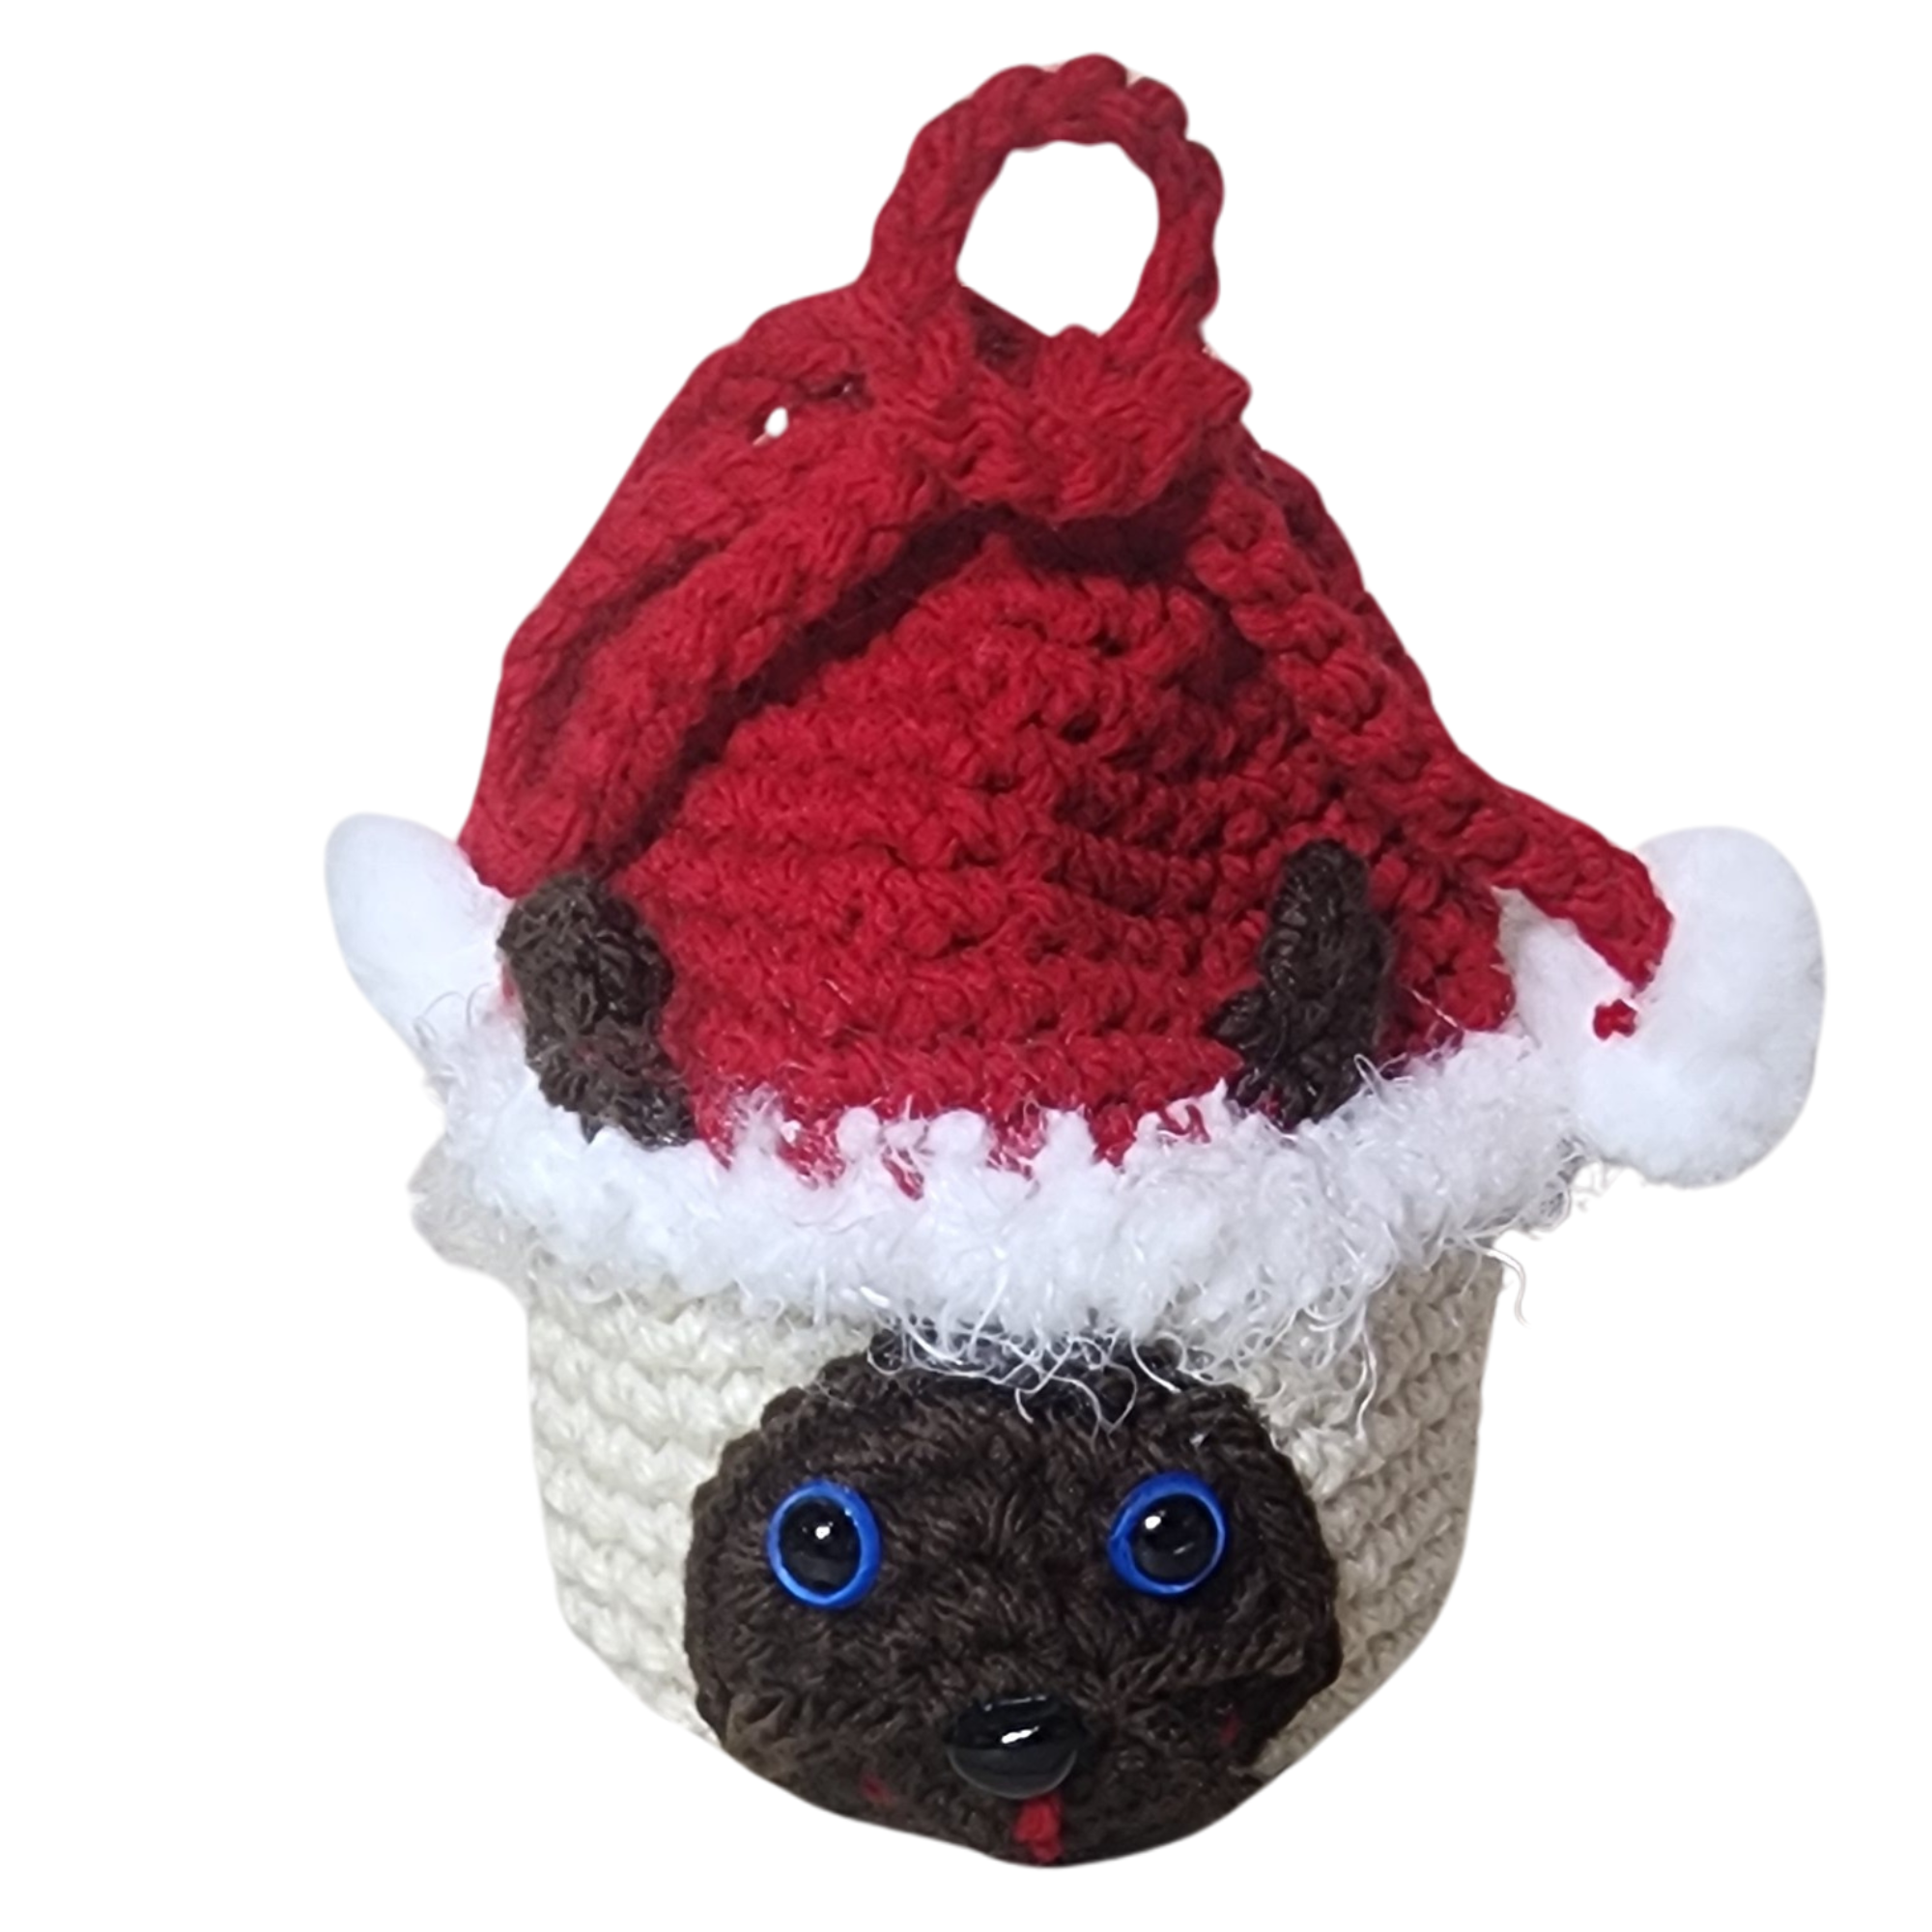
The cat is so much fun to make, because you can change eye color, hair color, hat color and embellishments so that you never make the same cat twice. Use colors from your stash or decorate it to look like one of your cats or your favorite cartoon cat.
Get the free PDF for the Santa Cat Gift Bag in My Fingers Fly Crochet Family on Facebook.
This post contains affiliate links. This means I may earn a commission should you chose to sign up for a program or make a purchase using my link. It’s okay – I love all of these companies anyways, and you will too!
Subscribe to get a one-year membership to I Like Crochet for only $5
I’m so proud to have my designs featured on Lion Brand Yarn Pattern Marketplace. Not only can you purchase great designs, but you can also purchase the yarn and supplies you need to make them.
Are you feeling stuck in a rut? July is officially Anti-Boredom Month, and it’s the perfect excuse to shake things up, try something new, and bring a little joy back into your routine.
Whether you’re stuck inside because of the heat, on a long road trip, or just need a break from the usual screen time, here are some fun and creative ways to beat boredom this month:
🧶 Pick Up a New Craft Project Crochet lovers, this is your time to shine! Try out a new stitch, start a small summer-friendly project (like a cute amigurumi or cotton washcloth), or finally use that skein of yarn you’ve been saving for something special. Not a crocheter? Now’s the time to learn!
📚 Start a Crafty Book Club Combine your love of stories and stitches—listen to an audiobook while you crochet. Or host a weekly meet-up (in person or online) to discuss books and share what you’re making. Two birds, one cozy stone.
🎲 Play with Patterns Challenge yourself with a pattern swap! Pick a pattern completely outside your comfort zone or style. Love amigurumi? Try wearables. Usually stick to neutrals? Go neon! You never know what you’ll discover.
🖍️ Get the Kids Involved Keep little hands (and minds) busy with fun fiber crafts. Finger knitting, pom-pom making, or even letting them choose yarn colors for your next project can keep boredom at bay and create sweet memories.
🌟 Host a “Craft-ternoon” Invite a friend or two over for snacks and stitching. It doesn’t have to be fancy—just good company, creative hands, and maybe a few crochet puns (because we’re hooked on fun).
Remember: boredom isn’t a bad thing—it’s often the gateway to your next burst of creativity. So let’s turn “I’m bored” into “I made this!”
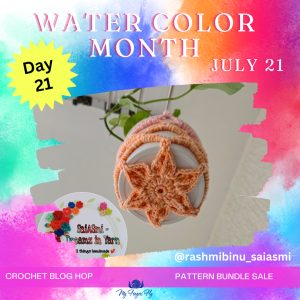
On this day in 2023 – Water Color Blog Hop
Arche de Fleurs Plant Holder from SaiASmi – Dreamz in Yarn –
I love my greenies. Waking up to see the green every morning is a serene experience. With this
pattern you can add a spot of color to your little green corner!
This post contains affiliate links. This means I may earn a commission should you chose to sign up for a program or make a purchase using my link. It’s okay – I love all of these companies anyways, and you will too!
Subscribe to get a one-year membership to I Like Crochet for only $5
I’m so proud to have my designs featured on Lion Brand Yarn Pattern Marketplace. Not only can you purchase great designs, but you can also purchase the yarn and supplies you need to make them.
The Truth Behind Those “Too Good to Be True” Crochet Photos: AI, Clickbait & What You Should Know
If you’ve ever been scrolling through social media and spotted a jaw-droppingly detailed crochet project — say, a life-sized dragon, hyper-realistic food, or a “crocheted” sculpture that looks more like CGI — you’re not alone. These images are everywhere lately, and sadly, many of them are fake.
Welcome to the world of AI-generated crochet photos being used as clickbait — and it’s creating confusion, frustration, and a lot of wasted time for crafters.
🤖 What’s Really Going On?
With the rise of powerful AI image tools, it’s easier than ever to generate a photo that looks like a beautifully crocheted item — even if it’s impossible to make with yarn and a hook.
Unfortunately, many of these images are:
Used to sell nonexistent patterns
Posted on clickbait blogs or videos to drive traffic
Shared widely without any indication that they’re fake
For someone new to crochet or looking for inspiration, this can be disheartening. You spend time searching for a pattern, only to realize it doesn’t exist… and never did.
🚩 Red Flags to Watch For
Not sure if what you’re seeing is real? Here are a few clues:
Stitches don’t look quite right — too uniform, blurry, or oddly shaped
Strange anatomy or design details — like ten fingers, tangled arms, or lumpy yarn “textures”
No actual photo credits or pattern source
Linked sites full of ads, pop-ups, or vague instructions
💡 What You Can Do
Stick with trusted designers and sources
Support real makers by buying from Etsy, Ravelry, or verified sites
Double-check before sharing – help others avoid the trap!
Call it out kindly – not everyone knows what to look for
🧶 Creativity, Not Clickbait
As makers, we love seeing the boundaries of crochet pushed — but let’s make sure it’s done honestly and respectfully. There are so many talented designers out there creating stunning, real patterns that deserve the spotlight.
So the next time you see an eye-popping crochet image that feels too perfect, take a closer look. It just might be AI in disguise.
AI should be used as a tool to help us grow in our crafts and careers — not as a shortcut for scammers to exploit. Whether it’s generating ideas, helping with pattern writing, or enhancing creativity, AI can be a wonderful aid. But when it’s used to mislead makers, sell fake patterns, or deceive supportive communities, it crosses a line. Let’s champion transparency, credit real creators, and use technology to uplift, not undermine, the handmade world we love.
Have you spotted fake crochet photos online? Let’s talk about it in the comments — and give a shout-out to your favorite real crochet creators!
Challenge Accepted!!
I decided to turn the tables on the AI-generated crochet images. There was an adorable cat crocheted into a craft basket that everyone loved! I thought, “I can do that,” so I did. This photo is the one that appeared on Facebook. I’ve omitted the links, because it’s clickbait.
And here’s my version of Kitty Caddy. Of course, it’s not as adorable as the AI, but crochet does have limits.
Rnd 1: With black yarn, ch 2 (or magic ring), 6 sc in 2nd ch from hook. Do not join. Work in continuous rnds throughout unless otherwise specified.
Rnd 2: 2 sc in each st (12 sc).
Rnd 3: *Sc in next st, 2 sc in next st,* repeat around (18 sc).
Rnd 4: *Sc in next 2 sts, 2 sc in next st,* repeat around (24 sc).
Rnd 5: *Sc in next 3 sts, 2 sc in next st,* repeat around (30 sc).
Rnd 6: *Sc in next 4 sts, 2 sc in next st,* repeat around (36 sc).
Rnd 7: Sc around: 18 black, 2 white, 16 black.
Rnd 8: Sc around: 18 black, 3 white, 15 black.
Rnd 9: Sc around: 18 black, 4 white, 14 black.
Rnd 10: Sc around: 18 black, 5 white, 13 black.
Rnd 11: Sc around: 18 black, 6 white, 12 black.
Rnd 12: Sc around: 18 black, 5 white, 13 black.
Rnd 13: Using black only, *inv dec, sc in next 4 sts,* repeat around (30 sc).
Rnd 14: *Inv dec, sc in next 3 sts,* repeat around (24 sc).
Rnd 15: *Inv dec, sc in next 2 sts,* repeat around (18 sc).
Rnd 16: With black yarn, *sc in next 2 sts, 2 sc in next st,* repeat twice in black, once in white, twice in black (24 sc).
Rnd 17: With black yarn, *sc in next 3 sts, 2 sc in next st,* repeat twice in black, once in white, twice in black (30 sc).
Rnd 18: Working with black yarn only, sc in next 15 sts, sc in BLO of next 5 sts, sc in both lps of next 10 sts (30 sc).
Rnds 19-24: With black only, sc in each st.
Rnd 25: *Inv dec, sc in next 3 sts,* repeat around (24 sc).
Insert eyes in Rnd 9, 2 sts away from white section. Stuff head.
Rnd 26: *Inv dec, sc in next 2 sts,* repeat around (18 sc).
Rnd 27: *Inv dec, sc in st,* repeat around (12 sc). Join with sl st. Fasten off yarn leaving 6” length. Close with ult fin.
Neck:
Row 1: Hold head so top of head is facing you. Attach white yarn in first lp of white sts in Rnd 18. Ch 1, sc in each st (5 sc).
Row 2: Ch 1, turn, sc in each st.
Rows 3-5: Ch 1, turn, dec over first 2 sts, sc across (2 sc at end of Row 5).
Row 6: Ch 1, turn, sc last 2 sc tog (1 sc). Fasten off leaving 9” length of white yarn for sewing.
Snout:
Rnd 1: With white yarn, ch 2 (or magic circle), 6 sc in 2nd ch from hook (6 sc). Do not join.
Rnd 2: *Sc in next st, 2 sc in next st,* repeat around (9 sc).
Rnd 3: *Sc in next 2 sts, sc in next st,* repeat around (12 sc).
Rnd 4: *Sc in next st, 2 sc in next st,* repeat around (18 sc). Join with sl st.
Insert safety nose into Rnd 1. Stuff lightly and sew snout to head at Rnds 10-15 of head.
Whiskers:
Cut 2 pieces of white yarn 4” long. Using one on each side of nose, double and pull through sts at side of nose. Trim to 1” length. Use needle to separate strands.
Body:
Rnd 1: With black yarn, ch 15, sc in 2nd ch from hook, sc in next 12 ch, 3 sc in last ch. Working on opposite side of foundation ch, sc in next 12 ch, 2 sc in last ch (30 sc). Do not join. Work in continuous rnds throughout unless otherwise specified.
Rnd 2: 2 sc in first st, sc in next 12 sts, 2 sc in next 3 sts, sc in next 12 sts, 2 sc in next 2 sts (36 sc).
Rnd 3: *Sc in next st, 2 sc in next st*, sc in next 12 sts, * to * 3 times, sc in next 12 sts, * to * 2 times (42 sc).
Rnd 4: *Sc in next 2 sts, 2 sc in next st*, sc in next 12 sts, * to * 3 times, sc in next 12 sts, * to * 2 times (48 sc).
Rnd 5: *Sc in next 3 sts, 2 sc in next st*, sc in next 12 sts, * to * 3 times, sc in next 12 sts, * to * 2 times (54 sc).
Rnd 6: *Sc in next 4 sts, 2 sc in next st*, sc in next 12 sts, * to * 3 times, sc in next 12 sts, * to * 2 times (60 sc).
Rnd 7: *Sc in next 5 sts, 2 sc in next st*, sc in next 12 sts, * to * 3 times, sc in next 12 sts, * to * 2 times (66 sc).
Lay piece flat on felt and trace edges. Cut out felt oval and set aside.
Rnd 8: Working in BLO, sc in each st.
Rnds 9-14: Working in both lps, sc in each st. Join with sl st at end of Rnd 14. Fasten off black yarn.
Insert felt into bottom of cat, covering Rnd 7.
Insert head into front portion of body with white neck piece outside body. Sew in place firmly. Sew white neck piece on outside of body.
Ears: (Make 2)
Row 1: With white yarn, ch 4, sc in 2nd ch from hook and next 2 ch (3 sc).
Row 2: Ch 1, turn, dec, sc in next st (2 sc).
Row 3: Ch 1, turn, dec (1 sc). Fasten off white.
Repeat Rows 1-3 with black yarn.
Place white ear on top of black ear and sc through both thicknesses with black yarn. Sc in edges of Row 1 and Row 2, 3 sc in Row 3 (tip of ear), sc in edges of Row 2 and Row 1. Sl st in beg ch. Fasten off black. Sew ears to head at Rnds 2-5.
Legs: (Make 4)
Rnd 1: With white yarn, ch 2 (or magic ring), 6 sc in 2nd ch from hook. Do not join. Work in continuous rnds throughout unless otherwise specified.
Rnd 2: 2 sc in each st (12 sc).
Rnd 3: *Sc in next st, 2 sc in next st,* repeat around (18 sc).
Rnd 3: *Sc in next 5 sts, 2 sc in next st,* repeat around (21 sc).
Rnd 4: Inv dec 5 times, sc in next 11 sc (16 sc). Join with sl st. Fasten off white yarn.
Rnd 5: Attach black yarn, sc in each st. Do not join.
Rnds 7-13: Sc in each st. Join with sl st at end of Rnd 13. Fasten off black yarn leaving 12” length for sewing.
Remove outer piece of plastic from roller. Leave center rod in place to give kitty more support. Insert roller into leg.
Sew legs in place on bottom of body – two in front and two in back.
Tail:
Rnd 1: With white yarn, ch 2 (or magic ring), 6 sc in 2nd ch from hook. Do not join. Work in continuous rnds throughout.
Rnds 2-3: Sc in each st. Join with sl st at end of Rnd 3.
Rnd 4: Attach black yarn, sc in each st. Do not join.
Repeat Rnd 4 until tail measures 5: Join with sl st. Fasten off leaving 12” length for sewing.
Fold pipe cleaner to fit and insert into tail.
Sew tail to body Rnds 8-14 at back center. Bend to desired shape.
Basket:
Row 1: With tan yarn, ch 51, sc in 2nd ch from hook and next 49 ch (50 sc).
Rows 2-5: Ch 1, turn, sc in each st.
Row 6: Ch 1, turn, sc in each st with 3 sc in last st. Turn to work down the side, sc in each row end with 3 sc in last row end. Sc in each lp of foundation ch with 3 sc in last lp. Work up other side in sc with 2 sc in last row end. Join with sl st. Fasten off leaving 12” length for sewing.
Pin basket around cat body with top of basket at Rnd 13 of body. Sew edges of basket to body. Sew bottom row of basked to Rnd 9 of body. Leave top of basket free. Sew vertical lines on basket to divide into sections.
This post contains affiliate links. This means I may earn a commission should you chose to sign up for a program or make a purchase using my link. It’s okay – I love all of these companies anyways, and you will too!
40% off all ebooks and the Crochet Club Membership through 11/19/2025
I’m so proud to have my designs featured on Lion Brand Yarn Pattern Marketplace. Not only can you purchase great designs, but you can also purchase the yarn and supplies you need to make them.
Every July 17th, math lovers and fans of the wonderfully weird come together to celebrate National Yellow Pig Day — a day devoted to the number 17, mathematical curiosities, and yes… a legendary yellow pig!
Born from the imagination of two Princeton mathematicians in the 1960s, this unusual holiday honors the many mathematical properties of the number 17 — from 17-sided polygons to 17-letter words — all wrapped in a pig-shaped package of fun.
🧠 Why Celebrate?
17 is a prime number
It’s the number of syllables in a haiku (5-7-5)
There are 17 moves needed to solve a Rubik’s Cube
And of course… the mythical yellow pig has 17 eyelashes!
So how do you celebrate Yellow Pig Day?
🧶 With Yarn, Of Course!
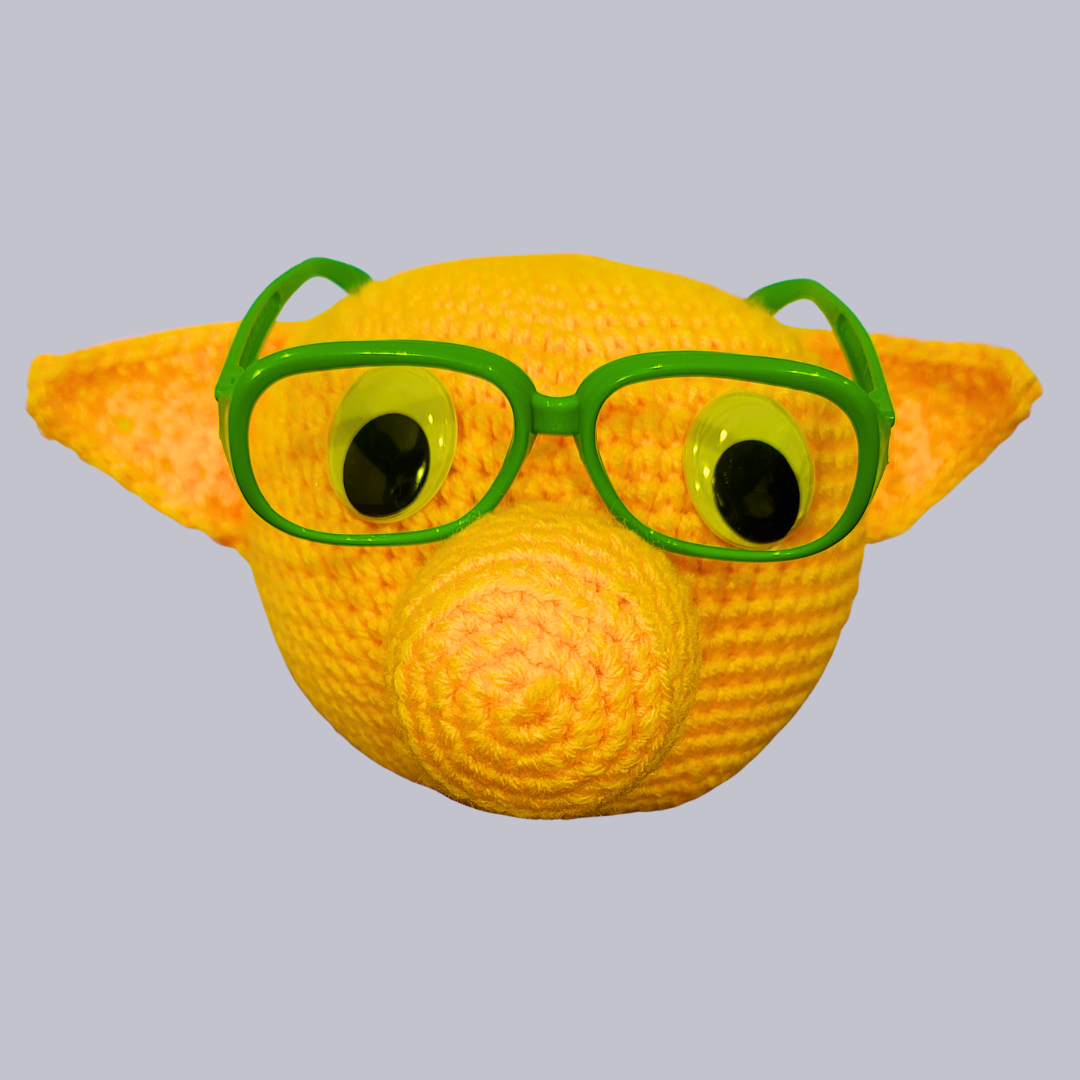
Why not crochet a yellow pig in honor of the day? Whether it’s a tiny amigurumi, a pig-themed rattle, or even a pig eyeglass holder (double-theme alert!), this is a perfect opportunity to get playful with your projects.
Sea turtles are some of the most beautiful and graceful creatures on Earth. They are also an important part of our oceans, playing a vital role in the ecosystem. If you love sea turtles, you’ll love this crochet pattern for a sea turtle wall hanging. This project is perfect for all skill levels, and it’s a great way to add a touch of the ocean to your home.
This post contains affiliate links. This means I may earn a commission should you chose to sign up for a program or make a purchase using my link. It’s okay – I love all of these companies anyways, and you will too!
Subscribe to get a one-year membership to I Like Crochet for only $5
I’m so proud to have my designs featured on Lion Brand Yarn Pattern Marketplace. Not only can you purchase great designs, but you can also purchase the yarn and supplies you need to make them.
Used to determine whether a user is included in an A / B or Multivariate test.
18 months
_ga
ID used to identify users
2 years
_gali
Used by Google Analytics to determine which links on a page are being clicked
30 seconds
_ga_
ID used to identify users
2 years
_gid
ID used to identify users for 24 hours after last activity
24 hours
_gat
Used to monitor number of Google Analytics server requests when using Google Tag Manager
1 minute
_gac_
Contains information related to marketing campaigns of the user. These are shared with Google AdWords / Google Ads when the Google Ads and Google Analytics accounts are linked together.
90 days
__utma
ID used to identify users and sessions
2 years after last activity
__utmt
Used to monitor number of Google Analytics server requests
10 minutes
__utmb
Used to distinguish new sessions and visits. This cookie is set when the GA.js javascript library is loaded and there is no existing __utmb cookie. The cookie is updated every time data is sent to the Google Analytics server.
30 minutes after last activity
__utmc
Used only with old Urchin versions of Google Analytics and not with GA.js. Was used to distinguish between new sessions and visits at the end of a session.
End of session (browser)
__utmz
Contains information about the traffic source or campaign that directed user to the website. The cookie is set when the GA.js javascript is loaded and updated when data is sent to the Google Anaytics server
6 months after last activity
__utmv
Contains custom information set by the web developer via the _setCustomVar method in Google Analytics. This cookie is updated every time new data is sent to the Google Analytics server.
2 years after last activity
Marketing cookies are used to follow visitors to websites. The intention is to show ads that are relevant and engaging to the individual user.
Pinterest Tag is a web analytics service that tracks and reports website traffic.
Unique value with which users can be identified by X. Collected information is used to be personalize X services, including X trends, stories, ads and suggestions.
2 years
external_referer
Our Website uses X buttons to allow our visitors to follow our promotional X feeds, and sometimes embed feeds on our Website.
2 years
guest_id
This cookie is set by X to identify and track the website visitor. Registers if a users is signed in the X platform and collects information about ad preferences.



 Santa Cat Gift Bag Crochet Pattern





 I decided to turn the tables on the AI-generated crochet images. There was an adorable cat crocheted into a craft basket that everyone loved! I thought, “I can do that,” so I did. This photo is the one that appeared on Facebook. I’ve omitted the links, because it’s clickbait.