Posted on — 7 Comments

Celebrate National Personal Chef Day with a Chef-Inspired Baby Sweater Crochet Pattern! 👶

July 16th is National Personal Chef Day, a perfect time to honor those culinary heroes who whip up gourmet meals with love and flair. Whether it’s a professional chef or the designated dinner-maker in your home, today we tip our hats (or toques!) to those who keep our plates full and our hearts happy.

And what better way to celebrate than with a bit of handmade cuteness?

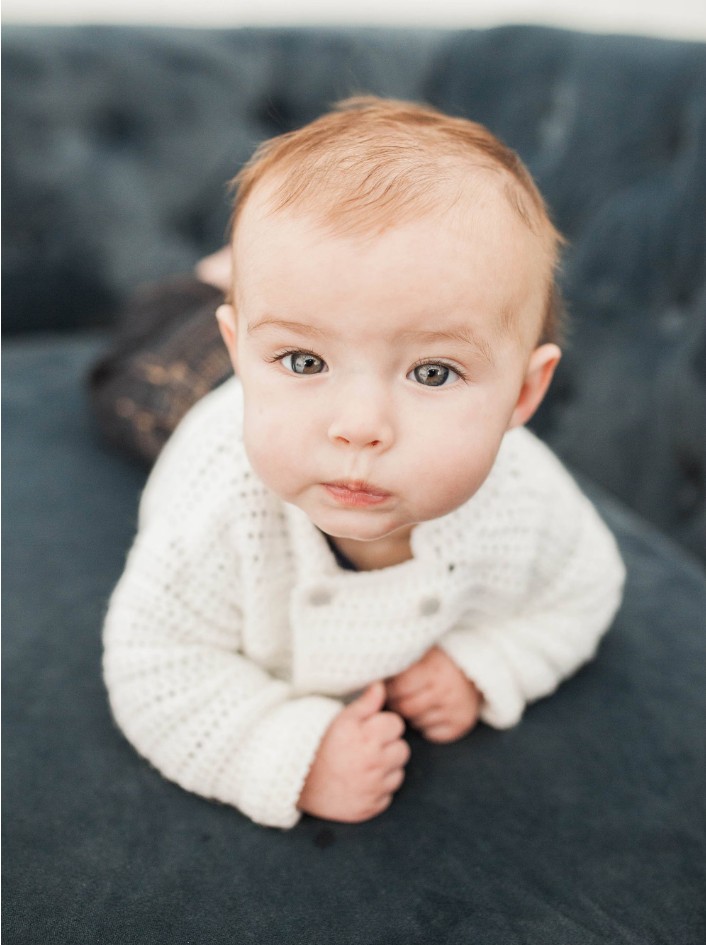
Chef Baby Sweater Crochet Pattern – a playful and cozy design perfect for the tiniest future foodies. Complete with little double-breasted buttons, this sweater turns your little one into the star of the kitchen – or at least the high chair.

Whether you’re gifting it to a chef parent, preparing for a baby shower, or just love themed crochet makes, this pattern is a recipe for smiles.

Why You’ll Love It:
👨‍🍳 Easy-to-follow instructions
👶 Sized perfectly for babies 
🎁 Makes a unique handmade gift

So grab your hook and cook up some crochet magic! And don’t forget to share your finished makes – we love seeing your mini master chefs in action.

Happy National Personal Chef Day – may your yarn be tangle-free and your stitches deliciously even!

Chef Uniform Infant Sweater Crochet Pattern

Size Newborn-3 months 

Measurements:

Chest circumference: 19”

Neckline to hem: 8 ½”

Materials:

Baby (or sport) yarn – 2 oz. White

1 oz. Black

Size F (3.75 mm) and G (4.0 mm) crochet hooks (or size needed to obtain gauge)

Yarn needle

8, 7/16” (11 mm) shank style white buttons

Gauge (G hook) 9 hdc = 2”, 6 rows hdc = 2”

Pattern is for newborn-3 month size.

BODY:

Row 1: With white yarn and G hook, ch 110. Hdc in 3rd ch from hook and each ch across, ch 1, turn (108 hdc).

Rows 2: Hdc in each hdc across. Ch 1, turn.

Repeat row 2 and work even in hdc until piece measures 5 1/2”.

ARMHOLE SHAPING: Hdc in first 27 sts, ch 1, turn. Leave remaining sts unworked.

Right front: Work even in hdc until armhole measures 2 inches. End on wrong side.

NECK SHAPING: Row 1: Sl st first 12 st, ch 1, hdc remaining sts. Ch 1, turn (15 hdc).

Row 2: Hdc across to last 2 sts, dec in last 2 sts (14 hdc).

Row 3: Dec 1st 2 st, hdc across (13 hdc).

Row 4: Repeat Row 2 (12 hdc).

Row 5: Dec 1st 2 st, hdc in next 4 st, sl st in next st. Leave remaining sts unworked.

BACK: Return to unworked stitches on body. Skip 8 sts. Attach yarn in 9th st, ch 1, hdc in same st.  Hdc in each of next 37 sts. Work even in hdc until piece measures one row less than length of right front.

Last row: Sl st in first 7 sts, sc in next 7 sts, hdc next 10 sts, sc next 7 sts, sl st next st, leave remaining sts unworked. Fasten off.

LEFT FRONT: Return to body, skip 8 st from back section. Attach yarn in 9th st, ch 1, hdc in same st and in each st across. (27 hdc). Ch 1, turn. Work even in hdc until left front measures 2 inches.

NECK SHAPING: Row 1: Hdc in 15 hdc. Leave remaining sts unworked. Ch 1, turn.

Row 2: Dec 1st 2 st, hdc across (14 hdc).

Row 3: Hdc across to last 2 st, dec last 2 st (13 hdc).

Row 4: Repeat Row 2 (12 hdc).

Row 5: Sl st next 6 sts, hdc next 4 sts, dec next 2 sts. Fasten off.

SLEEVES: (Make 2)

Row 1: With white yarn and G hook, ch 28. Hdc in 2nd ch from hook and each ch across (26 hdc). Ch 1, turn.

Rows 2-8: Hdc in each hdc across. Ch 1, turn.

Row 9: 2 hdc in 1st st, hdc across to last st, 2 hdc in last st. (28 hdc).

Rows 10-12: Hdc in each hdc across. Ch1, turn.

Repeat Rows 9-12, 2 times (34 hdc). Work even in hdc until piece measures 7 inches. Fasten off.

ASSEMBLY: With right sides facing, match shoulder seams and sew together. With wrong sides together, sew first 1” of sleeves together. This will be the sleeve cuff. Then turn with right sides together and sew remainder of sleeve seams. Then sew sleeves to body, easing to fit. Match shoulder seam to top middle of sleeve.

COLLAR:

With right side facing, skip 10 sc on right front. Attach yarn in next st. Ch 1, hdc in same st.  Hdc up side of right neck opening, hdc across back neck sts, hdc down left side of neck, leaving last 10 sts on left front unworked. Ch 1, turn.

Row 2-6: Hdc in each st across, ch 1, turn. Do not fasten off.

EDGING: Continuing with white yarn and G hook, ch 1, turn. Sc in each st across collar. Work 3 sc in corner. Work sc evenly spaced down front of body (approximately 3 sc for each 2 vertical hdc). Lay on a flat surface to ensure edging remains flat. Work 3 sc in corner, continue in sc in remaining loops of beginning chain at bottom of jacket. Work 2 sc in right bottom corner and sc up right front opening. Count stitches on left and right front openings to ensure both sides are even. Fasten off. Weave in all ends.

Buttons: Fold left front over right front. With contrasting color yarn, mark ½” from edge on left front. Measure from this line to side and mark another row the same distance on the opposite side of front. Sew 4 buttons evenly spaced on each side. If buttons are 7/16” or smaller, they will fit through stitches within needing to make buttonholes.

Weave in all ends.

baby chef sweater


PDF includes sizes 6-9 months and 9-12 months along with skillet baby rattle pattern, and it’s 50% off through 7/20/2025.

Baby Chef Sweater Crochet Pattern


A big thanks to everyone who purchased the Coastal Military Baby Sweater.

Proceeds from the sale of this pattern were donated to the Kerr County Flood Relief Fund. 


More Baby Patterns

Royal Baby Sweater Crochet Pattern, Newborn-3M, 6M or 9M sizes with Scepter Rattle
Royal Baby Sweater with Scepter Rattle
Briefcase Baby Rattle Crochet Pattern
First Aid Kit Baby Rattle Crochet Pattern
starfish baby rattle
Starfish Baby Rattle, My Fingers Fly


It’s a Girl Gift Tag
It’s a Boy Gift Tag
baby shower gift tag
Handmade with Love Gift Tag

Weekly Featured Pattern

This week the Maisie Market Bag is being featured on the Crochet Designer Community. 👜
Stop by the Crochet Designer Community and view this pinned post to get the code to use for 50% off this easy pattern on Ravelry until July 20th.

You can find the coupon code and pattern link here: https://www.facebook.com/CrochetDesignerCommunity


ICYMI (In Case You Missed It)

Cat Keychain
Hump Day Camel
Sloth Tumbler Boot
Space alien rattle
Easy Blueberry Muffin Recipe


Affiliate Links

This post contains affiliate links. This means I may earn a commission should you chose to sign up for a program or make a purchase using my link. It’s okay – I love all of these companies anyways, and you will too!


Subscribe to get a one-year membership to I Like Crochet for only $5

https://www.ilikecrochet.com/subscribe-2col/gctmb559ncmc/?mqsc=AFMYFINGERSFLY


I’m so proud to have my designs featured on Lion Brand Yarn Pattern Marketplace. Not only can you purchase great designs, but you can also purchase the yarn and supplies you need to make them.

Astronaut Baby Booties 


Amazon affiliate: https://amzn.to/4hkS5Zd
Best Seller on Amazon Haul


https://amzn.to/4joumZG


Posted on — 2 Comments

Celebrate National Blueberry Month with an Easy Blueberry Muffin Recipe

July is National Blueberry Month, and there’s no better way to celebrate than with a batch of warm, homemade blueberry muffins! These tiny blue gems are not only sweet and tangy but also packed with antioxidants, making them a delicious and nutritious treat.

Whether you pick your blueberries fresh from a local farm or buy them from your favorite grocery store, this recipe will bring out the best in every bite. This is a recipe I have been making for my children for many, many years. They love them!!

🫐 Fun Facts About Blueberries

  • Blueberries are native to North America and have been enjoyed for thousands of years.

  • They’re one of the few naturally blue foods.

  • A single blueberry bush can produce as many as 6,000 berries in a year!

Now, let’s get baking! This recipe makes 6 large muffins or 12 cupcake-size muffins.


🍽️ Easy Blueberry Muffins

Ingredients:

  • 2 cups Bisquick baking mix

  • 1 cup granulated sugar

  • 1 large egg

  • 1 cup milk (plus more if needed)

  • 1 cup fresh or frozen blueberries

  • Optional: 2 tablespoons coarse sugar for topping

Instructions:

  1. Preheat your oven to 400°F (200°C). Line a muffin tin with paper liners or grease well.

  2. In a large bowl, whisk together baking mix and sugar.

  3. In a separate bowl or large measuring cup, combine beaten egg and milk.

  4. Stir the wet ingredients into the dry until just combined. Do not overmix. Be sure to break up clumps of Bisquick.

  5. Gently fold in the blueberries.

  6. Fill each muffin cup about ¾ full. If desired, sprinkle the tops with coarse sugar for a sweet crunch.

  7. Bake for 20–25 minutes, or until a toothpick inserted in the center comes out clean.

  8. Cool for a few minutes in the pan before transferring to a wire rack.


💙 Tips & Tricks:

  • Frozen blueberries can be used straight from the freezer—no need to thaw!

  • Toss blueberries in a little flour before adding to the batter to prevent sinking.

  • Add a dash of lemon zest to the batter for a citrusy twist.


Whether you enjoy them for breakfast, a midday snack, or a sweet dessert, these blueberry muffins are sure to bring a smile to your face. So grab a basket of blueberries and celebrate this beautiful berry all month long!

Happy National Blueberry Month! 🫐

Download free recipe card:  Blueberry Muffins Recipe Card


ICYMI (In Case You Missed It)

Cat Keychain
Hump Day Camel
Sloth Tumbler Boot
Space alien rattle
Coastal Military baby sweater

Affiliate Links

This post contains affiliate links. This means I may earn a commission should you chose to sign up for a program or make a purchase using my link. It’s okay – I love all of these companies anyways, and you will too!


I’m so proud to have my designs featured on Lion Brand Yarn Pattern Marketplace. Not only can you purchase great designs, but you can also purchase the yarn and supplies you need to make them.

Astronaut Baby Booties 


Amazon affiliate: https://amzn.to/4hkS5Zd
Best Seller on Amazon Haul


https://amzn.to/4joumZG


Posted on — 13 Comments

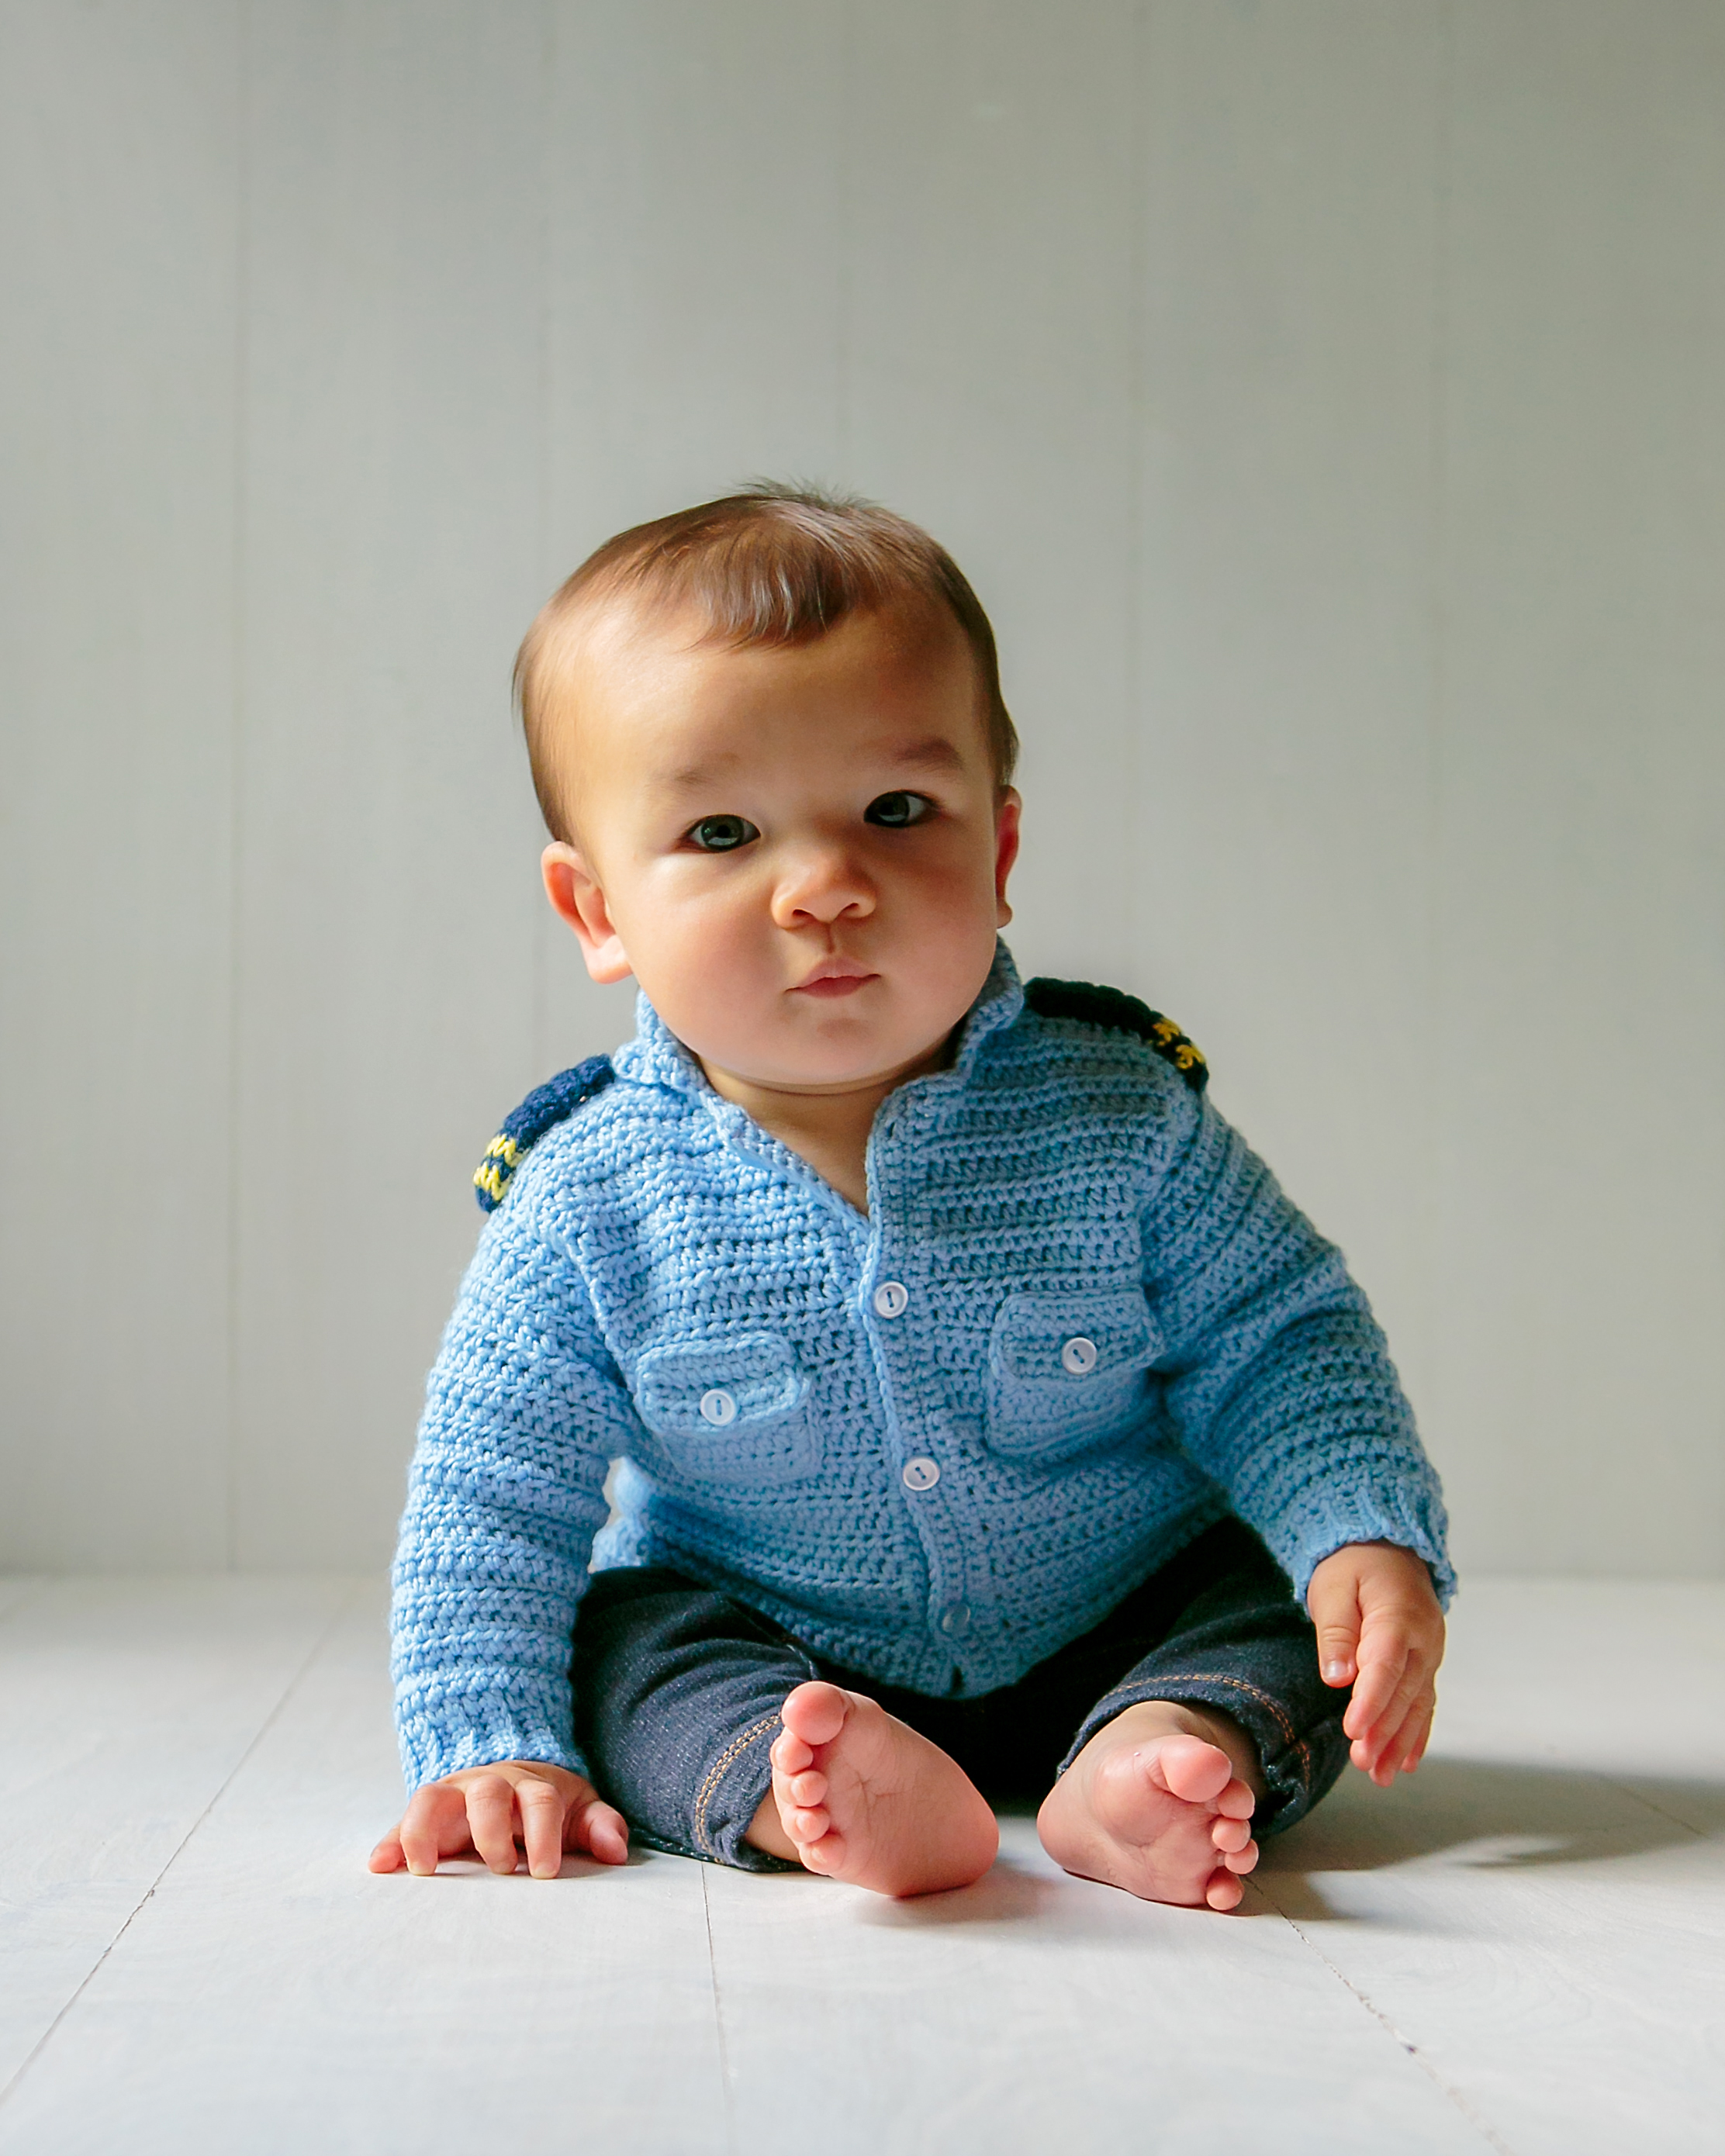
Coastal Military Baby Sweater Crochet Pattern

Coastal Military Baby Sweater Crochet Pattern

Coast Guard Hero: Bravery Beyond the Shore

When we think of military heroes, we often picture distant battlefields or dramatic air rescues. But many of the bravest souls serve much closer to home, keeping our coasts safe and our waters secure. Among them, Coast Guard heroes stand tall—often unrecognized, but never unremarkable.

Over the July 4th weekend—a time when most Americans were celebrating freedom and fireworks—one U.S. Coast Guard rescue swimmer was fighting rising waters and saving lives.

As devastating floods swept through parts of Texas, claiming homes and stranding families, one brave servicemember sprang into action. Amid the chaos, this rescue swimmer has now been hailed as a true American hero after saving over 200 people from the deadly flooding.

So today, let’s take a moment to honor these everyday heroes—the silent guardians who protect our shores and save lives, often without headlines or fanfare. Because heroism doesn’t always wear a cape. Sometimes, it wears a life vest and stands at the helm.

To this Coast Guard rescue swimmer and all the brave men and women who serve: thank you. You don’t just protect our coastlines—you inspire a nation.

Coastal Military Baby Sweater Crochet Pattern

Coastal Military Baby Sweater Crochet Pattern

Size Newborn-3 months

Measurements:

Chest circumference: 19”

Neckline to hem: 7 ½”

Materials:

Baby weight or sport weight yarn:

1 skein Baby Blue

¼ oz Yellow

Few yards Navy Blue

Size F (3.75 mm) & G (4.0 mm) crochet hooks (or size needed to obtain gauge)

6 – ½” or 5/8” blue buttons


Gauge (G hook) 9 hdc = 2”, 6 rows hdc = 2”


BODY:

Row 1: With Baby Blue yarn and F hook, ch 7. Sc in 2nd ch from hook and next 5 ch. Ch1, turn (6 sc).

Row 2: Sc in back loop of each sc. Ch 1, turn. Repeat Row 2 until piece measures 84 rows. Turn piece to work along ends of rows.

Row 1: With G hook, ch 1, work 1 hdc in each row end, ch 1, turn (84 hdc).

Row 2: Hdc in each hdc across. Ch 1, turn. Work even in hdc until piece measures 5 ½ inches. Ch 1, turn.

ARMHOLE SHAPING: Hdc in first 16 sts, ch 1, turn. Leave remaining sts unworked.

Right front: Work even in hdc until armhole measures 2 inches. End at neck edge.

NECK SHAPING: Row 1: Sl st first 3 st, ch 1, hdc remaining sts. Ch 1, turn (13 hdc).

Row 2: Hdc across to last 2 sts, dec in last 2 sts (12 hdc).

Row 3: Dec 1st 2 st, hdc across (11 hdc).

Row 4: Repeat Row 2 (10 hdc).

Row 5: Dec 1st 2 st, hdc in next 4 st, sl st in next st. Leave remaining sts unworked. Fasten off.

BACK: Return to unworked stitches on body. Skip 8 sts. Attach yarn in 9th st, ch 1, hdc in same st. Hdc in each of next 35 sts (36 hdc).  Work even in hdc until piece measures one row less than length of right front.

Last row: Sl st in first 7 sts, sc in each of next 7 sts, hdc across to last 14 sts, sc in each of next 7 sts, sl st next st, leave remaining sts unworked. Fasten off.

LEFT FRONT:

Return to body, skip 8 st from back section. Attach yarn in 9th st, ch 1, hdc in same st and in each st across. (16 hdc) Ch 1, turn. Work even in hdc until left front measures 2 inches.

NECK SHAPING:

Row 1: Hdc in 13 hdc. Leave remaining st unworked. Ch 1, turn.

Row 2: Dec 1st 2 st, hdc across (12 hdc).

Row 3: Hdc across to last 2 st, dec last 2 st (11 hdc).

Row 4: Repeat Row 2 (10 hdc).

Row 5: Sl st next 4 st, hdc next 4 st, dec next 2 st. Fasten off.

SLEEVES: (Make 2)

Row 1: With Baby Blue yarn and F hook, ch 7. Sc in 2nd ch from hook and each ch across (6 sc). Ch 1, turn.

Row 2: Sc in back loop of each sc across. Ch 1, turn. Repeat Row 2 until piece measures 24 rows. Switch to G hook. Turn to work across ends of rows.

Row 1: Hdc in each row end (24 hdc). Ch 1, turn.

Rows 2-3: Hdc in each hdc across. Ch 1, turn.

Row 4: 2 hdc in 1st st, hdc across to last st, 2 hdc in last st. Ch 1, turn. (26 [28, 28] hdc.

Rows 5-7: Hdc in each hdc across. Ch 1, turn.

Row 8: Repeat Row 4 (28 hdc).

Repeat Rows 5-8, 1 time (30 hdc). Work even in hdc until piece measures 6 ½ inches. Fasten off.

ASSEMBLY:

With right sides facing, match shoulder seams and sew together. With right sides facing, sew sleeve seam. Then sew sleeves to body, easing to fit. Match shoulder seam to top middle of sleeve.

COLLAR:

With right side facing, skip 1st 3 sts on right front, attach Baby Blue yarn, ch 1, hdc around collar, leaving last 3 sts on left front unworked. Ch1, turn. Make sure you have equal numbers of stitches on right and left sides.

Rows 2-6: Hdc in each st across, ch 1, turn. Fasten off.

EDGING (buttonhole side):

With F hook, attach Baby Blue yarn to bottom left opening with wrong side facing.

Row 1: Ch 1, sc in same st. Sc in next 5 sc of ribbing. Work sc evenly spaced up front of body (approximately 3 sc for each 2 vertical hdc). Lay on a flat surface to ensure edging remains flat.

At top of right side, ch 1, turn.

Row 2: Work even in sc.

Row 3: Mark buttonholes – one 2 sts from right end, one 2 sts from left end, 2nd and 3rd buttonholes evenly spaced between 1st and 4th.  Working sc across Row 3, *ch 1, skip 1 st* at each marker for buttonhole. Fasten off.

Turn piece to work edging on opposite side (button side). With wrong side facing and F hook, attach Baby Blue yarn at top of right side opening. Sc across right side, making sure you have the same number of sc as on the left side.

Rows 2-4: Work even in sc. At end of Row 4, do not fasten off. Work 3 sc in last st of Row 4, turn to work inn sc across end of edging, sc around collar working 3 sc in each corner. Work sc across top of let edging, 3 sc in corner, sc down left front including sc in each ch-1 space for buttonholes.

POCKET (Make 2):

Row 1: With Baby Blue yarn and G hook, ch 10. Work hdc in 3rd ch from hook and in each of next 7 ch (8 hdc).

Rows 2-4: Work even in hdc. At end of Row 4, ch 1, turn to work down side of pocket. Sc down side, work 3 sc in corner, sc in remaining loops of beginning ch, work 3 sc in corner, sc up side of pocket. Fasten off leaving 12” length for sewing.

POCKET FLAPS (Make 2):

Row 1: Repeat Row 1 of pocket.

Row 2: Hdc in each of 1st 3 sts, dc next st, ch 1 (buttonhole), dc next st, hdc in each of next 3 sts. Ch 1, turn and work sc around outer edges with 2 sc in each corner and 3 sc in ch-1 space.

Center pockets on front with bottoms at Row 6 of sweater. Sew flaps above pocket, overlapping so buttonhole is over top row of pocket.

Weave in all ends.

SHOULDER BOARD:

Row 1: With Navy Blue yarn and F hook, ch 15, sc in 2nd ch from hook and in each ch across (14 sc). Ch 1, turn.

Row 2: With Yellow yarn, sc in each sc, ch 1, turn.

Row 3: With Navy Blue yarn, sc across, ch 1, turn.

Row 4: Repeat Row 3.

Row 5: Repeat row 3. Continue in sc rows until piece measures long enough to span shoulder seam from collar to top of sleeve (approximately 4” [2 ¼”, 2 ½”). Fasten off leaving length for sewing.

Place piece right side up. Fold long edges toward center so they meet in the middle.

Stitch ends closed. Turn right side out and sew back seam.

Pin to shoulders along seam and sew in place.

PDF includes Sizes Newborn-3M, 3-6 months, and 9-12 months along with flashlight baby rattle pattern. 

is available at https://myfingersflyblog.com/product/coastal-military-baby-sweater-crochet-pattern-2/


Military Baby Sweaters Crochet Patterns Ebook

More Baby Patterns

Royal Baby Sweater Crochet Pattern, Newborn-3M, 6M or 9M sizes with Scepter Rattle
Royal Baby Sweater with Scepter Rattle
Briefcase Baby Rattle Crochet Pattern
First Aid Kit Baby Rattle Crochet Pattern
starfish baby rattle
Starfish Baby Rattle, My Fingers Fly


It’s a Girl Gift Tag
It’s a Boy Gift Tag
baby shower gift tag
Handmade with Love Gift Tag

Weekly Featured Pattern

A pretty striped shawl with different stitch patterns to keep you entertained.
The pattern calls for DK weight yarn, but you can use any yarn.
Create the shawl in stripes as shown, a solid color or even self-striping yarn.
Advanced beginner pattern.
The pattern is 50% off from June 7 – 14.
You can find the coupon code and pattern link here: https://www.facebook.com/CrochetDesignerCommunity


ICYMI (In Case You Missed It)

Cat Keychain
Hump Day Camel
Sloth Tumbler Boot
Space alien rattle


Affiliate Links

This post contains affiliate links. This means I may earn a commission should you chose to sign up for a program or make a purchase using my link. It’s okay – I love all of these companies anyways, and you will too!


I’m so proud to have my designs featured on Lion Brand Yarn Pattern Marketplace. Not only can you purchase great designs, but you can also purchase the yarn and supplies you need to make them.

Astronaut Baby Booties 


Amazon affiliate: https://amzn.to/4hkS5Zd
Best Seller on Amazon Haul


https://amzn.to/4joumZG


Posted on — 4 Comments

Alice in Wonderland Day

Down the Rabbit Hole: A Whimsical Journey Through Alice’s Adventures in Wonderland

There’s a reason Alice’s Adventures in Wonderland has remained a beloved classic for over 150 years—it’s a wild, imaginative ride that takes readers far beyond the ordinary.

Written by Lewis Carroll in 1865, the story begins when a curious young girl named Alice spots

a White Rabbit in a hurry and decides to follow him. Without warning, she tumbles down a rabbit hole and into a world that defies all logic: Wonderland.

In this topsy-turvy land, nothing makes sense, and that’s exactly what makes it so magical. Alice encounters an unforgettable cast of characters—

the grinning Cheshire Cat,

the riddle-loving Mad Hatter,

the tea-obsessed March Hare,

and the temperamental Queen of Hearts, who’s always shouting “Off with their heads!”

As she navigates this strange world, Alice drinks potions that make her shrink, eats cakes that make her grow, and tries to make sense of the constant nonsense around her.

She even ends up playing a bizarre game of croquet using flamingos as mallets and hedgehogs as balls.

But the real beauty of the story lies in its layers. Beneath the whimsy and wordplay, Carroll weaves in clever commentary on childhood, growing up, and the absurdity of rigid rules. In the end, just as Alice is about to be punished by the Queen, she boldly stands up for herself—and wakes up to realize it was all a dream.

Alice’s Adventures in Wonderland isn’t just a story—it’s an experience. A journey into the imagination where the impossible becomes reality and curiosity is the greatest superpower of all.


ICYMI (In Case You Missed It)

Space alien rattle
Hump Day Camel
Sloth Tumbler Boot

Affiliate Links

This post contains affiliate links. This means I may earn a commission should you chose to sign up for a program or make a purchase using my link. It’s okay – I love all of these companies anyways, and you will too!

Lion Brand YarnShop Lion Brand’s July 4th Holiday Savings and save 30% on Yarn/Kits + Double Points with code FIREWORKS30DP at checkout. Offer valid 07/04/25 until 07/06/25

https://www.lionbrand.com/?sscid=51k8_112wr4&utm_source=shareasale&utm_medium=affiliate&utm_campaign=2794578


Amazon affiliate: https://amzn.to/4hkS5Zd
Best Seller on Amazon Haul


https://amzn.to/4joumZG


Posted on — 3 Comments

World UFO Day

🛸 Stitching the Stars: Celebrate World UFO Day with Out-of-This-World Crochet!

July 2nd is World UFO Day, and whether you believe in extraterrestrial life or just love a good sci-fi mystery, it’s the perfect excuse to add a little space-themed fun to your crochet projects!

World UFO Day commemorates the Roswell Incident and aims to raise awareness about Unidentified Flying Objects and the possibilities of life beyond Earth. But for us yarn lovers, it’s a great chance to mix outer space with creative stitches!

👽 Crochet Ideas to Celebrate World UFO Day

UFO Amigurumi: Craft a baby rattle with a little flying saucer on one end and a tiny alien pilot on the other end!

Alien Dolls: Go green (or purple or blue!) with adorable alien plushies—three eyes, antennae, and all!

rocket nap buddy

Cosmic Granny Squares: Use black, navy, and metallic yarns to create star-inspired squares with an attached rocket.

Galaxy Cardigan: Create a beautiful sweater for your little one.

🧶 Make It a Crafty Encounter

Turn your crochet time into a galactic celebration:

  • Watch a classic alien movie while you crochet (“E.T.,” “Close Encounters,” or “Men in Black” anyone?)

  • Host a mini-UFO crochet-along in your online community or with crafty friends

  • Share your spacey makes on social media with hashtags like #WorldUFODay and #UFOcrochet

🌌 Final Thoughts

Even if little green men don’t land in your backyard today, you can still have a blast creating something out of this world. So grab your hook, pick some space-inspired yarns, and get ready for a close encounter of the crocheted kind!


Space Alien Baby Rattle


Materials:

Cotton worsted weight yarn:

10 yards yellow,  2 yards red, 5 yards blue, 10 yards black, 10 yards white, 10 yards lime green

Size G (4.0 mm) crochet hook

Yarn needle

Cotton stuffing

Rattle inserts https://amzn.to/4dXkx23


Gauge:  5 sc = 1”, 5 rows = 1”

Rattle measures approximately 8″ long

Stitches:

Invisible decrease: https://youtube.com/shorts/0NC5nXyDvwI?feature=share

Ultimate Finish: Fasten off yarn leaving 6” length. Thread length through yarn needle and pick up outer lp of each st around. Pull tight to close.

Ultimate Finish tutorial: https://youtu.be/jVpTr8mId3I


Directions:

Space ship:

Rnd 1: With yellow yarn, ch 2 (or magic ring), 6 sc in 2nd ch from hook (6 sc). Do not join. Work in continuous rnds throughout unless otherwise specified.

Rnd 2: 2 sc in each st (12 sc).

Rnd 3: *Sc in next st, 2 sc in next st,* repeat around (18 sc).

Rnd 4: *Sc in next 2 sts, 2 sc in next st,* repeat around (24 sc).

Rnd 5: *Sc in next 3 sts, 2 sc in next st,* repeat around (30 sc).

Rnd 6: Sc in each st.

Rnd 7: Sc in each st: *2 yellow sc, 1 red sc,* repeat around. Fasten off red.

Rnd 8: Sc in each st using only yellow.

Rnd 9: Working in BLO, sc in each st.

Rnd 10: *Inv dec, sc in next 3 sts,* repeat around (24 sc).

Rnd 11: *Inv dec, sc in next 1 sts,* repeat around (18 sc).

Rnd 12: *Inv dec, sc in next st,* repeat around (12 sc). Join with sl st. Fasten off yellow. Stuff space ship with rattle insert in middle of stuffing.

Handle:

Rnd 13: Sc in each st: *2 white sc, 1 black sc,* repeat around (12 sc). Do not join.

Repeat Rnd 13 for 4”. Join with sl st. Fasten off black and white. Stuff handle.

Alien:

Rnd 1: Attach lime green yarn, sc in each st (12 sc).

Rnd 2: *Sc in next st, 2 sc in next st,* repeat around (18 sc).

Rnd 3: *Sc in next 2 sts, 2 sc in next st,* repeat around (24 sc).

Rnd 4: *Sc in next 3 sts, 2 sc in next st,* repeat around (30 sc).

Rnd 5: Sc in each st.

Rnd 6: Sc in each st: 12 lime green sc, 1 black sc, 4 lime green sc, 1 black sc, 12 lime green sc.

Rnd 7: Sc in each st: 11 lime green sc, 2 black sc, 4 lime green sc, 2 black sc, 11 lime green sc.

Rnd 8: Sc in each st: 11 lime green sc, 2 black sc, 4 lime green sc, 2 black sc, 11 lime green sc. Fasten off black.

Rnd 9: Sc in each st using lime green only.

Rnd 10: *Inv dec, sc in next 3 sts,* repeat around (24 sc).

Rnd 11: *Inv dec, sc in next 1 sts,* repeat around (18 sc). Add rattle insert and stuff head.

Rnd 12: *Inv dec, sc in next st,* repeat around (12 sc). Join with sl st. Fasten off lime green. Finish stuffing. Close with ultimate finish.

Go back to unused lps of Rnd 8 and attach blue yarn. Ch 1, *hdc in next 2 sts, 2 hdc in next st,* repeat around (40 hdc). Join with sl st. Fasten off blue.

Weave in all ends.

PDF available at Space Alien Baby Rattle Crochet Pattern


Free space patterns

Outer Space Patterns

outer space gift tag
Outer Space Gift Tags – free download
space coloring page
Astronaut Coloring Page – free download


Alien Abduction Sticker
alien shirt
Alien Abduction T-shirt

ICYMI (In Case You Missed It)

Cat Keychain
Octopus Vent Clip
Hump Day Camel
Sloth Tumbler Boot

Affiliate Links

This post contains affiliate links. This means I may earn a commission should you chose to sign up for a program or make a purchase using my link. It’s okay – I love all of these companies anyways, and you will too!


I’m so proud to have my designs featured on Lion Brand Yarn Pattern Marketplace. Not only can you purchase great designs, but you can also purchase the yarn and supplies you need to make them.

Astronaut Snuggle Blanket https://shrsl.com/4wvgv


Amazon affiliate: https://amzn.to/4hkS5Zd
Best Seller on Amazon Haul


https://amzn.to/4joumZG