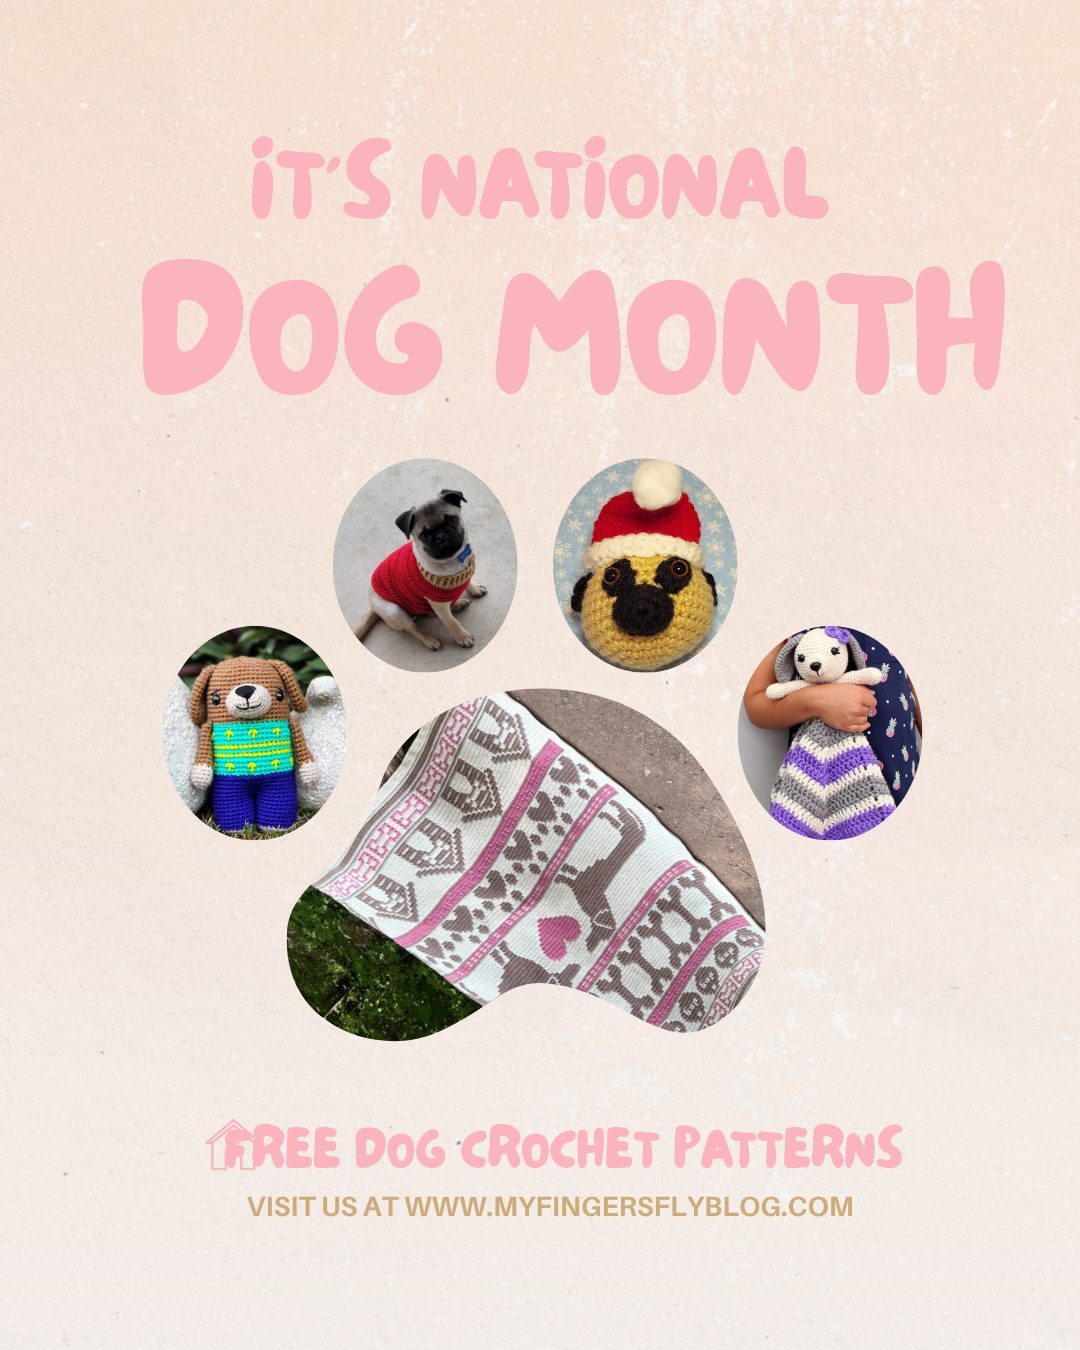
August is National Dog Month, making it the perfect time to celebrate our loyal, lovable, and four-legged best friends! Whether your companion is a playful puppy, a gentle giant, or a tiny lap dog, there’s no denying the joy dogs bring to our lives.
What better way to honor them than by crocheting something inspired by your favorite furry friends?
Crochet for Dog Lovers
Crochet allows us to celebrate the animals we love in creative ways. From adorable amigurumi puppies to cozy home décor and festive holiday decorations, dog-themed crochet projects make wonderful gifts and treasured keepsakes.
If you’re looking for your next project, National Dog Month is the perfect excuse to add another canine-inspired creation to your hook!
Free Dog Crochet Patterns
To celebrate National Dog Month, I’ve gathered a collection of FREE dog crochet patterns that are fun to make and perfect for crocheters of all skill levels.
You may find patterns such as:
🐶 Adorable amigurumi
🦴 Dog-themed home décor
🎄 Dog Christmas ornaments
❤️ Dog lover gifts
🧶 Breed-inspired crochet projects
🎁 Handmade gifts for pets
Whether you’re crocheting your own beloved pet or making a thoughtful gift for a fellow dog enthusiast, there’s something for everyone.
Why We Love Dog-Themed Crochet
Dog crochet patterns are always popular because they let us celebrate the unique personalities of our canine companions. Every stitch becomes a reminder of wagging tails, happy greetings, muddy paws, and unconditional love.
Handmade dog projects also make meaningful gifts for birthdays, holidays, pet memorials, or anyone who simply can’t resist a cute puppy.
Show Off Your Finished Project!
I’d love to see what you make! If you crochet one of the free dog patterns, be sure to share a photo of your finished project. Seeing your creativity and color choices is one of the best parts of designing crochet patterns.
Grab your favorite yarn, pick a pup-inspired project, and spend some quality time doing what you love. Here’s to celebrating the dogs that make our lives brighter—and the crochet projects that help us remember them.
July 29 is International Tiger Day, a day dedicated to raising awareness about one of the world’s most magnificent big cats. It’s the perfect opportunity to celebrate these incredible animals while enjoying a relaxing crochet project inspired by their bold beauty. It was established to bring attention to tiger conservation and the importance of protecting wild tiger populations and their habitats. While these beautiful animals face many challenges in the wild, we can all help spread awareness and appreciation for their conservation.
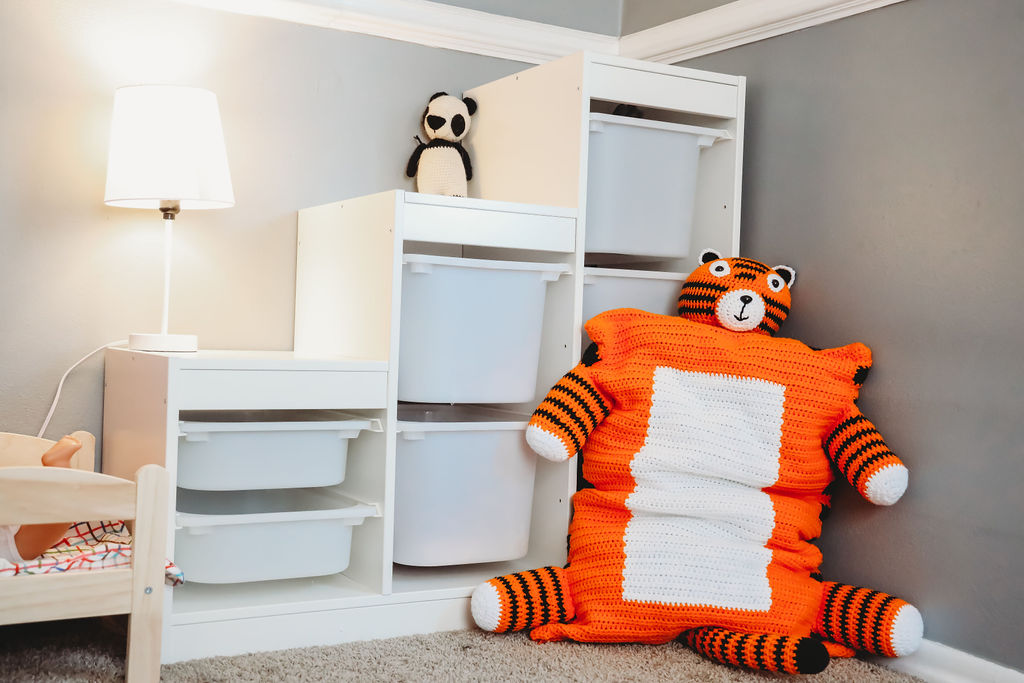
If you love wildlife-inspired crochet, my Tiger Pillow Sham Crochet Pattern is a fun and creative way to bring a touch of the jungle into your home décor.
A Roaring Addition to Your Home
Featuring the unmistakable stripes and majestic face of a tiger, this pillow sham makes a striking accent for a couch, reading nook, child’s bedroom, or wildlife-themed space. Whether you’re decorating your own home or making a thoughtful gift for an animal lover, this project is sure to stand out.
The tiger design captures the strength and beauty of these amazing creatures while giving crocheters an enjoyable project that will be admired for years to come.
Creating tiger-inspired crafts is a wonderful way to celebrate these remarkable animals and spark conversations about protecting wildlife.
Why You’ll Love This Pattern
🐅 Eye-catching tiger design
🧶 Fun and rewarding crochet project
🛋️ Beautiful home décor piece
🎁 Makes a unique handmade gift
Celebrate with Crochet
International Tiger Day is a wonderful reminder to appreciate the beauty of wildlife and the creativity that crochet allows us to express. Pick up your favorite yarn, enjoy every stitch, and create a tiger pillow sham that’s both cozy and conversation worthy.
Happy International Tiger Day—and happy crocheting!
Tiger Pillow Sham measures approximately 19” wide by 13” tall. Length varies by pillow size.
Materials:
Worsted weight yarn –
16 oz. orange
7 oz. black
4 oz. white
Size H (5.00 mm) crochet hook
Bed pillow (20×28 used for photos)
Yarn needle
20” orange zipper
Directions:
BACK:
Row 1: With orange yarn, ch 77, hdc in 2nd ch from hook and each ch across (76 hdc).
Rows 2-4: Ch 1, turn, hdc in each st.
Row 5: Attach black yarn. Ch 1, turn, hdc in each of next 37 sts, switch to orange yarn and hdc in remaining sts.
Row 6: Ch 1, turn, with orange yarn hdc in each of next 38 sts, with black yarn hdc in remaining 38 sts.
Row 7: Repeat Row 5.
Row 8: Ch 1, turn, with orange yarn hdc in each of next 39 sts, with black yarn hdc in remaining 37 sts.
Row 9: Ch 1, turn, with black yarn hdc in each of next 38 sts, with orange yarn hdc in remaining 38 sts.
Row 10: Repeat Row 8.
Repeat Rows 5-10 until piece measures 28” (or desired length equal to pillow length).
Repeat Row 2 with orange yarn for 4 more rows.
BELLY:
Row 1: With orange yarn, ch 61, hdc in 2nd ch from hook and each ch across (60 hdc).
Rows 2-10: Ch 1, turn, hdc in each st.
Row 11: Ch 1, turn, with orange hdc in each of the next 15 sts, with white hdc in each of next 30 sts, with orange hdc in each of next 15 sts.
Repeat Row 11 until piece measures 10 rows less than back. Then work 10 rows in orange hdc. Fasten off.
LEGS (Make 4):
Rnd 1: With white yarn, ch 2, 10 hdc in 2nd ch from hook. Join with sl st.
Rnd 2: Ch 1, 2 hdc in each st, join with sl st. (20 hdc).
Rnd 3: Ch 1, *hdc in next st, 2 hdc in next st,* repeat around, join with sl st (30 hdc).
Rnd 4: Ch 1, hdc in each st, join with sl st. Fasten off white yarn.
Rnds 5-6: With orange yarn, ch 1, hdc in each st, join with sl st.
Rnd 7: With black yarn, ch 1, hdc in each st. join with sl st.
Repeat Rnds 5-7 three times.
Repeat Rnds 5-6 once. Fasten off leaving 12” length for sewing.
TAIL:
Rnd 1: With black yarn, ch 2, 10 hdc in 2nd ch from hook. Join with sl st. (10 hdc).
Rnd 2: Ch 1, *hdc in next st, 2 hdc in next st,* repeat around. Join with sl st. (15 hdc).
Rnds 3-4: Ch 1, hdc in each st. Join with sl st.
Rnds 5-6: With orange yarn, ch 1, hdc in each st. Join with sl st.
Rnd 7: With black yarn, ch 1, hdc in each st. Join with sl st.
Repeat Rnds 5-7 seven times.
Repeat Rnds 5-6 once. Fasten off leaving 12” length for sewing.
HEAD:
Rnd 1: With orange yarn, ch 2, 9 hdc in 2nd ch from hook (9 hdc). Join with sl st.
Rnd 2: Ch 1, 2 hdc in each st (18 hdc). Join with sl st.
Rnd 3: Ch 1, *hdc in next st, 2 hdc in next st,* repeat around (27 hdc). Join with sl st.
Rnd 4: Ch 1, *hdc in next 2 sts, 2 hdc in next st,* repeat around (36 hdc). Join with sl st.
Rnd 5: Ch 1, *hdc in next 3 sts, 2 hdc in next st,* repeat 4 times, with black yarn repeat * to * twice, with orange yarn repeat * to * 3 times (45 hdc). Join with sl st.
Rnd 6: With orange yarn ch 1, *hdc in next 4 sts, 2 hdc in next st,* repeat around (54 hdc). Join with sl st.
Rnd 7: Ch 1, *hdc in next 5 sts, 2 hdc in next st,* 4 times, hdc in next 3 sts, black hdc in 2 sts, 2 hdc in next st, hdc in next 4 sts, orange hdc in next st, 2 hdc in next st, repeat * to * 3 times (63 hdc). Join with sl st.
Rnd 8: Ch 1, *hdc in next 8 sts, 2 hdc in next st,* repeat around (70 hdc). Join with sl st.
Rnd 9: Ch 1, orange hdc in next 39 sts, black hdc in next 4 sts, orange hdc in next 27 sts. Adjust sts as necessary to center stripes over one another. Join with sl st.
Rnds 10-11: Ch 1, orange hdc in each st.
Rnd 12: Ch 1, black hdc in each st.
Rnd 13: Ch 1, orange hdc in each st.
Rnd 14: Ch 1, black hdc in each st.
Rnd 15: Ch 1, orange hdc in each st.
Rnd 16: Ch 1, black *hdc in next 9 sts, dec over next 2 sts*, repeat around (63 hdc).
Rnd 17: Ch 1, orange *hdc in next 5 sts, dec over next 2 sts*, repeat around (54 hdc).
Rnd 18: Ch 1, *hdc in next 4 sts, dec over next 2 sts*, repeat around (36 hdc).
Rnd 19: Ch 1, *hdc in next 3 sts, dec over next 2 sts*, repeat around (36 hdc).
Rnds 20-22: Hdc in each st.
SNOUT:
Rnd 1: With white yarn, ch 2, 10 hdc in 2nd ch from hook. Join with sl st.
Rnd 2: Ch 1, 2 hdc in each st, join with sl st. (20 hdc).
Rnd 3: Ch 1, *hdc in next st, 2 hdc in next st,* repeat around, join with sl st (30 hdc).
Rnd 4: Ch 1, hdc in each st, join with sl st. Fasten off white yarn.
Rnds 5-6: With orange yarn, ch 1, hdc in each st, join with sl st. Fasten off leaving 12” length for sewing.
Attach black plastic safety nose or use black yarn to embroider nose. With black yarn, work straight sts for mouth and from mouth to nose. Stuff snout and sew to face at Rnds 12-18 centered under eyebrow stripes.
EYES (Make 2):
Rnd 1: With white yarn, ch 5, sc in 2nd ch from hook, sc in next 2 chs, 3 sc in last ch. Working on opposite side of starting ch, sc in next 2 chs, 2 sc in last ch (10 sc). Do not join.
Rnd 2: 2 sc in next st, sc in next 2 sts, 2 sc in next 3 sts, sc in next 2 sts, 2 sc in next 2 sts, join with sl st. Fasten off leaving length for sewing. Sew and eye patch to each side of brow stripes. Insert safety eye on bottom half of eye patch.
EARS (Make 2):
Rnd 1: With black yarn, ch 2, 6 sc in 2nd ch from hook. Do not join.
Rnd 2: 2 sc in each st (12 sc).
Rnds 3-4: Sc in each st. Fasten off leaving 6” length for sewing. Fold in half. Use white yarn to sc around edge. Fasten off black with 6” length for sewing. Sew ears to head at Rnds 4-7.
ASSEMBLY:
With right sides together, sew back to belly at side seams. Lay flat and measure to be sure back extends equally on both sides.
Then sew end seam with right sides together. On back end, sew in 20” zipper with double seams. Stuff tail and sew centered above zipper.
Stuff legs and sew to sides approximately 4” from ends with bottom of leg at side seam.
Center head approximately 3” from front edge. Stuff firmly and sew in place with a double seam.
Alternatively, sew tiger head at end with tiger pillow “sitting up.”
Support wildlife conservation and your passion for crochet at the same time. This collection of 20 crochet patterns celebrates the diversity of animals in the world – elephants, whales, red panda, tigers, zebra, giraffe, gorilla, bearded monkey, and horny toads. Great value – over $50 worth of patterns for only $9.99 through 7/31/2026.
Whether you’ve been cheering from the couch, gathering with friends to watch the matches, or simply checking the scores, it’s hard not to get caught up in the excitement. This year has been especially exciting with all the social media posts from fans around the world who are enjoying their visit to the United States.
There’s something special about seeing teams from around the world come together to compete. The energy, the teamwork, and those incredible moments on the field make every match memorable.
As a crocheter, I can’t help but let major events inspire new creations. That’s why I designed my Soccer Freezer Pop Holder Crochet Pattern! It’s a fun, quick project that’s perfect for soccer fans of all ages.
These reusable freezer pop holders keep little hands from getting too cold while enjoying frozen treats during hot summer afternoons. They’re great for:
Soccer team celebrations
End-of-season coach gifts
Tournament watch parties
Summer birthdays
Craft fairs
Family picnics
One of my favorite things about this pattern is how quickly it works up. If you have leftover black and white yarn, you can create several holders in an afternoon. Cotton yarn works best, but any worsted weight yarn will do. They’re practical, fun, and a great way to show off your love for the game.
You can even customize the colors to match your favorite club or national team, making each freezer pop holder unique.
So, tell me—have you been following the World Cup? Which team are you cheering for? I’d love to hear who you’re supporting while we all enjoy a little crochet between matches!
Happy crocheting, and may your team score plenty of goals!
Soccer Freezer Pop Holder
Freezer pop holder measures approximately 5.5” long.
Materials:
Berroco Modern Cotton worsted yarn
20 yards white
10 yards black
Size E (3.5 mm) crochet hook
Yarn needle
Directions:
Row 1: With black yarn, ch 21, sc in 2nd ch from hook and each remaining ch (20 sc).
Row 2: Ch 1, turn, sc in each st.
Row 3: With white yarn, ch 1, turn, sc in each st.
The Weekly Featured Pattern on the Crochet Designer Community is this beautiful Christmas Tree Wall Hanging from Marsha YarnDoodles. So … head over there to find out how you can get the pattern for 50% OFF this week!
Deck your walls with this festive crocheted Christmas wall hanging! Create it in a single color for a classic, elegant look, or let your creativity shine by mixing multiple colors to match your holiday décor and personal style. This charming project is a beautiful handmade addition to your seasonal decorations or a thoughtful gift for someone special.
The Granny Crochet Pattern Bundle is officially LIVE, but you only have 3 days left to purchase!
👉 Grab yours here: https://lisamff–nickishomemadecrafts.thrivecart.com/granny-bundle-2026/
If you love granny squares, granny stitch, granny hexagons (or anything granny-inspired!), you’re going to have so much fun with this collection.
Inside you’ll find:
✨ 40 beautiful crochet patterns
✨ From 31 talented designers
✨ 336 pages with a clickable table of contents
✨ Over 90% OFF (just $19.99!)
Whether you love blankets, garments, bags, accessories, or home décor… there’s something you’ll be excited to make.
🎁 Plus… DAILY GIVEAWAYS!
Every purchase automatically enters you to win one of FIVE prizes from Twice Sheared Sheep, including:
🧶 Stitch Scout Multi-Tool
🧶 Yarn Gator
🧶 Quick Gauge
🧶 Digital Row Counter
🧶 Ring Row Counter
Each prize is valued between $25-$45, and there’s a new winner every day!
👉 Get the bundle here: https://lisamff–nickishomemadecrafts.thrivecart.com/granny-bundle-2026/
The bundle is only available July 6-10, and once it’s gone, it won’t be offered again.
Happy crocheting!
Celebrating Today’s Animal and America’s 250th Anniversary
Some crochet ideas just come together perfectly.
Today’s featured animal is the mouse, and with America celebrating its 250th anniversary, I thought it would be fun to combine the two into one adorable project. The result is a sweet little Patriotic Mouse Amigurumi dressed in classic red, white, and blue.
Whether you’re decorating for the Fourth of July, honoring Memorial Day or Veterans Day, or simply enjoy patriotic handmade décor, this cheerful mouse is ready to celebrate.
Why a Mouse?
Mice may be small, but they have big personalities! They make wonderful amigurumi projects because of their round ears, tiny noses, and expressive faces. This patriotic version adds a festive twist that’s perfect for summer celebrations and makes a charming addition to your seasonal decorations.
Celebrating 250 Years
The year marks the 250th anniversary of the United States, making it a wonderful time to create projects that celebrate our nation’s history and spirit. Handmade decorations become keepsakes that can be displayed year after year and shared with family and friends.
This little mouse is a fun way to join in the celebration while doing what we love most—crocheting!
The finished mouse makes a wonderful decoration for:
Fourth of July celebrations
Memorial Day
Veterans Day
Tiered trays
Mantel displays
Handmade gifts
Craft fairs
Make It Your Own
While I designed this mouse in patriotic colors, you can customize it with your favorite color combinations to create a mouse for any season or occasion. Add a tiny bow, scarf, or accessories to give your mouse even more personality.
I hope you enjoy making this festive little friend as much as I enjoyed designing it. Happy crocheting, and here’s to celebrating creativity, handmade traditions, and 250 years of American history—one stitch at a time!
Materials:
Worsted weight yarn:
45 yards light gray
95 yards royal blue
45 yards red
25 yards white
4 yards pink
Size G (4.0 mm) crochet hook
Yarn needle
Fiberfill
Two 10-mm black safety eyes
10-mm pink safety nose
1 Soft foam curler
4 star buttons ½”
¼” ribbon (optional)
Finished mouse measures approximately 12” tall (including hat).
Rnd 1: With gray yarn, ch 2 (or magic circle), 6 sc in 2nd ch from hook. Do not join. Work in continuous rnds throughout.
Rnd 2: 2 sc in each st (12 sc).
Rnd 3: *Sc in next st, 2 sc in next st,* repeat around (18 sc).
Rnds 4-5: Sc in each st. Join with sl st at end of Rnd 5. Fasten off gray.
Rnd 6: Join red yarn, sc in each st.
Rnds 7-16: Sc in each st (18 sc).
At end of Rnd 16, join with sl st, fasten off for first leg.
For second leg, repeat Rnds 1-16. Do not fasten off.
Rnd 17: Sc in next 7 sts, 2 sc in next st, 2 sc in next st on first leg, sc in next 14 sts of first leg, 2 sc in next st, sk last 2 sts of first leg. Switch back to 2nd leg, sk next 2 sts, 2 sc in next st, sc in next 7 sts (36 sc). Do not join. Sew 2 skipped sts of first leg to 2 skipped sts of 2nd leg.
Rnds 18-22: Sc in each st. Fasten off red yarn. Stuff legs.
Rnd 23: Attach white yarn. Sc in each st.
Rnd 24: *Inv dec, sc in next 4 sts,* repeat around (30 sc).
Rnds 25-31: Sc in each st
Rnd 32: *Inv dec, sc in next 3 sts,* repeat around (24 sc).
Rnds 33-34: Sc in each st. Insert foam curler into body and let it extend out the top. Stuff body.
Rnd 35: *Inv dec, sc in next 2 sts,* repeat around (18 sc).
Rnd 36: *Inv dec, sc in next st,* repeat around (12 sc). Join with sl st. Fasten off white.
Rnd 37: Join gray yarn, sc in each st.
Rnd 38: *Sc in next st, 2 sc in next st,* repeat around (18 sc).
Rnd 39: *Sc in next 2 sts, 2 sc in next st,* repeat around (24 sc).
Rnd 40: *Sc in next 3 sts, 2 sc in next st,* repeat around (30 sc).
Rnd 41: *Sc in next 4 sts, 2 sc in next st,* repeat around (36 sc).
Rnds 42-48: Sc in each st. Stuff neck.
Rnd 49: *Inv dec, sc in next 4 sts,* repeat around (30 sc).
Rnd 50: *Inv dec, sc in next 3 sts,* repeat around (24 sc).
Rnd 51: *Inv dec, sc in next 2 sts,* repeat around (18 sc).
Insert safety eyes at Rnd 46 approximately 5 sts apart. Insert safety nose centered at Rnd 44.
Finish stuffing.
Rnd 52: *Inv dec, sc in next st,* repeat around (12 sc).
Rnd 53: Inv dec around (6 sc). Join with sl st. Fasten off. Close with ultimate finish.
SNOUT:
Rnd 1: With gray yarn, ch 2 (or magic circle), 6 sc in 2nd ch from hook (6 sc). Do not join.
Rnd 2: *Sc in next st, 2 sc in next st,* repeat around (9 sc).
Rnd 3: *Sc in next 2 sts, 2 sc in next st,* repeat around (12 sc).
Rnd 4: *Sc in next st, 2 sc in next st,* repeat around (18 sc).
Rnd 5: *Sc in next 2 sts, 2 sc in next st,* repeat around (24 sc). Join with sl st. Fasten off leaving 9” length for sewing.
Insert safety nose in Rnd 1. Stuff snout lightly and sew to front of head just below eyes.
EARS: (Make 2)
Rnd 1: With pink yarn, ch 2 (or magic circle), 6 sc in 2nd ch from hook (6 sc). Do not join.
Rnd 2: 2 sc in each st (12 sc). Join with sl st. Fasten off yarn.
Repeat Rnds 1-2 with gray yarn. Do not fasten off. Place pink ear on top of gray ear and use gray yarn to work through both layers.
Rnd 3: *Sc in next st, 2 sc in next st,* repeat around (18 sc). Join with sl st. Fasten off yarn leaving 9” length.
Pinch end to bend ear slightly. Sew ears to Rnds 44-46 on both sides of head.
JACKET:
Begin jacket by making the 2 tuxedo tails:
Row 1: With blue yarn, ch 2, sc in 2nd ch from hook (1 sc).
Row 2: Ch 1, turn, 2 sc in sc (2 sc).
Row 3: Ch 1, turn, 2 sc in first st, sc in next st (3 sc).
Rows 4-6: Ch 1, turn, 2 sc in first st, sc in remaining sts (6 sc at end of Row 6). Fasten off.
Row 7: With blue yarn, ch 15, sc in 2nd ch from hook and next 13 ch, sc across 6 sc of first tail, work 1 fsc, sc in 6 sc of other tail, work 14 fsc (41 sc).
Rows 8-17: Ch 1, turn, sc in each st.
Row 18: Ch 1, turn, sc in 9 sts, dec 2 times, sc in next 16 sts, dec 2 times, sc in next 8 sts (37 sc).
Row 19: Ch 1, turn, sc in 8 sts, dec 2 times, sc in next 14 sts, dec 2 times, sc in next 7 sts (33 sc).
Row 20: Ch 1, turn, sc in 7 sts, dec 2 times, sc in next 12 sts, dec 2 times, sc in next 6 sts (29 sc).
Row 21: Ch 1, turn, sc in 5 sts, dec 2 times, sc in next 10 sts, dec 2 times, sc in next 6 sts (25 sc).
Row 22: Ch 1, turn, sl st in first 2 sts, sc in next 21 sts, sl st in next 2 sts, sc down edge with 3 sc in last row, sc in each lp of foundation ch of Row 7 to tail, sc around tail with 3 sc in Row 1, sl st between tails, sc around other tail with 3 sc in Row 1, sc in remaining fsc of Row 7 with 3 sc in last ch, sc up edge. Fasten off blue yarn with 12” length.
Fit jacket on mouse. Sew in place with collar at Rnd 36 of body and bottom covering white rows of body. Fold lapels back and sew in place.
Make sure tails are positioned correctly on back of mouse.
Sew 4 star buttons on front of jacket, evenly spaced.
ARMS: (Make 2)
Rnd 1: With red yarn, Ch 2 (or magic circle), 6 sc in 2nd ch from hook. Do not join. Work in continuous rnds throughout.
Rnd 2: 2 sc in each st (12 sc).
Rnd 3: Sc in each st. Join with sl st. Fasten off gray.
Rnds 4-12: With blue yarn, sc in each st. Join with sl st at end of Rnd 12. Fasten off leaving 12” length for sewing.
Fold ends of arms flat and sew to sides of jacket 2 rows below jacket collar. Be sure to make sts deep enough to catch the jacket and part of the body.
BOWTIE:
With red yarn, ch 15, sc in 2nd ch from hook, sc in all remaining chs with 3 sc in last ch. Working on opposite side of foundation ch, sc in each lp. Join with sl st to first sc of Rnd. Fasten off red leaving 12” length for sewing.
Sew ends together. Place seam at center back. Wrap remaining yarn around center of tie and pull tight. Sew bowtie at neckline.
HAT:
Row 1: With red yarn, ch 9, sc in 2nd ch from hook and next 7 ch (8 sc).
Row 2: Ch 1, turn, sc in each st.
Rows 3-4: With white yarn, ch 1, turn, sc in each st.
Rows 5-6: With red yarn, ch 1, turn, sc in each st.
Rows 7-32: Repeat Rows 3-6 ending with white stripe. Fasten off yarn leaving 9” length. With right sides tog, sew Row 1 to Row 32 to form circle.
Top of hat:
Rnd 1: Working along edge of circle with blue yarn, sc in row end (32 sc). Do not join.
Rnd 2: *Inv dec, sc in next 3 sts,* 6 times, sc in last 2 sts (26 sc).
Rnd 3: *Inv dec, sc in next 2 sts,* 6 times, sc in last 2 sts (20 sc).
Rnd 4: *Inv dec, sc in next st,* 6 times, sc in last 2 sts (14 sc).
Rnd 5: Inv dec 7 times (7 sc). Close top of hat with ult fin.
Brim:
Rnd 1: Attach blue yarn on other side of striped circle, ch 1, *sc in row end, 2 sc in next row end,* repeat around (48 sc). Do not join.
Rnd 2: *Sc in next 2 sts, 2 sc in next st,* repeat around (64 sc).
Rnd 3: Sc in each st. Join with sl st. Fasten off yarn.
Weave in all ends.
NOTE: Hat can be removable or sewn to top of head. If you are sewing hat, stuff lightly first.
If desired, embellish top of hat with star applique.
Cut a piece of ribbon measuring from bottom of jacket to top of foot and glue in place along outer edge of leg.
For those of you who love woodland creatures, Sweet Softies has designed a Baby Mouse who sleeps in his very own Moses basket with a leaf blanket. There is also a Mushroom Box for him to hide in.
We had a discussion at the Craft & Chat meeting at the library – will robots ever learn to crochet?
Short answer: kind of—but not the way you’re picturing (yet).
That said, researchers and engineers are working on it. There have been experimental robotic systems that can crochet simple shapes, and advances in robotics + AI + computer vision are slowly making more complex stitching possible.
So what’s realistic?
Now:
Machines can mimic some crochet-like structures, but not true handmade crochet
A fully capable crochet robot is possible—but it would still struggle to match human creativity, speed adjustments, and pattern improvisation
And honestly? Even if a robot could crochet perfectly…
it wouldn’t replace the charm of handmade pieces made with care (and a few “oops” stitches )
IMO:
I don’t believe it would be economical to spend so much on a robot to make crocheted items. It is estimated that an advanced “actually useful” crochet robot (R&D level) could cost $150,000 – $500,000+
Why it’s so expensive:
Custom software (AI + motion control)
High-precision actuators (tiny, accurate movements)
Welcome to the 2026 Pet Appreciation Blog Hop where you will find adorable crochet patterns just for your Fur Babies!
May is National Pet Appreciation Month, and boy do I have something exciting for you! From May 1-14 there will be daily free and a couple of discounted crochet patterns designed specifically for your lovable pets.
A fun, simple repetitive set of instructions that give you a textured collar with a circular adjustable crochet slider which also works as an motif piece! It’s a good way to re-purpose old plastic buckles from leashes or just making a new one from scratch.
Visit the hop to find out how to get this pattern free for one day only.
The Weekly Featured Pattern on the Crochet Designer Community is the Magical Days Summer Wrap crochet pattern from Marsha YarnDoodles
Head over to Crochet Designer Community to find out how to get this lovely pattern for 50% OFF this week!
Picture yourself wrapped in this airy, elegant piece on a warm summer evening. Lightweight and versatile, it transitions effortlessly from casual daytime wear to a more polished evening look—making it a perfect companion for any occasion. It’s the kind of accessory that doesn’t just complete an outfit, but lifts your mood the moment you put it on.
The wrap’s beautiful texture comes from a simple yet striking two-row repeat, designed to be both engaging and approachable. The pattern includes two stitch variations, each offering a distinct look, so you can tailor the finished piece to your personal style. Feeling creative? Alternate between the two stitch patterns to create a third, uniquely textured version.
For a breezy spring or summer wrap, a #3 (Light Worsted) or light #4 (Worsted) weight yarn works wonderfully. That said, the pattern is flexible and can be adapted to almost any yarn weight with the appropriate hook size. Adjusting the length and width is easy, allowing you to customize the wrap to suit your needs perfectly.
Contains information related to marketing campaigns of the user. These are shared with Google AdWords / Google Ads when the Google Ads and Google Analytics accounts are linked together.
90 days
__utma
ID used to identify users and sessions
2 years after last activity
__utmt
Used to monitor number of Google Analytics server requests
10 minutes
__utmb
Used to distinguish new sessions and visits. This cookie is set when the GA.js javascript library is loaded and there is no existing __utmb cookie. The cookie is updated every time data is sent to the Google Analytics server.
30 minutes after last activity
__utmc
Used only with old Urchin versions of Google Analytics and not with GA.js. Was used to distinguish between new sessions and visits at the end of a session.
End of session (browser)
__utmz
Contains information about the traffic source or campaign that directed user to the website. The cookie is set when the GA.js javascript is loaded and updated when data is sent to the Google Anaytics server
6 months after last activity
__utmv
Contains custom information set by the web developer via the _setCustomVar method in Google Analytics. This cookie is updated every time new data is sent to the Google Analytics server.
2 years after last activity
__utmx
Used to determine whether a user is included in an A / B or Multivariate test.
18 months
_ga
ID used to identify users
2 years
_gali
Used by Google Analytics to determine which links on a page are being clicked
30 seconds
_ga_
ID used to identify users
2 years
_gid
ID used to identify users for 24 hours after last activity
24 hours
_gat
Used to monitor number of Google Analytics server requests when using Google Tag Manager
1 minute
Marketing cookies are used to follow visitors to websites. The intention is to show ads that are relevant and engaging to the individual user.
Pinterest Tag is a web analytics service that tracks and reports website traffic.
Unique value with which users can be identified by X. Collected information is used to be personalize X services, including X trends, stories, ads and suggestions.
2 years
external_referer
Our Website uses X buttons to allow our visitors to follow our promotional X feeds, and sometimes embed feeds on our Website.
2 years
guest_id
This cookie is set by X to identify and track the website visitor. Registers if a users is signed in the X platform and collects information about ad preferences.





 LEGS (Make 4):
 TAIL:
TAIL: HEAD:
HEAD: EARS (Make 2):


 Want even more animals to crochet?


