July is National Blueberry Month, and there’s no better way to celebrate than with a batch of warm, homemade blueberry muffins! These tiny blue gems are not only sweet and tangy but also packed with antioxidants, making them a delicious and nutritious treat.
Whether you pick your blueberries fresh from a local farm or buy them from your favorite grocery store, this recipe will bring out the best in every bite. This is a recipe I have been making for my children for many, many years. They love them!!
🫐 Fun Facts About Blueberries
Blueberries are native to North America and have been enjoyed for thousands of years.
They’re one of the few naturally blue foods.
A single blueberry bush can produce as many as 6,000 berries in a year!
Now, let’s get baking! This recipe makes 6 large muffins or 12 cupcake-size muffins.
🍽️ Easy Blueberry Muffins
Ingredients:
2 cups Bisquick baking mix
1 cup granulated sugar
1 large egg
1 cup milk (plus more if needed)
1 cup fresh or frozen blueberries
Optional: 2 tablespoons coarse sugar for topping
Instructions:
Preheat your oven to 400°F (200°C). Line a muffin tin with paper liners or grease well.
In a large bowl, whisk together baking mix and sugar.
In a separate bowl or large measuring cup, combine beaten egg and milk.
Stir the wet ingredients into the dry until just combined. Do not overmix. Be sure to break up clumps of Bisquick.
Gently fold in the blueberries.
Fill each muffin cup about ¾ full. If desired, sprinkle the tops with coarse sugar for a sweet crunch.
Bake for 20–25 minutes, or until a toothpick inserted in the center comes out clean.
Cool for a few minutes in the pan before transferring to a wire rack.
💙 Tips & Tricks:
Frozen blueberries can be used straight from the freezer—no need to thaw!
Toss blueberries in a little flour before adding to the batter to prevent sinking.
Add a dash of lemon zest to the batter for a citrusy twist.
Whether you enjoy them for breakfast, a midday snack, or a sweet dessert, these blueberry muffins are sure to bring a smile to your face. So grab a basket of blueberries and celebrate this beautiful berry all month long!
This post contains affiliate links. This means I may earn a commission should you chose to sign up for a program or make a purchase using my link. It’s okay – I love all of these companies anyways, and you will too!
I’m so proud to have my designs featured on Lion Brand Yarn Pattern Marketplace. Not only can you purchase great designs, but you can also purchase the yarn and supplies you need to make them.
When we think of military heroes, we often picture distant battlefields or dramatic air rescues. But many of the bravest souls serve much closer to home, keeping our coasts safe and our waters secure. Among them, Coast Guard heroes stand tall—often unrecognized, but never unremarkable.
Over the July 4th weekend—a time when most Americans were celebrating freedom and fireworks—one U.S. Coast Guard rescue swimmer was fighting rising waters and saving lives.
As devastating floods swept through parts of Texas, claiming homes and stranding families, one brave servicemember sprang into action. Amid the chaos, this rescue swimmer has now been hailed as a true American hero after saving over 200 people from the deadly flooding.
So today, let’s take a moment to honor these everyday heroes—the silent guardians who protect our shores and save lives, often without headlines or fanfare. Because heroism doesn’t always wear a cape. Sometimes, it wears a life vest and stands at the helm.
To this Coast Guard rescue swimmer and all the brave men and women who serve: thank you. You don’t just protect our coastlines—you inspire a nation.
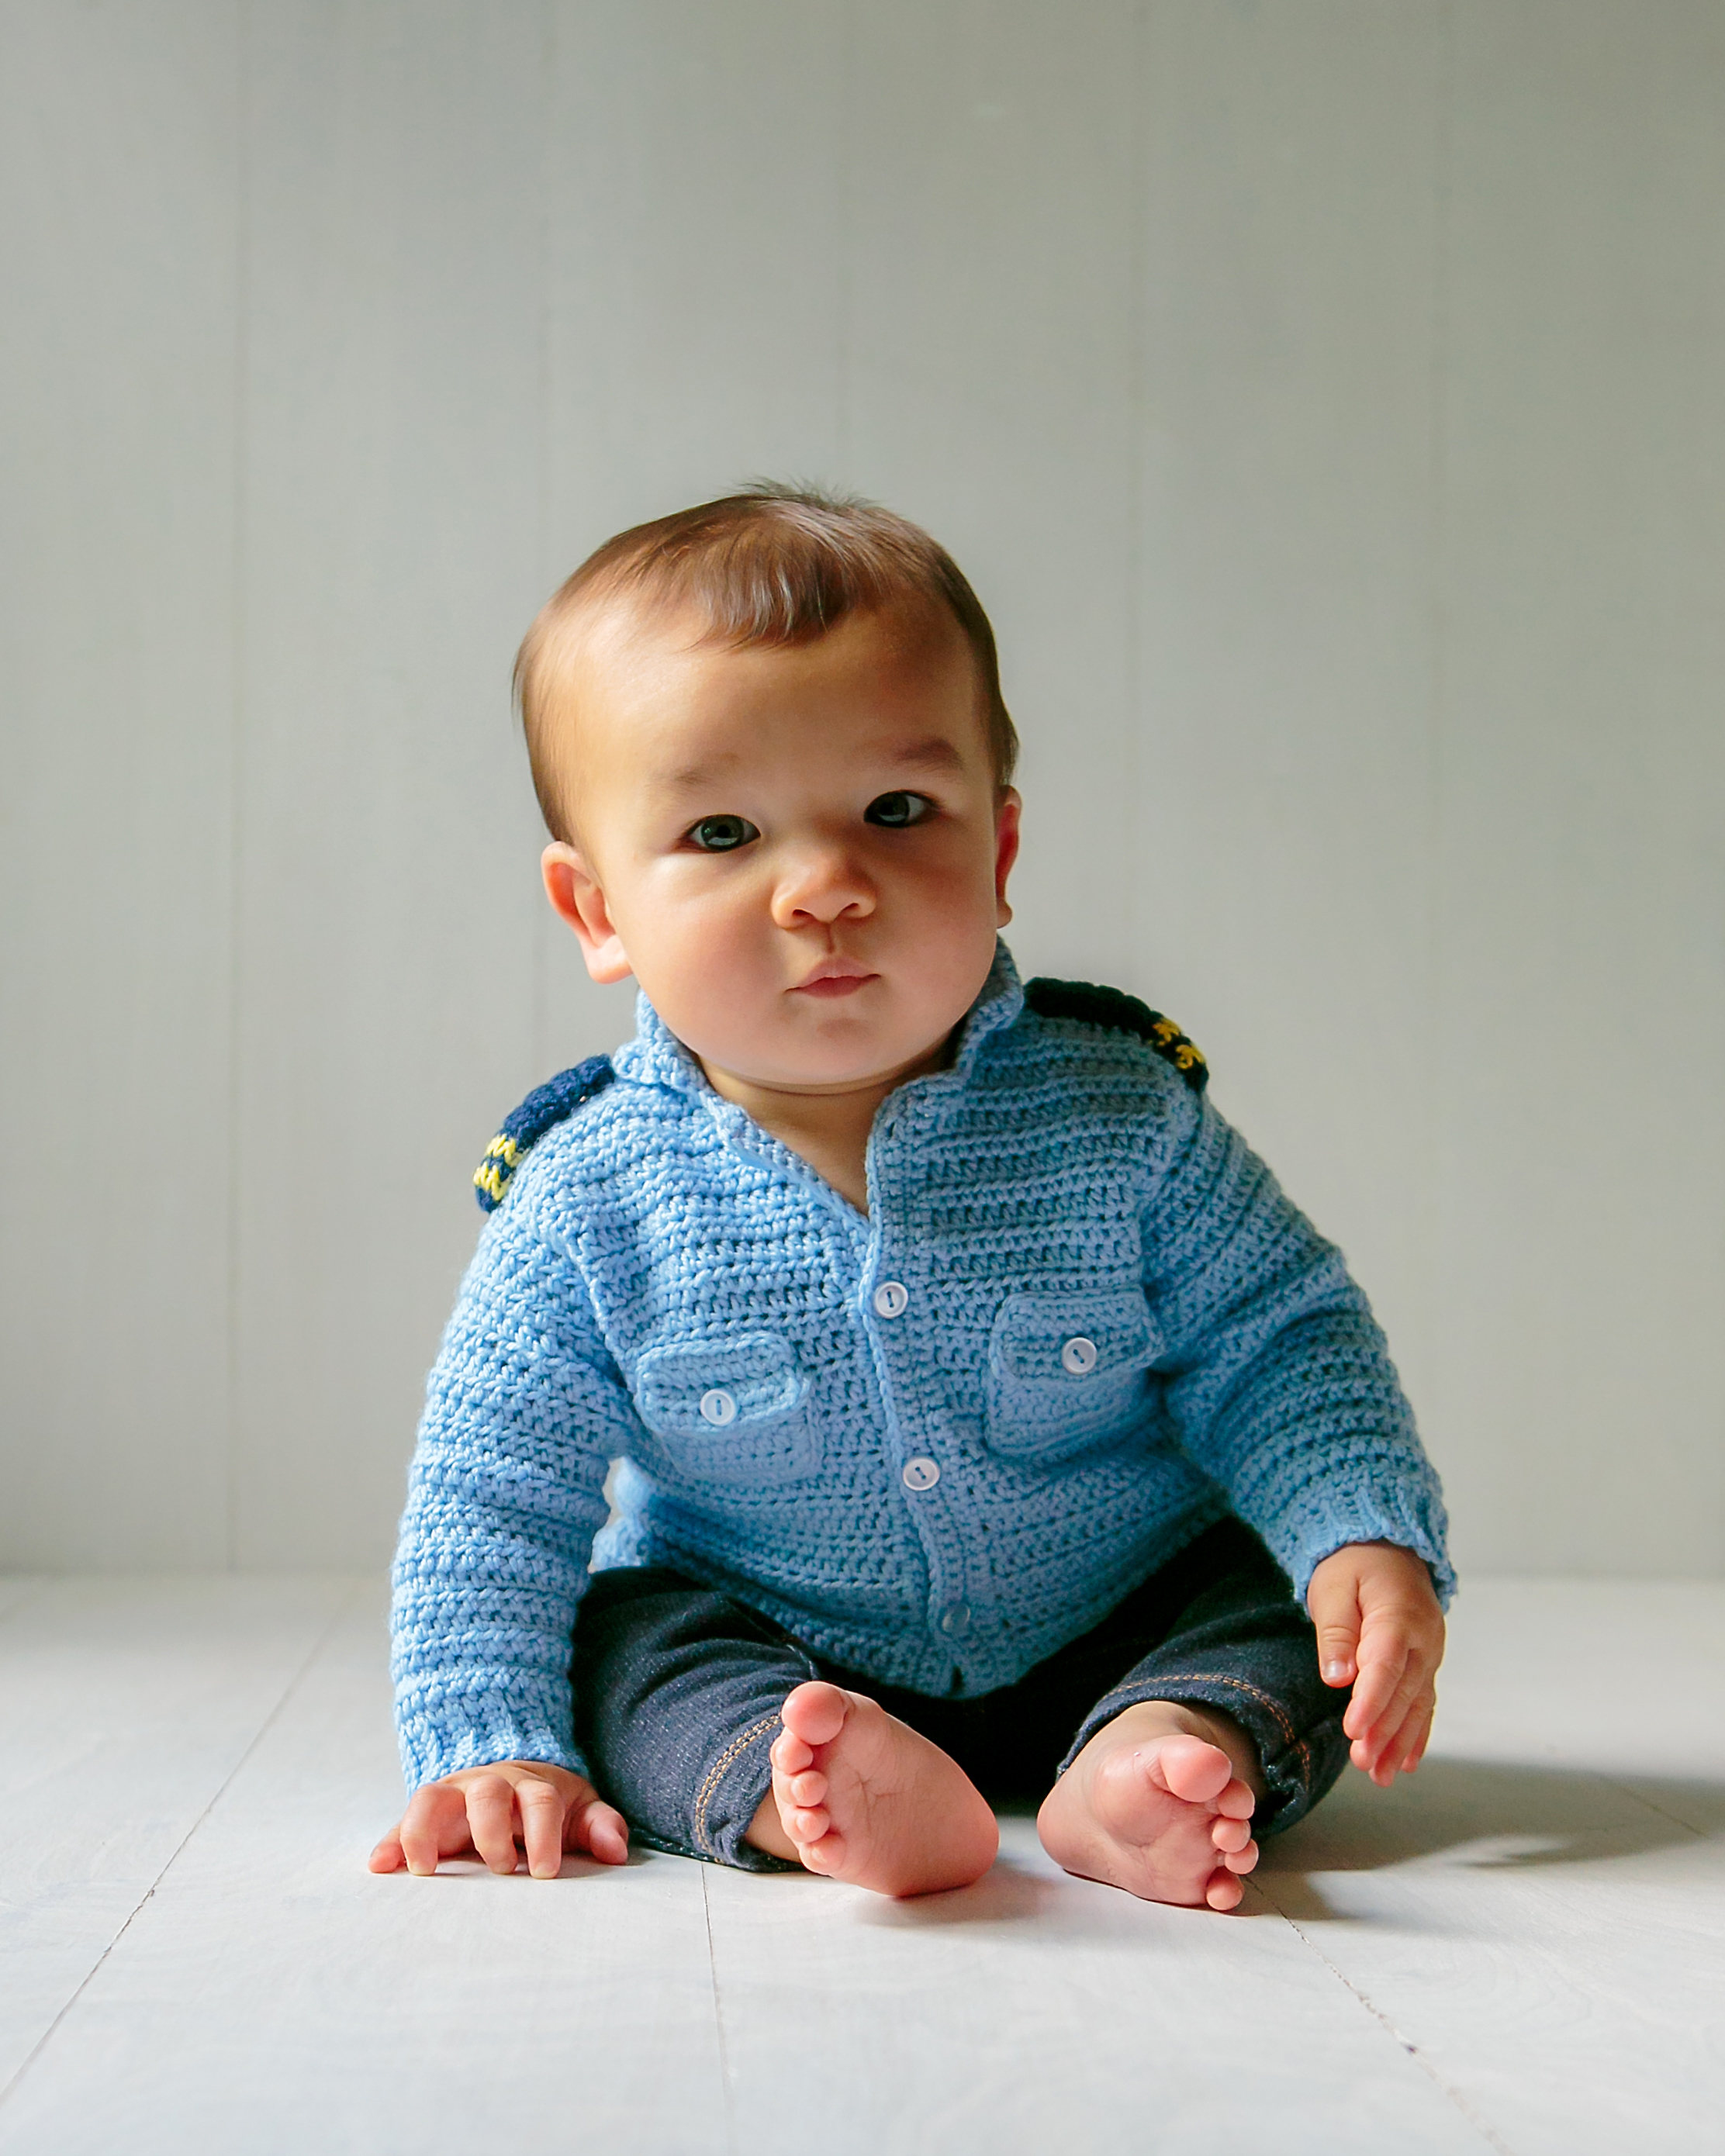
Coastal Military Baby Sweater Crochet Pattern
Size Newborn-3 months
Measurements:
Chest circumference: 19”
Neckline to hem: 7 ½”
Materials:
Baby weight or sport weight yarn:
1 skein Baby Blue
¼ oz Yellow
Few yards Navy Blue
Size F (3.75 mm) & G (4.0 mm) crochet hooks (or size needed to obtain gauge)
6 – ½” or 5/8” blue buttons
Gauge (G hook) 9 hdc = 2”, 6 rows hdc = 2”
BODY:
Row 1: With Baby Blue yarn and F hook, ch 7. Sc in 2nd ch from hook and next 5 ch. Ch1, turn (6 sc).
Row 2: Sc in back loop of each sc. Ch 1, turn. Repeat Row 2 until piece measures 84 rows. Turn piece to work along ends of rows.
Row 1: With G hook, ch 1, work 1 hdc in each row end, ch 1, turn (84 hdc).
Row 2: Hdc in each hdc across. Ch 1, turn. Work even in hdc until piece measures 5 ½ inches. Ch 1, turn.
ARMHOLE SHAPING: Hdc in first 16 sts, ch 1, turn. Leave remaining sts unworked.
Right front: Work even in hdc until armhole measures 2 inches. End at neck edge.
NECK SHAPING: Row 1: Sl st first 3 st, ch 1, hdc remaining sts. Ch 1, turn (13 hdc).
Row 2: Hdc across to last 2 sts, dec in last 2 sts (12 hdc).
Row 3: Dec 1st 2 st, hdc across (11 hdc).
Row 4: Repeat Row 2 (10 hdc).
Row 5: Dec 1st 2 st, hdc in next 4 st, sl st in next st. Leave remaining sts unworked. Fasten off.
BACK: Return to unworked stitches on body. Skip 8 sts. Attach yarn in 9th st, ch 1, hdc in same st. Hdc in each of next 35 sts (36 hdc). Work even in hdc until piece measures one row less than length of right front.
Last row: Sl st in first 7 sts, sc in each of next 7 sts, hdc across to last 14 sts, sc in each of next 7 sts, sl st next st, leave remaining sts unworked. Fasten off.
LEFT FRONT:
Return to body, skip 8 st from back section. Attach yarn in 9th st, ch 1, hdc in same st and in each st across. (16 hdc) Ch 1, turn. Work even in hdc until left front measures 2 inches.
NECK SHAPING:
Row 1: Hdc in 13 hdc. Leave remaining st unworked. Ch 1, turn.
Row 2: Dec 1st 2 st, hdc across (12 hdc).
Row 3: Hdc across to last 2 st, dec last 2 st (11 hdc).
Row 4: Repeat Row 2 (10 hdc).
Row 5: Sl st next 4 st, hdc next 4 st, dec next 2 st. Fasten off.
SLEEVES: (Make 2)
Row 1: With Baby Blue yarn and F hook, ch 7. Sc in 2nd ch from hook and each ch across (6 sc). Ch 1, turn.
Row 2: Sc in back loop of each sc across. Ch 1, turn. Repeat Row 2 until piece measures 24 rows. Switch to G hook. Turn to work across ends of rows.
Row 1: Hdc in each row end (24 hdc). Ch 1, turn.
Rows 2-3: Hdc in each hdc across. Ch 1, turn.
Row 4: 2 hdc in 1st st, hdc across to last st, 2 hdc in last st. Ch 1, turn. (26 [28, 28] hdc.
Rows 5-7: Hdc in each hdc across. Ch 1, turn.
Row 8: Repeat Row 4 (28 hdc).
Repeat Rows 5-8, 1 time (30 hdc). Work even in hdc until piece measures 6 ½ inches. Fasten off.
ASSEMBLY:
With right sides facing, match shoulder seams and sew together. With right sides facing, sew sleeve seam. Then sew sleeves to body, easing to fit. Match shoulder seam to top middle of sleeve.
COLLAR:
With right side facing, skip 1st 3 sts on right front, attach Baby Blue yarn, ch 1, hdc around collar, leaving last 3 sts on left front unworked. Ch1, turn. Make sure you have equal numbers of stitches on right and left sides.
Rows 2-6: Hdc in each st across, ch 1, turn. Fasten off.
EDGING (buttonhole side):
With F hook, attach Baby Blue yarn to bottom left opening with wrong side facing.
Row 1: Ch 1, sc in same st. Sc in next 5 sc of ribbing. Work sc evenly spaced up front of body (approximately 3 sc for each 2 vertical hdc). Lay on a flat surface to ensure edging remains flat.
At top of right side, ch 1, turn.
Row 2: Work even in sc.
Row 3: Mark buttonholes – one 2 sts from right end, one 2 sts from left end, 2nd and 3rd buttonholes evenly spaced between 1st and 4th. Working sc across Row 3, *ch 1, skip 1 st* at each marker for buttonhole. Fasten off.
Turn piece to work edging on opposite side (button side). With wrong side facing and F hook, attach Baby Blue yarn at top of right side opening. Sc across right side, making sure you have the same number of sc as on the left side.
Rows 2-4: Work even in sc. At end of Row 4, do not fasten off. Work 3 sc in last st of Row 4, turn to work inn sc across end of edging, sc around collar working 3 sc in each corner. Work sc across top of let edging, 3 sc in corner, sc down left front including sc in each ch-1 space for buttonholes.
POCKET (Make 2):
Row 1: With Baby Blue yarn and G hook, ch 10. Work hdc in 3rd ch from hook and in each of next 7 ch (8 hdc).
Rows 2-4: Work even in hdc. At end of Row 4, ch 1, turn to work down side of pocket. Sc down side, work 3 sc in corner, sc in remaining loops of beginning ch, work 3 sc in corner, sc up side of pocket. Fasten off leaving 12” length for sewing.
POCKET FLAPS (Make 2):
Row 1: Repeat Row 1 of pocket.
Row 2: Hdc in each of 1st 3 sts, dc next st, ch 1 (buttonhole), dc next st, hdc in each of next 3 sts. Ch 1, turn and work sc around outer edges with 2 sc in each corner and 3 sc in ch-1 space.
Center pockets on front with bottoms at Row 6 of sweater. Sew flaps above pocket, overlapping so buttonhole is over top row of pocket.
Weave in all ends.
SHOULDER BOARD:
Row 1: With Navy Blue yarn and F hook, ch 15, sc in 2nd ch from hook and in each ch across (14 sc). Ch 1, turn.
Row 2: With Yellow yarn, sc in each sc, ch 1, turn.
Row 3: With Navy Blue yarn, sc across, ch 1, turn.
Row 4: Repeat Row 3.
Row 5: Repeat row 3. Continue in sc rows until piece measures long enough to span shoulder seam from collar to top of sleeve (approximately 4” [2 ¼”, 2 ½”). Fasten off leaving length for sewing.
Place piece right side up. Fold long edges toward center so they meet in the middle.
Stitch ends closed. Turn right side out and sew back seam.
This post contains affiliate links. This means I may earn a commission should you chose to sign up for a program or make a purchase using my link. It’s okay – I love all of these companies anyways, and you will too!
I’m so proud to have my designs featured on Lion Brand Yarn Pattern Marketplace. Not only can you purchase great designs, but you can also purchase the yarn and supplies you need to make them.
Time to start getting your little elves ready for the holidays! This weekend only, get this adorable Christmas Elf Sweater Crochet Pattern free for the first 100 customers. Use code ELVES.
All year long, but especially at Christmas time, I see people asking in the crochet groups, “What do you make for men?” Men don’t wear as many accessories, and traditionally crocheted kitchen gifts are for women. Men can be difficult to crochet or knit for unless you like making sweaters. This year Helen Wilkinson from Sunflower Cottage Crochet put together a wonderful blog hop filled with gift ideas for the men in our lives! Each day through the end of November, a different pattern will be featured on the SunflowerCottageCrochet.com blog. https://sunflowercottagecrochet.com/just-for-him-event/
d gift-making! A unique gift made-by-you is always a pleasure for anyone receiving it!
What do you need to do?
Visit the Email Hop Hub to see which patterns are there in the event and choose your favorite ones. Sign up for the host newsletter. You will get an email with the special access to the Email Hop.
Visit the link in the email from the host, find the link to the featured pattern (each pattern will be available for only 24h from 10am ET everyday).
Go to the featured designer’s website/landing page and sign up for their newsletter
Find the free pattern in the email from the featured designer, and download! Enjoy your pattern
Does it seem too much for you? I know, it’s a busy time of the year! If you love to get all 30+ Xmas ami patterns without hopping around, consider grabbing the Ami Super Pack at 90% off normal price. (You can add your affiliate direct link here). Check it out right now! https://transactions.sendowl.com/stores/15531/209390
Another Christmas Email Hop!
This event is put together by Blue Star Crochet, and it has been amazing! Each day from November 1 through November 27, there was a new free crochet pattern for you to download. Today is the last day of this awesome event, so hurry and get your freebie! https://bluestarcrochet.com/crochet-freebie-blog-hop
If you have ever wanted a crown/tiara for your child or yourself this is the moment to get it! Free pattern bundle of 4 crowns/tiaras from Made by Nensi that are easily sized and made not to mention super cute to wear!
Hey! Thought you’d like to try Ibotta, a cash back rewards app that I use to make real money every time I shop for groceries, online purchases, and more! Just use my referral code “eugysjd” at registration. Sign up at → https://ibotta.onelink.me/iUfE/8cc13c64?friend_code=eugysjd
Five-Day Free Trial of Marmalead
Join Rakuten and get $30 cash back. Plus earn money on online purchases.
🎄🦇 Christmas Gargoyle? Yes, Please! The Cuddliest Guardian of the Season
Move over reindeer — there’s a new holiday helper in town, and he’s a little grumpy, a little magical, and totally adorable. Meet the Christmas Gargoyle Plush Toy, the most unexpected (but lovable) twist on traditional holiday decor!
You might be thinking: A gargoyle… for Christmas? And the answer is a big, festive yes!
🧶 A Whimsical Holiday Twist
Traditionally known as protectors perched atop ancient buildings, gargoyles don’t usually get invited to Christmas parties. But we think it’s time to change that! With a sprinkle of tinsel and a heart full of handmade charm, this Christmas Gargoyle is here to:
✨ Guard your holiday cookies ✨ Perch by the fireplace with cozy vibes ✨ Bring a little gothic cheer to your tree or gift pile
Whether you make him as a gift or keep him for yourself, this plushy guardian is guaranteed to spark conversation and smiles.
What Makes Him So Special?
🎁 Soft, huggable yarn and festive accents 🎁 Adorned with a Santa hat, scarf, or tiny lights (your choice!) 🎁 Perfect stocking stuffer or collector’s item for the quirky at heart
Pair him with your other handmade holiday decorations for a touch of fantasy-meets-festive charm!
A Handmade Holiday Guardian
This little guy isn’t just cute — he’s full of character. With tiny wings, a sweet scowl, and possibly a candy cane in hand, he’s ready to watch over your holiday season in style.
Looking for something unique to make or gift this year? The Christmas Gargoyle Plush Toy is the perfect blend of spooky and sweet — and he’s ready to sleigh. 🎅🖤
Ready to make your own? Gargoyle Plush Toy Crochet Pattern Tag us when he’s done! We’d love to see how you deck out your gargoyle in holiday flair.
Alternatively, use a single strand of blanket yarn for a plush toy measuring approximately 12” tall.
Directions:
HEAD AND BODY (start at top):
Rnd 1: With a double strand of white yarn, ch 2 (or magic circle), 6 sc in 2nd ch from hook. Do not join. Work in continuous rnds throughout.
Rnd 2: 2 sc in each sc around (12 sc).
Rnd 3: *Sc in next sc, 2 sc in next sc,* repeat around (18 sc).
Rnd 4: *Sc in next 2 sc, 2 sc in next sc,* repeat around (24 sc).
Rnds 5-8: Sc in each st. Insert safety eyes at Rnd 5 approximately 2 sts apart.
Rnd 9: *Dec, sc in next 6 sts,* repeat twice (21 sc).
Rnd 10: Sc in each st.
Rnd 11: *Dec, sc in next 5 sts,* repeat twice (18 sc).
Rnds 12-13: Sc in each st. Stuff head and neck firmly.
Rnd 14: *Sc in next 2 sts, 2 sc in next st,* repeat twice (24 sc).
Rnd 15: Sc in each st.
Rnd 16: *Sc in next 3 sts, 2 sc in next st,* repeat around (30 sc).
Rnd 17: Sc in each st.
Rnd 18: *Sc in next 4 sts, 2 sc in next st,* repeat around (36 sc).
Rnds 19-28: Sc in each st.
Rnd 29: Working in BLO, *dec, sc in next 4 sts,* repeat around (30 sc).
Rnd 30: Working in both lps, *dec, sc in next 3 sts,* repeat around (24 sc).
Rnd 31: *Dec, sc in next 2 sts,* repeat around (18 sc). Stuff firmly.
Rnd 32: *Dec, sc in next st,* repeat around (12 sc).
Rnd 33: Dec around (6 sc). Join with sl st. Fasten off leaving 6” length. Thread remaining length through needle and pick up outer lp of each of the 6 sc. Pull tight to close opening.
Rnd 1: With a double strand of white yarn, ch 2 (or magic circle), 6 sc in 2nd ch from hook. Do not join rounds.
Rnd 2: 2 sc in each st (12 sc).
Rnds 3-8: Sc in each sc. Stuff.
Rnd 9: Dec around (6 sc).
Rnd 10: *Sc in next st, 2 sc in next st,* repeat twice (9 sc). Mark beg of rnd.
Rnds 11-12: Sc in each sc. Join with sl st at end of Rnd 12.
Rnd 13: Fold foot flat to work toes through both thicknesses. Sl st through both sides of Rnd 12, *ch 4, sl st in 2nd ch, sc in next ch, hdc in next ch, sl st through both sides of Rnd 12,” repeat twice (3 toes).
Fasten off yarn leaving 12” length for sewing. Fold leg at marker and sew in L-shape to sides of body at Rnds 23-28 of body with toes facing front.
FRONT LEGS: (Make 2)
Rnd 1: With a double strand of white yarn, ch 2 (or magic circle), 6 sc in 2nd ch from hook. Do not join rounds.
Rnd 2: *Sc in next st, 2 sc in next st,* repeat twice (9 sc).
Rnds 3-4: Sc in each st.
Rnds 5-6: Sc in 1st st, hdc in next 3 sts, sc in next 2 sts, sl st in next 3 sts (9 sts).
Rnds 7-8: Sc in each st (9 sc). Join with sl st at end of Rnd 8. Stuff lightly.
Toes: Fold in half to work through both sides of Rnd 8. Turn, sl st through both thicknesses, *ch 3, sl st in 2nd ch, sc in next ch, sl st through both thicknesses of front leg,* repeat twice (3 toes). Fasten off yarn leaving 9” length. Sew arms to sides at Rnds 12-18 of body.
Rnd 1: With a double strand of white yarn, ch 2 (or magic circle), 6 sc in 2nd ch from hook. Do not join rounds.
Rnd 2: 2 sc in each st (12 sc).
Rnd 3:*Sc in next st, bpdc in next st,* repeat once, sc in next 8 sts. (12 sts)
Rnd 4: Sc in next st, bpdc in next st, 2 sc in next st, bpdc in next st, sc in next 3 sts, dec over next 2 sts, sc in next 4 sts (12 sts).
Rnd 5: Sc in next st, bpdc in next st, sc in next st, 2 sc in next st, bpdc in next st, sc in next 3 sts, dec over next 2 sts, sc in next 3 sts (12 sts). Join with sl st. Fasten off leaving 9” length for sewing. Stuff and sew to center of face just below the eyes.
EARS: (Make 2)
Row 1: With a double strand of white yarn, ch 2, sc in 2nd ch from hook (1 sc).
Row 2: Ch 1, turn, 2 sc in next st (2 sc).
Row 3: Ch 1, turn, sc in each st.
Row 4: Ch 1, turn, sc in first st, 2 sc in next st (3 sc).
Row 5: Ch 1, turn, sc in each st. Fasten off yarn leaving 6” length. Sew ears to sides of head at Rnds 4-6.
WINGS: (Make 2)
Row 1: With a double strand of white yarn, ch 13, sc in 2nd ch from hook, sc in next 10 ch, 3 sc in last ch. Working on opposite side of foundation ch, sc in next 11 lps (25 sc).
Row 2: Ch 1, turn, working in BLO, sc in next 12 sts, 3 sc in sc at tip of wing, sc in next 12 sts (27 sc).
Row 3: Ch 1, turn, working in BLO, sc in 13 sts, 3 sc in sc at tip of wing, sc in next 13 sts (29 sc).
Fasten off leaving 12” length. Sew to back of gargoyle with both wings touching at the top of the wings, then angled downward to approximately Rnd 23. Weave in all ends.
HAT:
Rnd 1: With a double strand of variegated yarn, ch 2 (or magic circle), 4 sc in 2nd ch from hook. Do not join rnds.
Rnd 2: *Sc in next st, 2 sc in next st,* repeat once (6 sc).
Rnd 3: *Sc in next st, 2 sc in next st,* repeat twice (9 sc).
Rnd 4: Sc in each st.
Rnd 5: *Sc in next 2 sts, 2 sc in next st,* repeat twice (12 sc).
Rnd 6: Sc in each st.
Rnd 7: *Sc in next st, 2 sc in next st,* repeat around (18 sc).
Rnd 8: Sc in each st.
Rnd 9: *Sc in next 2 sts, 2 sc in next st,* repeat around (24 sc).
Rnds 10-11: Sc in each st. Join with sl st at end of Rnd 11. Fasten off red yarn.
Rnd 12: Attach white eyelash yarn, sc in each st.
Sew pompom to top of hat. Sew hat to head.
OPTIONAL: Attach chain around gargoyle’s neck.
OPTIONAL SCARF:
Row 1: With a double strand of variegated yarn, ch 5, sc in 2nd ch from hook and next 3 ch (4 sc).
Row 2: Ch 1, turn, sc in each st.
Repeat Row 2 until scarf reaches desired length to tie around gargoyle’s neck.
Crochet an adorable sweater for the new military baby in your family. Choose from Camouflage for Army or Air Force, Marine Corps, Sailor, or Coast Guard. Also available in an ebook with all 5 sweater patterns and matching rattle patterns.
Pink Ribbon Chemo HatBat Trick or Treat BagStarfish Baby RattleZombie Hat & Face MaskHalloween Activity PageSugar Skull Gift Tag
Affiliate Links
This post contains affiliate links. This means I may earn a commission should you chose to sign up for a program or make a purchase using my link. It’s okay – I love all of these companies anyways, and you will too!
Contains information related to marketing campaigns of the user. These are shared with Google AdWords / Google Ads when the Google Ads and Google Analytics accounts are linked together.
90 days
__utma
ID used to identify users and sessions
2 years after last activity
__utmt
Used to monitor number of Google Analytics server requests
10 minutes
__utmb
Used to distinguish new sessions and visits. This cookie is set when the GA.js javascript library is loaded and there is no existing __utmb cookie. The cookie is updated every time data is sent to the Google Analytics server.
30 minutes after last activity
__utmc
Used only with old Urchin versions of Google Analytics and not with GA.js. Was used to distinguish between new sessions and visits at the end of a session.
End of session (browser)
__utmz
Contains information about the traffic source or campaign that directed user to the website. The cookie is set when the GA.js javascript is loaded and updated when data is sent to the Google Anaytics server
6 months after last activity
__utmv
Contains custom information set by the web developer via the _setCustomVar method in Google Analytics. This cookie is updated every time new data is sent to the Google Analytics server.
2 years after last activity
__utmx
Used to determine whether a user is included in an A / B or Multivariate test.
18 months
_ga
ID used to identify users
2 years
_gali
Used by Google Analytics to determine which links on a page are being clicked
30 seconds
_ga_
ID used to identify users
2 years
_gid
ID used to identify users for 24 hours after last activity
24 hours
_gat
Used to monitor number of Google Analytics server requests when using Google Tag Manager
1 minute
Marketing cookies are used to follow visitors to websites. The intention is to show ads that are relevant and engaging to the individual user.
Pinterest Tag is a web analytics service that tracks and reports website traffic.
Unique value with which users can be identified by X. Collected information is used to be personalize X services, including X trends, stories, ads and suggestions.
2 years
external_referer
Our Website uses X buttons to allow our visitors to follow our promotional X feeds, and sometimes embed feeds on our Website.
2 years
guest_id
This cookie is set by X to identify and track the website visitor. Registers if a users is signed in the X platform and collects information about ad preferences.