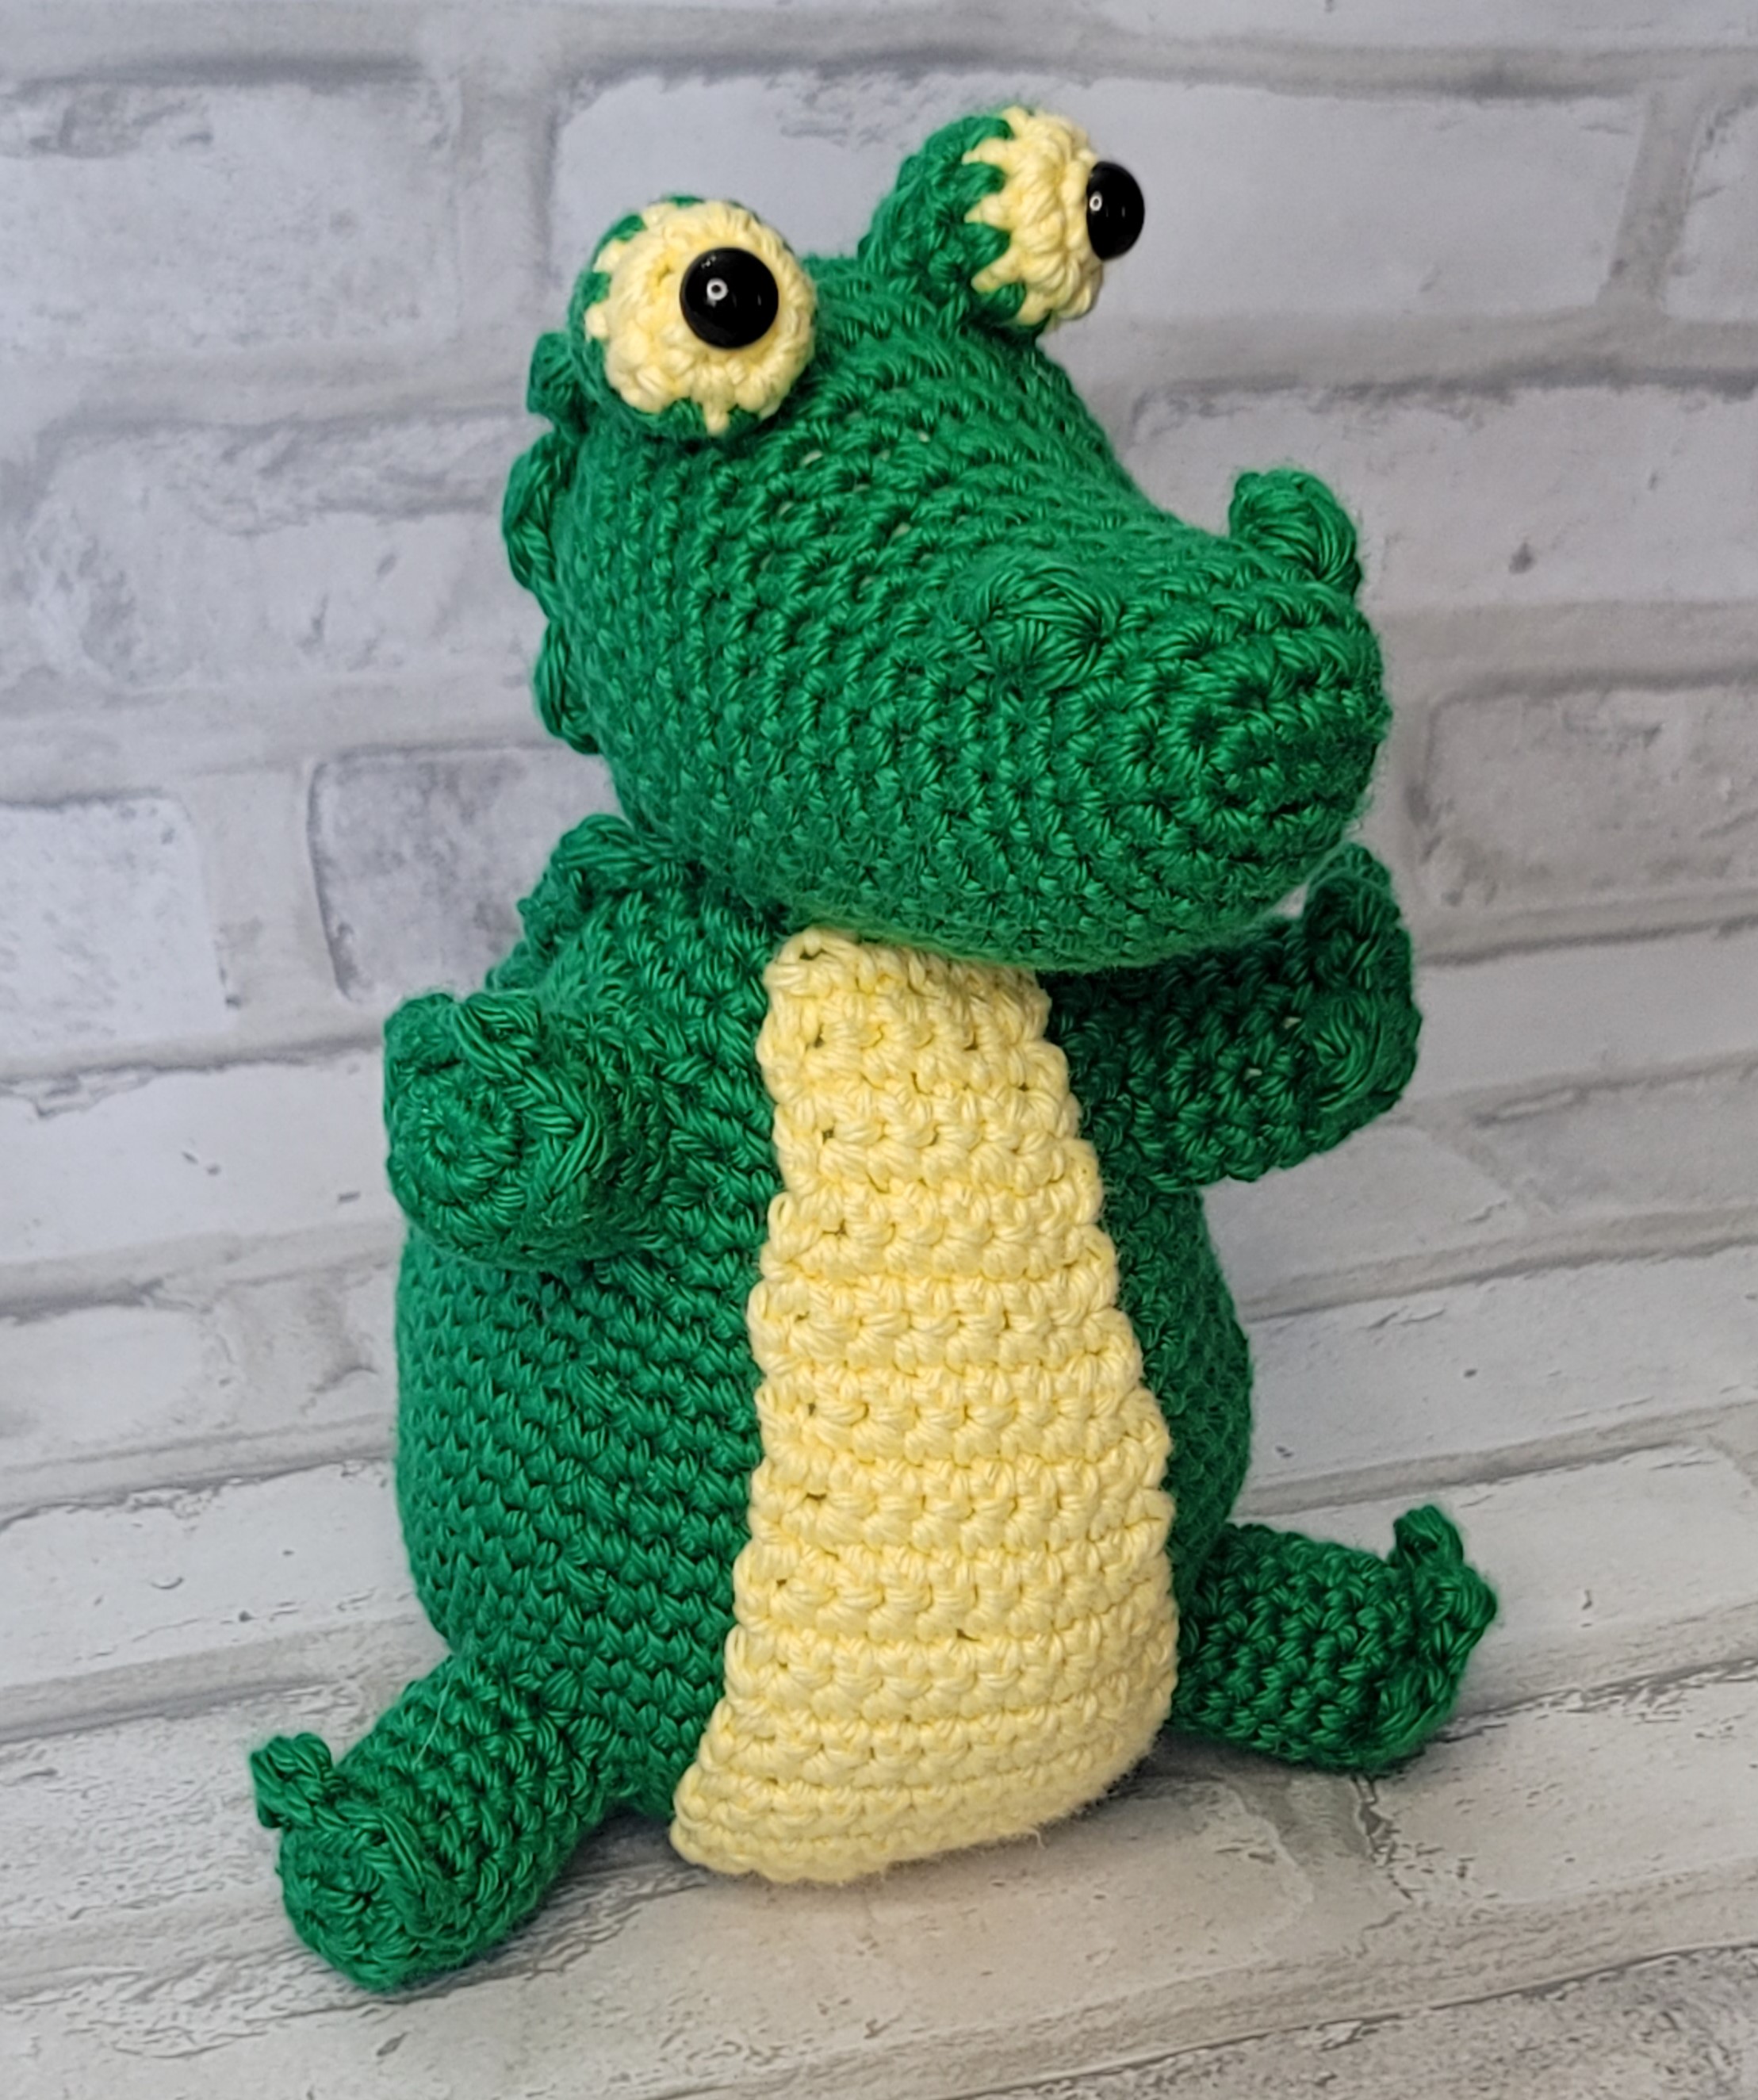
Baby Gator Amigurumi
Materials:
I Love This Cotton:
3 oz. Bright Green
2 oz. Buttercup
Size F (3.75 mm) crochet hook
Yarn needle
Fiberfill
10 mm black safety eyes
Gauge (F hook) 9 sc = 2”, 10 rows sc = 2”
Finished alligator measures approximately 8” tall
Popcorn st: work 5 dc in same st. Insert hook through top of first dc, pull up lp from last dc, pull through first dc.
Directions:
BODY:
Rnd 1: With green yarn, ch 2 (or magic circle), 6 sc in 2nd ch from hook. Do not join. Work in continuous rnds throughout body.
Rnd 2: 2 sc in each sc around (12 sc).
Rnd 3: *Sc in next sc, 2 sc in next sc,* repeat around (18 sc).
Rnd 4: *Sc in next 2 sc, 2 sc in next sc,* repeat around (24 sc).
Rnd 5: *Sc in next 3 sc, 2 sc in next sc,* repeat around (30 sc).
Rnd 6: *Sc in next 4 sc, 2 sc in next sc,* repeat around (36 sc).
Rnd 7: *Sc in next 5 sc, 2 sc in next sc,* repeat around (42 sc).
Rnd 8: *Sc in next 6 sc, 2 sc in next sc,* repeat around (48 sc).
Rnd 9: *Sc in next 7 sc, 2 sc in next sc,* repeat around (54 sc).
Rnd 10: *Sc in next 8 sc, 2 sc in next sc,* repeat around (60 sc).
Rnds 11-15: Sc in each st.
Rnd 16: *Dec next 2 sc, sc next 8 sc,* repeat around (54 sc).
Rnd 17: Sc in each st.
Rnd 18: *Dec next 2 sc, sc next 7 sc,* repeat around (48 sc).
Rnd 19: Sc in each st.
Rnd 20: *Dec next 2 sc, sc next 6 sc,* repeat around (42 sc).
Rnds 21-22: Sc in each st.
Rnd 23: *Dec next 2 sc, sc next 5 sc,* repeat around (36 sc).
Rnds 24-25: Sc in each st.
Rnd 26: *Dec next 2 sc, sc next 4 sc,* repeat around (30 sc).
Rnds 27-28: Sc in each st.
Rnd 29: *Dec next 2 sc, sc next 3 sc,* repeat around (24 sc).
Rnd 30-31: Sc in each st. Join with sl st. Fasten off leaving 12” length for sewing. Stuff body firmly.
BELLY:
Row 1: With yellow yarn, ch 6, sc in 2nd ch from hook and in each remaining ch (5 sc).
Rows 2-3: Ch 1, turn, sc in each st.
Row 4: Ch 1, turn, inc first st, sc in remaining sts (6 sc).
Rows 5-6: Ch 1, turn, sc in each st.
Row 7: Ch 1, turn, inc first st, sc in remaining sts (7 sc).
Rows 8-9: Ch 1, turn, sc in each st.
Row 10: Ch 1, turn, inc first st, sc in remaining sts (8 sc).
Rows 11-12: Ch 1, turn, sc in each st.
Row 13: Ch 1, turn, inc first st, sc in remaining sts (9 sc).
Rows 14-15: Ch 1, turn, sc in each st.
Row 16: Ch 1, turn, inc first st, sc in remaining sts (10 sc).
Rows 17-18: Ch 1, turn, sc in each st.
Row 19: Ch 1, turn, inc first st, sc in remaining sts (11 sc).
Rows 20-23: Ch 1, turn, sc in each st.
Row 24: Ch 1, dec 1 st each end (9 sc).
Row 25: Ch 1, dec 1 st each end (7 sc).
Row 26: Ch 1, dec 1 st each end (5 sc).
TAIL:
Rnd 1: With green yarn, ch 2 (or magic circle), 2 sc in 2nd ch from hook. Do not join. Work in continuous rnds throughout tail.
Rnd 2: 2 sc in each st (6 sc).
Rnd 3: *Sc in next st, 2 sc in next st,* repeat twice (9 sc).
Rnd 4: *Sc in next 2 sts, 2 sc in next st,* repeat twice (12 sc).
Rnd 5: Sc in each st.
Rnd 6: *Sc in next st, 2 sc in next st,* repeat around (18 sc).
Rnd 7: Sc in each st.
Rnd 8: *Sc in next 2 sts, 2 sc in next st,* repeat around (24 sc).
Rnd 9: Sc in each st.
Rnd 10: *Sc in next 3 sts, 2 sc in next st,* repeat around (30 sc).
Rnds 11-12: Sc in each st. Join with sl st. Fasten off green leaving 12” tail for sewing. Stuff tail. Center on back and sew in place.
BACK LEGS: (Make 2)
Rnd 1: With green yarn, ch 2 (or magic circle), 6 sc in 2nd ch from hook. Do not join.
Rnd 2: 2 sc in each st (12 sc). Join with sl st in front loop only.
Toes – Rnd 3: Working in FLO, *sc, dc, sc in next st, sl st in next st,* repeat twice. Working in BLO, sc in next 6 sts. Working in BLO in loops leftover behind toes, sc in next 6 sts. Do not join.
Rnd 4: Working in both loops, sc in each st (12 sc).
Rnds 5-8: Sc in each st. Join with sl st. Stuff legs and sew to body at Rnds 8-12.
FRONT LEGS: (Make 2)
Repeat Rnds 1-6 of back legs. Sew to body at Rnds 24-28.
HEAD:
Rnd 1: With green yarn, ch 4, sc in 2nd ch, sc in next ch, 3 sc in last ch. Working on opposite side of starting ch, sc in next lp, 2 sc in last lp (8 sc). Do not join. Work in continuous rnds throughout head.
Rnd 2: 2 sc in first st, sc in next st, 2 sc in next 3 sts, sc in next st, 2 sc in next 2 sts (14 sc).
Rnd 3: *sc in next st, 2 sc in next st,* sc in next st, repeat * to * 3 times, sc in next st, repeat * to * twice (20 sc).
Rnd 4: Sc in each st.
Rnd 5: Sc in next 2 sts, popcorn st (nostril), sc in next 4 sts, popcorn st, sc in next 12 sts.
(Adjust placement of popcorn sts if needed to place nostrils on the top of the snout.)
Rnd 6: Sc in each st.
Rnd 7: *Sc in next 3 sts, 2 sc in next st,* repeat around (25 sc).
Rnds 8-10: Sc in each st.
Rnd 11: Sc in next 5 sts, 2 sc in next 5 sts (these increases should be at center top of head), sc in next 15 sts (30 sc).
Rnd 12: Sc in each st.
Rnd 13: Sc in next 8 sts, 2 sc in next 6 sts (center top), sc in next 16 sts (36 sc).
Rnds 14-18: Sc in each st.
Rnd 19: *Dec, sc in next 4 sts,* repeat around (30 sc).
Rnd 20: *Dec, sc in next 3 sts,* repeat around (24 sc). Stuff head.
Rnd 21: *Dec, sc in next 2 sts,* repeat around (18 sc).
Rnd 22: *Dec, sc in next st,* repeat around (12 sc). Finish stuffing head.
Rnd 23: Dec around (6 sc). Join with sl st. Close with ultimate finish technique.
Sew Rnds 13-20 of head to top of body.
EYES: (Make 2)
Rnd 1: With yellow yarn, ch 2 (or magic circle), 5 sc in 2nd ch from hook. Do not join.
Rnd 2: 2 sc in each st (10 sc). Fasten off yellow.
Rnds 3-4: With green yarn, sc in each st.
Insert safety eyes into center of Rnd 1. Stuff eye.
Rnd 5: Dec around (5 sc). Close Rnd 5 and sew eyes to head at Rnds 14-16 approximately 3 sts (1/2”) apart.
SPIKES:
Mark a line with CC yarn from behind the eye to the tip of the tail, then back up to behind the other eye. Join green yarn behind one eye, *sc, dc, sc in same st, sl st in next row,* repeat down to the tail with last spike at the center point of the tail. Work in same pattern up to behind the other eye. Remove marking yarn.
More Amigurumi Patterns
Zoo Blog Hop Day 14 – Alligators!
National Zoo & Aquarium Month Blog Hop, Day 1 World Reef Awareness Day
Miles the Jazzy Elephant Amigurumi
A to Z Animal Crochet Patterns Ebook
Affiliate Links:
This post contains affiliate links. If you use these links to purchase your yarn and supplies, I may earn a commission. Thanks for helping support my crochet blog.
![]()
![]()


