Posted on 4 Comments

Texas Independence Day

On February 28, 1836, a group of Texians came together at Washington-on-the-Brazos to declare independence from Mexico and declare Texas as a Republic. The Texas Declaration of Independence was signed on March 2, 1836. Sixty men signed the document, 57 of whom had moved from the United States to Texas after the Mexican government had promised them a republican government. War had begun several months before and ended with the capture of Santa Anna at the Battle of San Jacinto on April 21, 1936. The signing of the declaration took place while the Battle of the Alamo was raging in San Antonio.

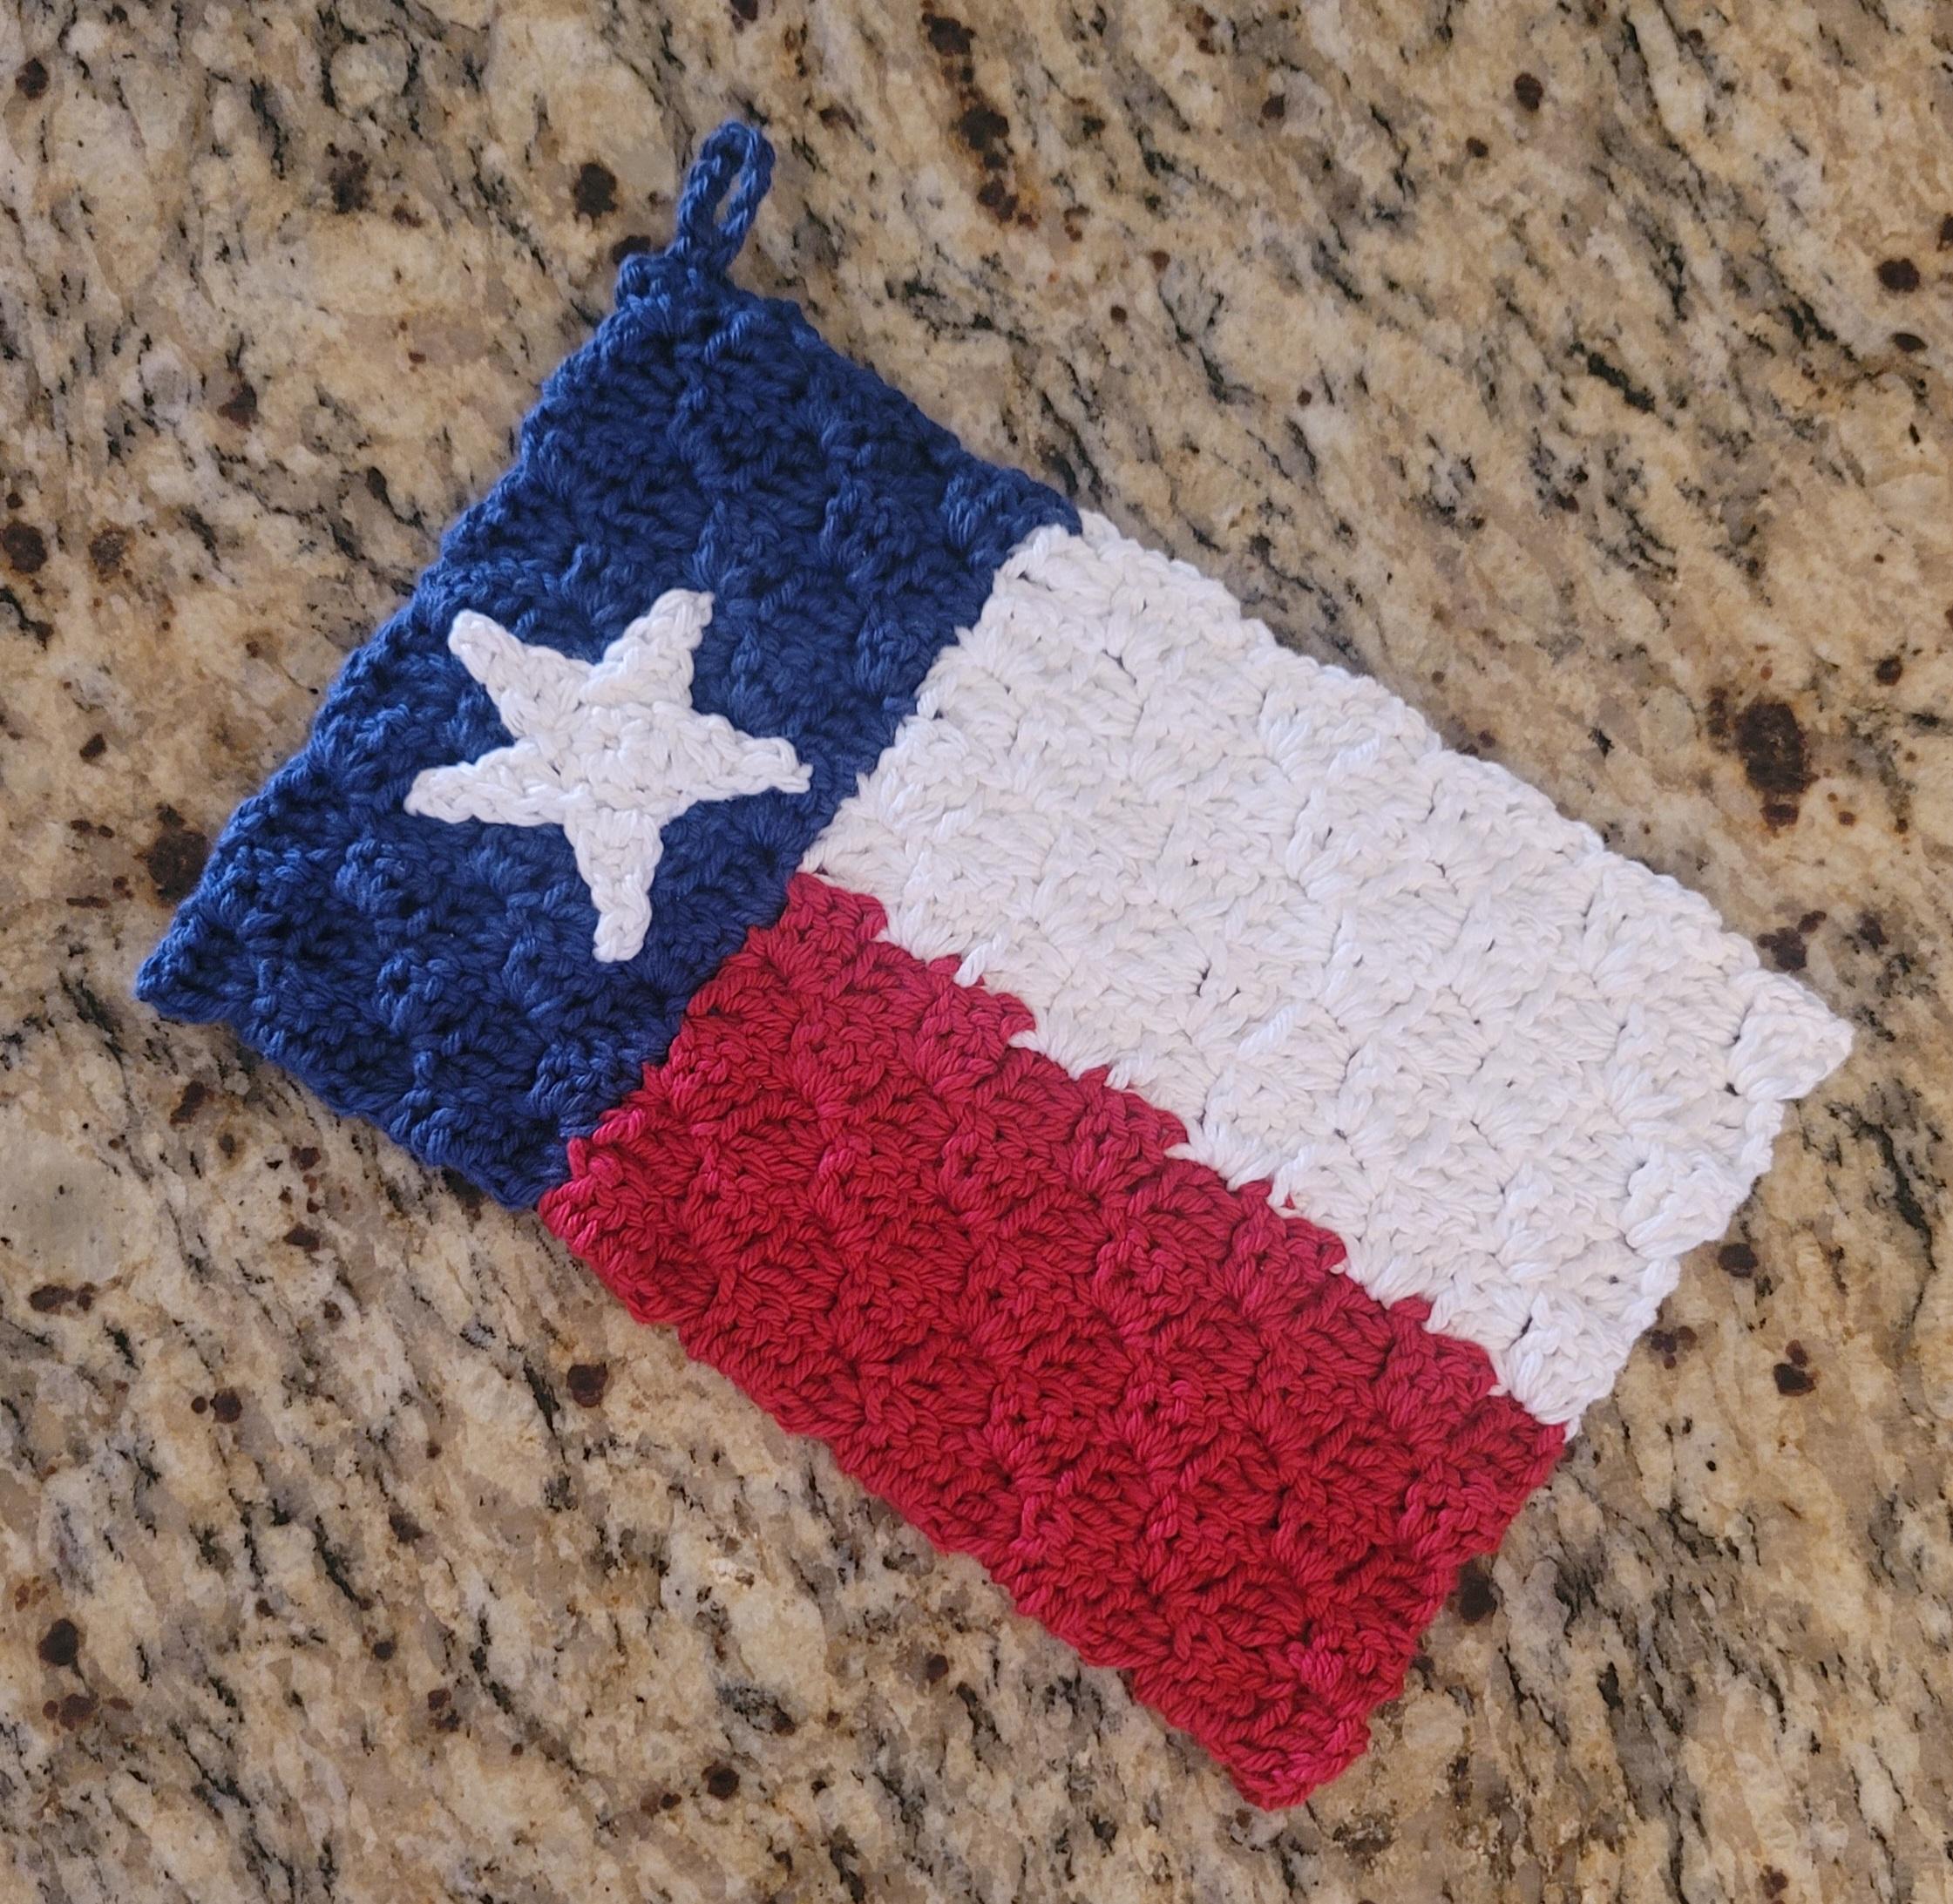
To celebrate my favorite state, this year I’ve made an easy C2C potholder using the Texas flag as inspiration.

Materials:

Dishie cotton worsted yarn – 1/2 oz. each red, white, blue

Size G (4.0 mm) crochet hook

Directions:

Working in C2C format:

Row 1: 1 red square

Row 2: 2 red squares

Row 3: 3 red squares

Row 4: 4 red squares

Row 5: 5 red squares

Row 6: 5 red squares, 1 white square (wrong side)

Row 7: 2 white squares, 5 red squares

Row 8: 5 red squares, 3 white squares

Row 9: 4 white squares, 5 red squares

Row 10: 5 red squares, 5 white squares

Begin to decrease on top of flag (white side), increase on bottom of flag (red side)

Row 11: 5 white squares, 4 red squares, 1 blue square (right side)

Row 12: 2 blue squares, 3 red squares, 5 white squares

Row 13: 5 white squares, 2 red squares, 3 blue squares

Row 14: 4 blue squares, 1 red square, 5 blue squares. Fasten off red.

Row 15: 5 white squares, 5 blue squares

Begin to decrease both sides

Row 16: 5 blue, 4 white

Row 17: 3 white, 5 blue

Row 18: 5 blue, 2 white

Row 19: 1 white, 5 blue. Fasten off white.

Row 20: 5 blue

Row 21: 4 blue

Row 22: 3 blue

Row 23: 2 blue

Row 24: 1 blue

If you would like to put a hanging lp on the corner of your potholder, make the last square of Row 24: ch 3, dc, ch 10, sl st in 10th ch, 2 dc, sl st in next square.

Fasten off blue. Weave in all ends.

Star:

With white yarn, ch 2 (or magic circle), 5 sc in 2nd ch. Join with sl st. *ch 4, sl st in 2nd ch, sc in next ch, hdc in next ch, sl st in next sc,* 5 times. Fasten off white leaving 12″ length. Sew star to center of blue portion of potholder.


PDF download Texas Flag Potholder C2C Crochet Pattern

More Texas Designs

Yellow Rose of Texas Afghan Crochet Pattern


Yellow Rose of Texas Afghan Crochet Pattern


Crochet - Texas Style Crochet Patterns Ebook


Crochet – Texas Style Crochet Patterns Ebook


texas flag ornament


Texas Flag Christmas Tree Ornament


Texas Horny Toad Crochet Patterns Ebook


Texas Horny Toads Crochet Patterns Ebook


Armadillo Toddler Blanket Crochet Pattern


Affiliate Links

This post contains affiliate links. This means I may earn a commission should you chose to sign up for a program or make a purchase using my link. It’s okay – I love all of these companies anyways, and you will too!


Lion Brand Yarn

Free shipping on orders over $40. Use code FSUS40.

Up to 30% off Top Picks


Posted on 8 Comments

Snowflake Kitchen Boa Crochet Pattern in Tunisian Stitch

Snowflake Kitchen Boa Crochet Pattern in Tunisian Stitch

If you’ve ever looked at a crochet project and thought, “That almost looks knitted,” chances are it was made using Tunisian crochet.

Tunisian stitch is a beautiful technique that blends the look of knitting with the comfort of crochet — and the best part? It’s much easier to learn than it looks.

If you’re ready to try something new with your yarn, this is a great place to start.


What Is Tunisian Crochet?

Tunisian crochet uses a long hook (similar to a knitting needle with a hook on the end) and works in two steps:

  1. Forward pass – you pick up loops across the row

  2. Return pass – you work those loops back off the hook

Unlike regular crochet, you don’t turn your work after every row. This creates a thicker fabric with gorgeous texture.


Why Crocheters Love Tunisian Stitch

Tunisian crochet is popular because it:

  • Creates a knit-like look

  • Has beautiful texture

  • Makes a warm, sturdy fabric

  • Is perfect for blankets, scarves, hats, and dishcloths

  • Uses familiar crochet motions — just slightly different

It’s a wonderful next step once you’re comfortable with basic crochet stitches.


The Basic Tunisian Simple Stitch (TSS)

The Tunisian Simple Stitch is usually the first stitch beginners learn.

Here’s the basic idea:

  • Insert your hook under the vertical bar

  • Yarn over and pull up a loop

  • Leave the loop on the hook

You repeat this across the row, then work the return pass by yarn over and pulling through loops until one loop remains.

That’s it — you’ve just completed a Tunisian row!

Snowflake Kitchen Boa Crochet Pattern in Tunisian Stitch


I made several styles of kitchen boas for Christmas gifts, and this is one that can brighten up your kitchen throughout the winter. If you’re well versed in Tunisian stitch, this will be a simple project for you. If you’ve never done it before, this is the perfect easy project to learn Tunisian or afghan stitch. There’s also a YouTube tutorial to help you through it. https://youtu.be/_4QHPqtdys4

Materials:

I Love This Cotton worsted weight yarn

3.5 oz blue

1 oz. white

Crochet hook size G (4.0 mm)

Yarn needle

8” x 20” (20 cm x 51 cm) Kitchen Towel

Needle and Thread


Directions:

Row 1: With blue yarn, ch 20, Tunisian st in 2nd ch and each rem ch (19 sc). This should measure approximately 4” across.

Row 2: Work in Tunisian st until piece measures 37”. Bind off blue yarn. When sewn to both sides of the kitchen towel, the boa will measure approximately 68”. If shorter or longer boa is needed, adjust the length of the crocheted piece.

Work snowflake pattern in white yarn using cross-stitch (or duplicate st if you prefer). Skip 2 rows and work another snowflake above it. Repeat 2 snowflakes on opposite end.

Snowflake Chart
Cross-Stitch Chart


Cut towel in half and serge or zigzag raw edges. Fold edges to middle and sew edge.

Fold edges again to middle and sew in place. This will give you a width of approximately 4”.

Hand sew or machine sew this edge of towel to back side of crocheted piece.

Block boa and weave in all ends.

PDF download is available at Snowflake Kitchen Boa Crochet Pattern in Tunisian Stitch


January’s New Designs

Pink Power Pillow Crochet Pattern - Rainbow Power Pillow Crochet Pattern
Pink Power Pillow Crochet Pattern – Rainbow Power Pillow Crochet Pattern


Lover's Eye Necklace Crochet Pattern

Lover’s Eye Necklace Crochet Pattern


Coming Soon

February will be an amazing month for blog roundups including:


Affiliate Links

This post contains affiliate links. This means I may earn a commission should you chose to sign up for a program or make a purchase using my link. It’s okay – I love all of these companies anyways, and you will too!

Lion Brand Yarn
Black Friday Sale – up to 70% off bundles


Amazon affiliate: https://amzn.to/4hkS5Zd