Easter is the perfect time to get busy crocheting, and what better way to celebrate than with a handmade Easter Bunny? Whether you’re looking for a charming gift, festive decor, or just a fun project to enjoy, crocheting your own Easter Bunny is a delightful choice.
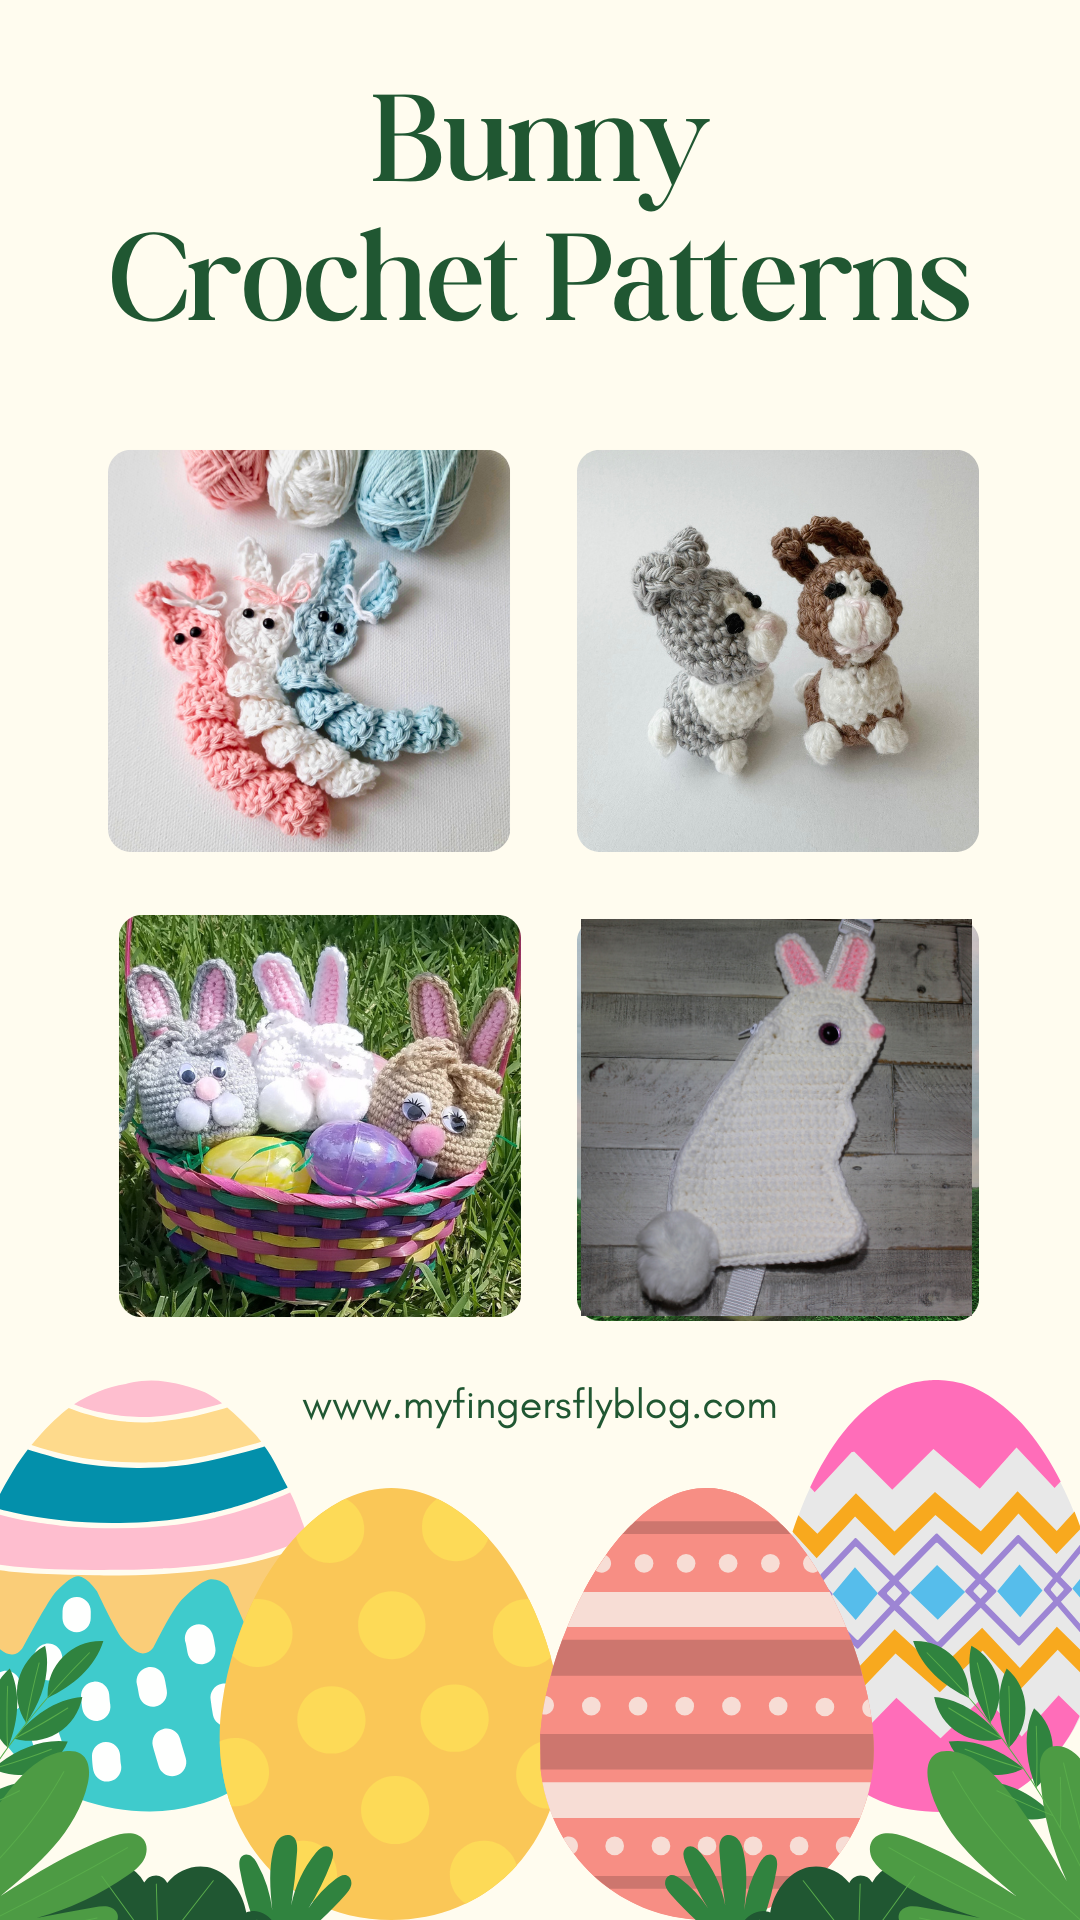
Today’s feature is bunnies of all types – from tiny amigurumi to a bunny bobblehead to an adorable sling bag. Each bunny is more adorable than the next, and all patterns are free to view on the designers’ blogs.
Share Your Bunny Creations. We’d love to see your Easter bunnies! Tag your photos on social media using #EasterBunnyCraft and inspire others to get creative.

Bunny Worry Worm from Start Crochet

Free Bunny Crochet Pattern from Pocket Yarnlings

Bunny Butt Coasters from Marsha YarnDoodles


Bunny Bobblehead Crochet Pattern

Easter Egg Cozy from Start Crochet
 Easter Bunny Find the Differences Game – Free download

Bunny Sling Bag Crochet Pattern
Materials:
Worsted weight yarn:
100 yards MC
5 yards CC
Size H (5.0 mm) crochet hook
Yarn needle
7” zipper
20-mm safety eye
½” pink pompom for nose
2-3” white pompom for tail
Buckle and strap set with polyester webbing (https://amzn.to/4774ZYe)
Gauge: 7 sc = 2”, 8 rows = 2”
Bunny measures 11.5” tall by 6” wide. Bag with strap measures 20-30” (depending on length of strap).
DIRECTIONS:
BUNNY: (Make 2)
Row 1: With MC, ch 19, sc in 2nd ch from hook and in next 17 ch (18 sc).
Row 2: Ch 1, turn, inc in first st, sc in next 16 sts, inc in last st (20 sc).
Row 3: Ch 1, turn, sc in each st.
Row 4: Ch 1, turn, dec, sc across remaining sts (19 sc).
Row 5: Ch 1, turn, sc in 17 sts, dec (18 sc).
Row 6: Ch 1, turn, sc in each st.
Row 7: Ch 1, turn, sc in 16 sts, dec (17 sc).
Rows 8-10: Ch 1, turn, sc in each st.
Row 11: Ch 1, turn, sc in 15 sts, dec (16 sc).
Row 12: Ch 1, turn, sc in each st.
Row 13: Ch 1, turn, dec, sc in next 13 sts, inc (16 sc).
Row 14: Ch 1, turn, sc in each st.
Row 15: Ch 1, turn, dec, sc in next 13 sts, inc (16 sc).
Row 16: Ch 1, turn, sc in each st.
Row 17: Ch 1, turn, dec, sc in next 13 sts, inc (16 sc).
Row 18: Ch 1, turn, sc in each st.
Row 19: Ch 1, turn, dec, sc in next 12 sts, dec (14 sc).
Row 20: Ch 1, turn, sc in each st.
Row 21: Ch 1, turn, dec, sc in next 12 sts (13 sc).
Row 22: Ch 1, turn, inc in first st, sc in next 10 sts, dec (13 sc).
Row 23: Ch 1, turn, dec, sc in next 10 sts, inc (13 sc).
Row 24: Ch 1, turn, sc in each st.
Row 25: Ch 1, turn, dec, sc in next 10 sts, inc (13 sc).
Row 26: Ch 1, turn, sc in each st.
Row 27: Ch 1, turn, dec, sc in next 10 sts, inc (13 sc).
Row 28: Ch 1, turn, sc in 11 sts, dec (12 sc).
Row 29: Ch 1, turn, inc in first st, sc in next 10 sts, inc in next st (14 sc).
Row 30: Ch 1, turn, sc in 12 sts, dec (13 sc).
Row 31: Ch 1, turn, dec, sc in next 9 sts, dec (11 sc).
Row 32: Ch 1, turn, sc in each st.
Row 33: Ch 1, turn, dec, sc in next 7 sts, dec (9 sc).
Row 34: Ch 1, turn, dec, sc in next 5 sts, dec (7 sc).
Row 35: Ch 1, turn, dec, sc in next 3 sts, dec (5 sc). Fasten off yarn.
If using a sewing machine, it’s easier to sew webbing to back of bunny before assembling the bag. Cut polyester webbing 52-60” long.
Sew with 5” of webbing extending off the top of the bunny.
Turn over and place other bunny piece on top. Pin together and mark Rows 4 & 30. The distance between markers should be approximately 7” to fit zipper.
Attach MC at Row 30, sc along edges of rows of top bunny piece to Row 5. At Row 4, sc through both layers from Row 4 to Row 1 with 2 sc in Row 1. Continue around bottom using unused lps of foundation ch with 2 sc in last lp. Continue up the front and head of bunny with 2 sc in any corner to help maintain the shape. Continue through both layers around head until you reach marker at Row 30. Join with sl st in first sc of rnd. On back bunny piece, sc through edges of Rows 5-29. Join with sl st at Row 4. Fasten off yarn.
EARS: (Make 2)
Row 1: With CC yarn, ch 8, sc in 2nd ch from hook, sc in next 5 ch, 3 sc in last ch. Working on opposite side of foundation ch, sc in next 6 chs. Fasten off CC.
Repeat Row 1 with MC yarn. Do not fasten off.
Row 2: Ch 1, turn, place CC ear on top of MC ear and work through both layers. Sc in 6 sts, 2 sc in next 3 sts, sc in next 6 sts, sl st in same sp as last sc. Fasten off leaving 9” length for sewing. Sew ears to top of head.
Sew ½” pompom at end of Row 30. Insert safety eye at Row 30, 6 sts from nose. Sew zipper to 7” slot in back of bunny. Sew white pompom below zipper.
Thread female clip on 5” piece of webbing above bunny and sew the end in place.
Insert slide clip on other end of webbing. Insert male clip on end and thread end of webbing back through slide clip.

Add-free PDF available at Bunny Sling Bag Crochet Pattern
Easter Advent Crochet Patterns

For 2 weeks leading up to Easter, we will feature free Easter patterns on the blog for your holiday crafting. Over 40 designs with a different theme every day. Be sure to visit every day to experience all the beautiful patterns from some of the best indie designers. There will also be a new free download each day with a different theme – coloring pages, gift tags, activities for children, and so many more.
Download a copy of the calendar so you can print it as your daily reminder. Each date on the calendar will contain a link to that day’s blog post.


Affiliate Links
This post contains affiliate links. This means I may earn a commission should you chose to sign up for a program or make a purchase using my link. It’s okay – I love all of these companies anyways, and you will too!
 Red Heart Crochet Kit