Posted on — 8 Comments

Snowflake Kitchen Boa Crochet Pattern in Tunisian Stitch

Snowflake Kitchen Boa Crochet Pattern in Tunisian Stitch

If you’ve ever looked at a crochet project and thought, “That almost looks knitted,” chances are it was made using Tunisian crochet.

Tunisian stitch is a beautiful technique that blends the look of knitting with the comfort of crochet — and the best part? It’s much easier to learn than it looks.

If you’re ready to try something new with your yarn, this is a great place to start.


What Is Tunisian Crochet?

Tunisian crochet uses a long hook (similar to a knitting needle with a hook on the end) and works in two steps:

  1. Forward pass – you pick up loops across the row

  2. Return pass – you work those loops back off the hook

Unlike regular crochet, you don’t turn your work after every row. This creates a thicker fabric with gorgeous texture.


Why Crocheters Love Tunisian Stitch

Tunisian crochet is popular because it:

  • Creates a knit-like look

  • Has beautiful texture

  • Makes a warm, sturdy fabric

  • Is perfect for blankets, scarves, hats, and dishcloths

  • Uses familiar crochet motions — just slightly different

It’s a wonderful next step once you’re comfortable with basic crochet stitches.


The Basic Tunisian Simple Stitch (TSS)

The Tunisian Simple Stitch is usually the first stitch beginners learn.

Here’s the basic idea:

  • Insert your hook under the vertical bar

  • Yarn over and pull up a loop

  • Leave the loop on the hook

You repeat this across the row, then work the return pass by yarn over and pulling through loops until one loop remains.

That’s it — you’ve just completed a Tunisian row!

Snowflake Kitchen Boa Crochet Pattern in Tunisian Stitch


I made several styles of kitchen boas for Christmas gifts, and this is one that can brighten up your kitchen throughout the winter. If you’re well versed in Tunisian stitch, this will be a simple project for you. If you’ve never done it before, this is the perfect easy project to learn Tunisian or afghan stitch. There’s also a YouTube tutorial to help you through it. https://youtu.be/_4QHPqtdys4

Materials:

I Love This Cotton worsted weight yarn

3.5 oz blue

1 oz. white

Crochet hook size G (4.0 mm)

Yarn needle

8” x 20” (20 cm x 51 cm) Kitchen Towel

Needle and Thread


Directions:

Row 1: With blue yarn, ch 20, Tunisian st in 2nd ch and each rem ch (19 sc). This should measure approximately 4” across.

Row 2: Work in Tunisian st until piece measures 37”. Bind off blue yarn. When sewn to both sides of the kitchen towel, the boa will measure approximately 68”. If shorter or longer boa is needed, adjust the length of the crocheted piece.

Work snowflake pattern in white yarn using cross-stitch (or duplicate st if you prefer). Skip 2 rows and work another snowflake above it. Repeat 2 snowflakes on opposite end.

Snowflake Chart
Cross-Stitch Chart


Cut towel in half and serge or zigzag raw edges. Fold edges to middle and sew edge.

Fold edges again to middle and sew in place. This will give you a width of approximately 4”.

Hand sew or machine sew this edge of towel to back side of crocheted piece.

Block boa and weave in all ends.

PDF download is available at Snowflake Kitchen Boa Crochet Pattern in Tunisian Stitch


January’s New Designs

Pink Power Pillow Crochet Pattern - Rainbow Power Pillow Crochet Pattern
Pink Power Pillow Crochet Pattern – Rainbow Power Pillow Crochet Pattern


Lover's Eye Necklace Crochet Pattern

Lover’s Eye Necklace Crochet Pattern


Coming Soon

February will be an amazing month for blog roundups including:


Affiliate Links

This post contains affiliate links. This means I may earn a commission should you chose to sign up for a program or make a purchase using my link. It’s okay – I love all of these companies anyways, and you will too!

Lion Brand Yarn
Black Friday Sale – up to 70% off bundles


Amazon affiliate: https://amzn.to/4hkS5Zd


Posted on — 8 Comments

Small Dog Bed Crochet Pattern

dog bed

My new puppy needed a bed, and I had soooo much red yarn, so I whipped up this simple pattern.

Bed measures approximately 19” diameter with 4” deep sides

Materials: 

Caron One Pound – 20 oz.

Size J (6.0 mm) crochet hook

Fiberfil

Yarn needle

Foam stabilizer

Directions: 

CUSHION (Make 2):

Rnd 1: With 2 strands of yarn, magic circle, 12 dc in magic circle. Join with sl st.

Rnd 2: Ch 1, 2 dc in each st (24 dc). Join with sl st.

Rnd 3: Ch 1, *dc in next st, 2 dc in next st,* repeat around (36 dc). Join with sl st.

Rnd 4: Ch 1, *dc in each of next 2 sts, 2 dc in next st,* repeat around (48 dc). Join with sl st.

Rnd 5: Ch 1,*dc in each of next 3 sts, 2 dc in next st,* repeat around (60 dc). Join with sl st.

Rnd 6: Ch 1, *dc in each of next 4 sts, 2 dc in next st,* repeat around (72 dc). Join with sl st.

Rnd 7: Ch 1, *dc in each of next 5 sts, 2 dc in next st,* repeat around (84 dc). Join with sl st.

Rnd 8: Ch 1, *dc in each of next 6 sts, 2 dc in next st,* repeat around (96 dc). Join with sl st.

Rnd 9: Ch 1,*dc in each of next 7 sts, 2 dc in next st,* repeat around (108 dc). Join with sl st.

Rnd 10: Ch 1, *dc in each of next 8 sts, 2 dc in next st,* repeat around (120 dc). Join with sl st.

Rnd 11: Ch 1, *dc in each of next 9 sts, 2 dc in next st,* repeat around (132 dc). Join with sl st.

Rnd 12: Ch 1,*dc in each of next 10 sts, 2 dc in next st,* repeat around (144 sc). Join with sl st.

Rnd 13: Ch 1, *dc in each of next 11 sts, 2 dc in next st,* repeat around (156 sc). Join with sl st. Do not fasten off yarn.

ASSEMBLY:

Place both pieces together with a little Fiberfil or quilt batting in the middle. Sc through both thicknesses all the way around to close cushion.

SIDE:

Row 1: Ch 1, working in BLO, sc in 116 sts. Leave rem sts unworked.

Rows 2-6: Ch 1, turn, dc in each st.

Row 7: Ch 1, working BLO, dc in each st.

Rows 8-12: Ch 1, working in both loops, dc in each st. Fasten off yarn.

Measure length of side (approximately 45”) and height of Rows 1-6 (approximately 4”). Cut a piece of foam stabilizer to this dimension. This will give the side of the bed a little extra support. Sew Row 12 of side to Row 1 of side, inserting foam stabilizer in between as you go.

Sweater Crochet Pattern for the New Puppy

Pug Puppy Sweater Update – New Size

Dog Crochet Patterns

Zoo Blog Hop Day 25 – Dogs

Poodle Eyeglass Holder Crochet Pattern

Dog Crochet Patterns
Dog Bookmark
Posted on — 5 Comments

Benjamin Turtle CAL Part 3

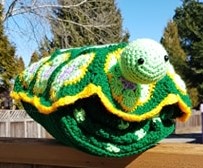
TGIF! I hope everyone is enjoying the Benjamin Turtle pattern. Today’s post is the final one for this crochet-along. You will be making the bottom flap and assembling the nap buddy.

Directions:

Bottom:

Row 1: With Dark Olive yarn, ch 30, hdc in 2nd ch and in each ch across (29 hdc).

Rows 2-4: Ch 1, turn, 2 hdc in first st, hdc across (32 hdc at end of Row 4).

Row 5: Ch 1, turn, 1 hdc, ch 1, sk next st, 30 hdc.

Row 6: Ch 1, turn, hdc in each hdc and ch-1 sp.

Rows 7-14: Ch 1, turn, hdc in each st.

Rows 15-24: Repeat Rows 5-14.

Rows 25-26: Repeat Rows 5-6.

Rows 27-29: Ch 1, turn, dec over first 2 sts, hdc across (29 hdc at end of Row 29). Do not fasten off.

Edging:

Ch 1, turn, hdc in each st across top, down side, across unused loops on bottom, and up the other side with 2 hdc in each corner. Join with sl st. Fasten off leaving 12” length for sewing.

Finished flap measures approximately 10” x 11”.

Assembly:

turtle blanket centers

Mark centers of blanket and turtle. Measure from center, 5” to left and 5” to right and pin blanket to turtle at these spots. Sew center 10” of blanket to turtle using Dark Olive yarn and back stitch. For extra security, sew edges of blanket to turtle with whip st.

Fold blanket into thirds and roll it, then fit it inside the turtle. Pin bottom flap centered over the blanket/turtle seam and sew in place.

turtle bottom flap

Sew buttons to bottom of shell corresponding to buttonholes in bottom flap.

turtle buddy bottom 

Head:

Rnd 1: Ch 2 (or magic circle), 6 sc in 2nd ch. Do not join. Work in continuous rnds throughout head.

Rnd 2: 2 sc in each st (12 sc).

Rnd 3: *Sc in next st, 2 sc in next st,* repeat around (18 sc).

Rnd 4: *Sc in next 2 sts, 2 sc in next st,* repeat around (24 sc).

Rnd 5: *Sc in next 3 sts, 2 sc in next st,* repeat around (30 sc).

Rnds 6-9: Sc in each st.

Rnd 10: *Dec, sc in next 3 sts,* repeat around (24 sc).

Rnd 11: Sc in each st.

Insert eyes at Rnd 4, approximately 1” apart.

Rnd 12: *Dec, sc in next 2 sts,* repeat around (18 sc).

Rnds 13-16: Sc in each st. Join with sl st. Fasten off leaving 12” length.

Stuff head and sew to front of turtle at the top edge of the center hexagon. Weave in all ends.

turtle buddy both small

Part 1 of the CAL can be found at Benjamin Turtle Nap Buddy CAL.

Part 2 of the CAL can be found at Benjamin Turtle Nap Buddy CAL Part 2.

Free Turtle Jewelry Pattern

Four Free Turtle Patterns

Please post your turtle photos to Facebook or Instagram.

Rainbow Nap Buddy

Bunny Nap Buddy Crochet Pattern

Summer Solstice Giveaway

I am thrilled to be a part of this amazing crochet pattern giveaway! There are 25 designers, each offering a different summer pattern. Use coupon code SUMMER2020 on Ravelry through 6/24/2020. These amazing patterns should keep you busy for quite a while this summer!

Summer Solstice Giveaway

My contribution to the roundup is also available at First Day of Summer – easy butterfly flip flop pattern. If you prefer video tutorials, please see YouTube.

National Zoo & Aquarium Month

June 50% off patterns continue with today’s animal being the Polar Bear. We still have over a week to go in June with lots more half price patterns. Thursday’s sale is also still available – Fish Dish Towel. Makes a great Father’s Day gift!

June2020calendar

National Zoo & Aquarium Month 2021 Blog Hop

Turtle Christmas Ornament

For the bargain shoppers among you, this week’s Etsy specials are 20% off yarn and 30% off select finished products.

King Snake crocheted in Bernat blanket yarn

king snake coiled

I spent this week working on a giant snake plushie. Bernat blanket yarn is so soft and squishy, I just love using it to make stuffed animals! The pattern is complete, but I need a couple of people to test it. If you would like to test, please join my Facebook group for the King snake and other testing opportunities. The snake in the photo measures 100″ long, and instructions are also given for a 66″ snake.

Panda Bear Eyeglass Holder

panda

For the Addi knitter, this cute panda pattern is quick and easy.

Panda Eyeglass Holder Addi Pattern

Have a safe and happy summer. Happy crocheting!


Posted on — Leave a comment

Bald Eagle Crochet Potholder

bald eagle potholder

Here I am, sitting at the airport waiting to start another California adventure. This time I will be going to Riverside and staying at the historic Mission Inn. It was built as a boarding house in 1876 and was designated as a historic landmark in 1977. Several wings have been added over the years, including the Cloister, the Spanish Wing, and the Rotunda Wing. The oldest bell in Christendom (dated 1247) is currently housed at the Mission Inn.

Mission Inn Courtyard https://www.missioninn.com/?gclid=Cj0KCQjw2K3rBRDiARIsAOFSW_4C161I284X84mXQgBoXYuGJG8vroDwt4zWgovjJz1ulM0iVeL_hQwaAg71EALw_wcB&gclsrc=aw.ds

I am so looking forward to exploring this beautiful inn and the surrounding Riverside community. What new designs will this trip inspire? I promise to take lots of photos and post them next week.

This week includes both Labor Day and V-J Day on September 2. V-J Day celebrates the day that Japan surrendered to the U.S. to end World War II on September 2, 1945. To honor the veterans of that war and all U.S. veterans, this week’s free pattern is a Bald Eagle Potholder.  Eagle Plushie Crochet Pattern is also available.

For PDF download, click here https://www.myfingersfly.com/products/bald-eagle-crochet-pattern

Materials:

Peaches & Crème cotton worsted yarn

½ oz. brown

½ oz. white

Few yards gold

1 yd black

Crochet hook size J (6.0 mm)

Yarn needle

Directions:

Row 1: With double strand of brown yarn, ch 16. Sc in 2nd ch from hook and each of th enext 14 chs (15 sc).

Rows 2-5: Ch 1, turn, sc in each st.

Rows 6-7: Ch 1, turn, dec, sc across (13 sc). Fasten off brown.

Row 8: Switch to white yarn. Ch 1, turn, sc in 1st st, *sk next st, 3 dc in corresponding st of Row 6, sk next st, sc in next st,* repeat twice.

Rows 9-10: Ch 1, turn, dec, sc across, dec (9 sc).

Rows 11-13: Repeat Row 6 (6 sc).

Rows 14-17: Ch 1, turn, sc in each st.

Row 18: Repeat Row 9. Fasten off white.

EDGING:

With right side facing, attach brown yarn at side of Row 7. Ch 1, sc in same st. Sc in each row end with 2 sc in last row end. Sc in each unused loop of beg ch with 2 sc in last ch. Continue up side with sc, changing to white at Row 8. Sc around head in same manner with 3 sc in corners. At center top of head, ch 6, sl st in same st for hanging loop.

BEAK:

With double strand of gold yarn, ch 4. Counting backwards on white sts, in 7th st from brown section, sl st in 7th st. Sc in 1st ch, 2 sc in next ch, sc in next ch, 3 sc in next ch. Working on opposite side of ch, dec, sc in last ch. Sl st in next white st on head. Fasten off with 12” length. Use this length for straight sts to better define the beak.

Use double strand of black to make French knot for the eye. Weave in all ends.

More Potholder Designs

Zoo Blog Hop Day 21 – Giraffes Beaver Smiling Duck Kitchen Crochet Pattern Ebook – 17 Patterns in PDF format


baby eagle


Baby Eagle Amigurumi Crochet Pattern


MFF Crochet Family       

Want to be the first to hear about new crochet patterns, exclusive sales, freebies, giveaways, crochet tips, and fun community discussions?

Come join our Facebook community and stay up to date on everything happening! Share your latest projects, connect with fellow crocheters, ask questions, and find plenty of inspiration along the way.

We’d love to have you stitch along with us!

https://www.facebook.com/share/g/1CYyuWsXEd/

Affiliate Links

This post contains affiliate links. This means I may earn a commission should you chose to sign up for a program or make a purchase using my link. It’s okay – I love all of these companies anyways, and you will too!

Lion Brand Yarn

Posted on — Leave a comment

🍑 Peachy Queen Goes to Atlanta: A Sweet Southern Adventure

peachy queen

When a Peachy Queen takes on Atlanta, you know it’s going to be a peach-perfect time! From skyline views to sweet tea sips, my recent trip to Georgia’s capital was filled with charm, creativity, and a whole lot of fun.

First Stop: The City That Blends Old & New


Atlanta has a way of mixing history with hip in the most fabulous way. I started my trip with a stroll through Centennial Olympic Park, where fountains danced under the sun and the energy was contagious. 

Southern Hospitality, Y’all 💁‍♀️

Next we stopped for a pulled pork sandwich. 

Crochet Came Along for the Ride 🧶

Naturally, my travel bag included a small project or two (okay, maybe five). I crocheted under magnolia trees and even got a few compliments at a café from fellow yarn lovers. Atlanta is definitely a city where creativity thrives!

Until Next Time, ATL! ✨

My heart (and suitcase) came back a little fuller after this Atlanta adventure. Whether you’re planning a trip or just daydreaming about your next getaway, I highly recommend following in the footsteps of this Peachy Queen and discovering all the sweet surprises Atlanta has to offer.

Stay peachy, y’all! 🍑👑

Peachy Queen Amigurumi

 Finished measures approximately 5 tall (including crown) by 6” wide (including arms).

 Materials:

Worsted weight yarn

      1.5 oz. peach

      A few yards yellow

      1 yard red

Crochet hook size G (4.0 mm)

Safety eyes

Fiberfill

Directions:

BODY:

Rnd 1: With peach yarn, ch 2. Sc 6 in second ch from hook. Do not join.

Rnd 2: 2 sc in each sc (12 sc).

Rnd 3: *1 sc in next sc, 2 sc in next sc,* repeat around (18 sc).

Rnd 4: *1 sc in next 2 sc, 2 sc in next sc*, repeat around (24 sc).

Rnd 5: *1 sc in next 3 sc, 2 sc in next sc*, repeat around (30 sc).

Rnd 6: *1 sc in next 4 sc, 2 sc in next sc,* repeat around (36 sc).

Rnd 7: *1 sc in next 5 sc, 2 sc in next sc,* repeat around (41 sc).

Rnds 8-14: Sc in each st.

Rnd 15: *Dec, sc in next 5 sc,* repeat around (36 sc).

Rnd 16: *Dec, sc in next 4 sc,* repeat around (30 sc).

Rnd 17: *Dec, sc in next 3 sc,* repeat around (24 sc).

Insert safety eyes at Rnd 12 approximately 5 sts apart. Embroider mouth in red. Stuff firmly.

Rnd 18: *Dec, sc in next 2 sc,* repeat around (18 sc).

Rnd 19: *Dec, sc in next sc,* repeat around (12 sc). Finish stuffing.

Rnd 20: Dec around (6 sc). Join with sl st. Fasten off peach leaving 6” length for sewing. Gather remaining 6 sts and pull tightly to close.  

LEGS: (Make 2)

Rnd 1: With peach yarn, ch 2. Sc 6 in second ch from hook. Do not join.

Rnd 2: 2 sc in each sc (12 sc).

Rnd 3: *1 sc in next 3 sc, 2 sc in next sc,* repeat around (15 sc).

Rnd 4: Sc in each st.

Rnd 5: *Dec, sc in next 3 sc *, repeat around (12 sc).

Rnds 6-8: Sc in each st. Join with sl st. Fasten off leaving 12” length for sewing.

ARMS: (Make 2)

Rnd 1: With peach yarn, ch 2. Sc 6 in second ch from hook. Do not join.

Rnd 2: 2 sc in each sc (12 sc).

Rnd 3: Sc in each st.

Rnd 4: *Dec, sc in next 2 sc *, repeat around (9 sc).

Rnds 5-6: Sc in each st. Join with sl st. Fasten off leaving 12” length for sewing.

Stuff arms and legs firmly and sew to body.

CROWN:

Rnd 1: With yellow yarn, ch 42, sc in 2nd ch and each ch to last ch, 3 sc in last ch. Working on opposite side of starting ch (mark 1st st), sc in each ch. Join with sl st in marked st.

Rnd 2: Ch 1, *sc, sk 2 sts, (3 dc, ch 3, sl st in 3rd ch, 3 dc) in next st, sk 2 sts,* repeat around, sl st in top of 1st sc. Fasten off leaving 12” length for sewing. Sew crown to top of head.

Weave in all ends.

PDF available at Peachy Queen Amigurumi Crochet Pattern – My Fingers Fly 

In Case You Missed It

butterfly flip-flops
Butterfly Flip-Flops
turtle earrings
Turtle Earrings