Posted on — 17 Comments

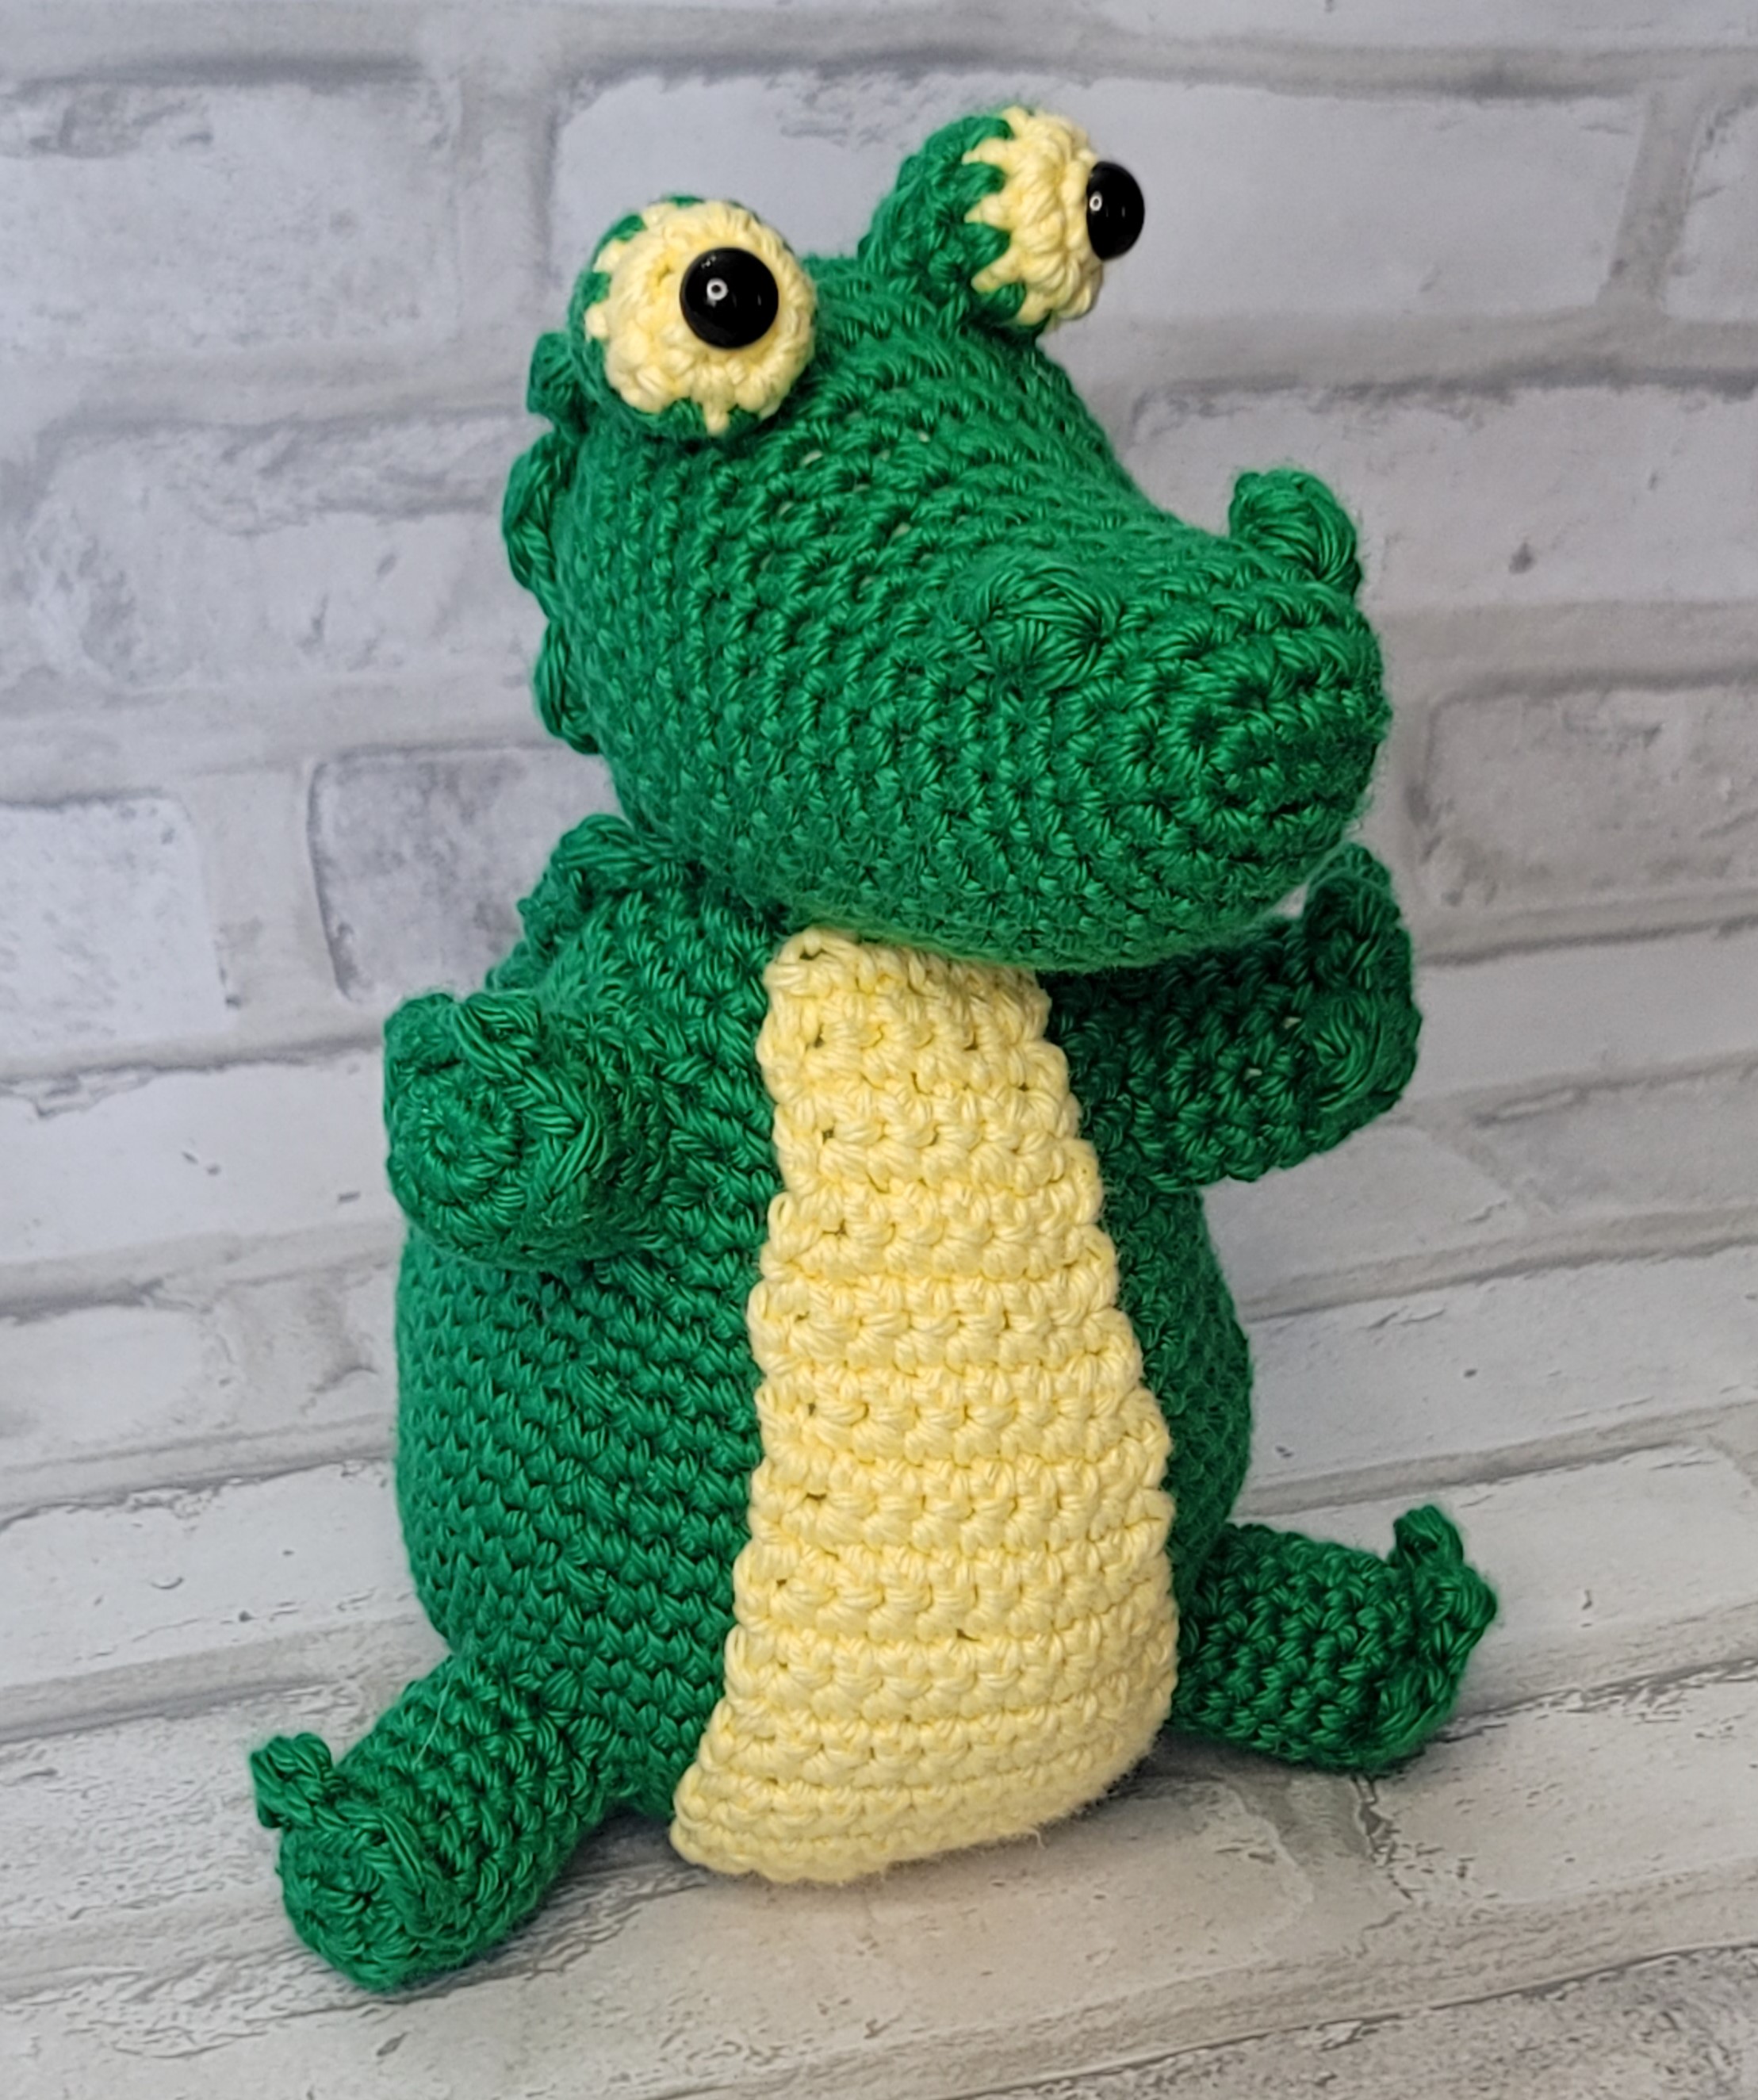
Baby Gator Amigurumi

baby gator amigurumi

Baby Gator Amigurumi

Materials:

I Love This Cotton:

3 oz. Bright Green

2 oz. Buttercup

Size F (3.75 mm) crochet hook

Yarn needle

Fiberfill

10 mm black safety eyes

Gauge (F hook) 9 sc = 2”, 10 rows sc = 2”


Finished alligator measures approximately 8” tall


Popcorn st: work 5 dc in same st. Insert hook through top of first dc, pull up lp from last dc, pull through first dc.


Directions:

BODY:

Rnd 1: With green yarn, ch 2 (or magic circle), 6 sc in 2nd ch from hook. Do not join. Work in continuous rnds throughout body.

Rnd 2: 2 sc in each sc around (12 sc).

Rnd 3: *Sc in next sc, 2 sc in next sc,* repeat around (18 sc).

Rnd 4: *Sc in next 2 sc, 2 sc in next sc,* repeat around (24 sc).

Rnd 5: *Sc in next 3 sc, 2 sc in next sc,* repeat around (30 sc).

Rnd 6: *Sc in next 4 sc, 2 sc in next sc,* repeat around (36 sc).

Rnd 7: *Sc in next 5 sc, 2 sc in next sc,* repeat around (42 sc).

Rnd 8: *Sc in next 6 sc, 2 sc in next sc,* repeat around (48 sc).

Rnd 9: *Sc in next 7 sc, 2 sc in next sc,* repeat around (54 sc).

Rnd 10: *Sc in next 8 sc, 2 sc in next sc,* repeat around (60 sc).

Rnds 11-15: Sc in each st.

Rnd 16: *Dec next 2 sc, sc next 8 sc,* repeat around (54 sc).

Rnd 17: Sc in each st.

Rnd 18: *Dec next 2 sc, sc next 7 sc,* repeat around (48 sc).

Rnd 19: Sc in each st.

Rnd 20: *Dec next 2 sc, sc next 6 sc,* repeat around (42 sc).

Rnds 21-22: Sc in each st.

Rnd 23: *Dec next 2 sc, sc next 5 sc,* repeat around (36 sc).

Rnds 24-25: Sc in each st.

Rnd 26: *Dec next 2 sc, sc next 4 sc,* repeat around (30 sc).

Rnds 27-28: Sc in each st.

Rnd 29: *Dec next 2 sc, sc next 3 sc,* repeat around (24 sc).

Rnd 30-31: Sc in each st. Join with sl st. Fasten off leaving 12” length for sewing. Stuff body firmly.


BELLY:

Row 1: With yellow yarn, ch 6, sc in 2nd ch from hook and in each remaining ch (5 sc).

Rows 2-3: Ch 1, turn, sc in each st.

Row 4: Ch 1, turn, inc first st, sc in remaining sts (6 sc).

Rows 5-6: Ch 1, turn, sc in each st.

Row 7: Ch 1, turn, inc first st, sc in remaining sts (7 sc).

Rows 8-9: Ch 1, turn, sc in each st.

Row 10: Ch 1, turn, inc first st, sc in remaining sts (8 sc).

Rows 11-12: Ch 1, turn, sc in each st.

Row 13: Ch 1, turn, inc first st, sc in remaining sts (9 sc).

Rows 14-15: Ch 1, turn, sc in each st.

Row 16: Ch 1, turn, inc first st, sc in remaining sts (10 sc).

Rows 17-18: Ch 1, turn, sc in each st.

Row 19: Ch 1, turn, inc first st, sc in remaining sts (11 sc).

Rows 20-23: Ch 1, turn, sc in each st.

Row 24: Ch 1, dec 1 st each end (9 sc).

Row 25: Ch 1, dec 1 st each end (7 sc).

Row 26: Ch 1, dec 1 st each end (5 sc).


TAIL:

Rnd 1: With green yarn, ch 2 (or magic circle), 2 sc in 2nd ch from hook. Do not join. Work in continuous rnds throughout tail.

Rnd 2: 2 sc in each st (6 sc).

Rnd 3: *Sc in next st, 2 sc in next st,* repeat twice (9 sc).

Rnd 4: *Sc in next 2 sts, 2 sc in next st,* repeat twice (12 sc).

Rnd 5: Sc in each st.

Rnd 6: *Sc in next st, 2 sc in next st,* repeat around (18 sc).

Rnd 7: Sc in each st.

Rnd 8: *Sc in next 2 sts, 2 sc in next st,* repeat around (24 sc).

Rnd 9: Sc in each st.

Rnd 10: *Sc in next 3 sts, 2 sc in next st,* repeat around (30 sc).

Rnds 11-12: Sc in each st. Join with sl st. Fasten off green leaving 12” tail for sewing. Stuff tail. Center on back and sew in place.


BACK LEGS: (Make 2)

Rnd 1: With green yarn, ch 2 (or magic circle), 6 sc in 2nd ch from hook. Do not join.

Rnd 2: 2 sc in each st (12 sc). Join with sl st in front loop only.

Toes – Rnd 3: Working in FLO, *sc, dc, sc in next st, sl st in next st,* repeat twice. Working in BLO, sc in next 6 sts. Working in BLO in loops leftover behind toes, sc in next 6 sts. Do not join.

Rnd 4: Working in both loops, sc in each st (12 sc).

Rnds 5-8: Sc in each st. Join with sl st. Stuff legs and sew to body at Rnds 8-12.


FRONT LEGS: (Make 2)

Repeat Rnds 1-6 of back legs. Sew to body at Rnds 24-28.


HEAD:

Rnd 1: With green yarn, ch 4, sc in 2nd ch, sc in next ch, 3 sc in last ch. Working on opposite side of starting ch, sc in next lp, 2 sc in last lp (8 sc). Do not join. Work in continuous rnds throughout head.

Rnd 2: 2 sc in first st, sc in next st, 2 sc in next 3 sts, sc in next st, 2 sc in next 2 sts (14 sc).

Rnd 3: *sc in next st, 2 sc in next st,* sc in next st, repeat * to * 3 times, sc in next st, repeat * to * twice (20 sc).

Rnd 4: Sc in each st.

Rnd 5: Sc in next 2 sts, popcorn st (nostril), sc in next 4 sts, popcorn st, sc in next 12 sts.

(Adjust placement of popcorn sts if needed to place nostrils on the top of the snout.)

Rnd 6: Sc in each st.

Rnd 7: *Sc in next 3 sts, 2 sc in next st,* repeat around (25 sc).

Rnds 8-10: Sc in each st.

Rnd 11: Sc in next 5 sts, 2 sc in next 5 sts (these increases should be at center top of head), sc in next 15 sts (30 sc).

Rnd 12: Sc in each st.

Rnd 13: Sc in next 8 sts, 2 sc in next 6 sts (center top), sc in next 16 sts (36 sc).

Rnds 14-18: Sc in each st.

Rnd 19: *Dec, sc in next 4 sts,* repeat around (30 sc).

Rnd 20: *Dec, sc in next 3 sts,* repeat around (24 sc). Stuff head.

Rnd 21: *Dec, sc in next 2 sts,* repeat around (18 sc).

Rnd 22: *Dec, sc in next st,* repeat around (12 sc). Finish stuffing head.

Rnd 23: Dec around (6 sc). Join with sl st. Close with  ultimate finish technique.

Sew Rnds 13-20 of head to top of body.


EYES: (Make 2)

Rnd 1: With yellow yarn, ch 2 (or magic circle), 5 sc in 2nd ch from hook. Do not join.

Rnd 2: 2 sc in each st (10 sc). Fasten off yellow.

Rnds 3-4: With green yarn, sc in each st.

Insert safety eyes into center of Rnd 1. Stuff eye.

Rnd 5: Dec around (5 sc). Close Rnd 5 and sew eyes to head at Rnds 14-16 approximately 3 sts (1/2”) apart.

SPIKES:

Mark a line with CC yarn from behind the eye to the tip of the tail, then back up to behind the other eye. Join green yarn behind one eye, *sc, dc, sc in same st, sl st in next row,* repeat down to the tail with last spike at the center point of the tail. Work in same pattern up to behind the other eye. Remove marking yarn.

More Amigurumi Patterns

Zoo Blog Hop Day 14 – Alligators!

Zoo Blog Hop Day 21 – Zebras

National Zoo & Aquarium Month Blog Hop, Day 1 World Reef Awareness Day

Miles the Jazzy Elephant Amigurumi

Jack the Sloth

Eagle Plushie Crochet Pattern

Peachy Queen Amigurumi

Addi Fat Cat Pattern

Toy Soldier Cuddler

A to Z Animal Crochet Patterns Ebook


Affiliate Links:

This post contains affiliate links. If you use these links to purchase your yarn and supplies, I may earn a commission. Thanks for helping support my crochet blog. 

Lion Brand Yarn

Posted on — 5 Comments

Benjamin Turtle CAL Part 3

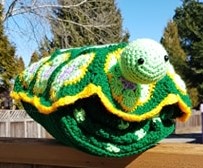
TGIF! I hope everyone is enjoying the Benjamin Turtle pattern. Today’s post is the final one for this crochet-along. You will be making the bottom flap and assembling the nap buddy.

Directions:

Bottom:

Row 1: With Dark Olive yarn, ch 30, hdc in 2nd ch and in each ch across (29 hdc).

Rows 2-4: Ch 1, turn, 2 hdc in first st, hdc across (32 hdc at end of Row 4).

Row 5: Ch 1, turn, 1 hdc, ch 1, sk next st, 30 hdc.

Row 6: Ch 1, turn, hdc in each hdc and ch-1 sp.

Rows 7-14: Ch 1, turn, hdc in each st.

Rows 15-24: Repeat Rows 5-14.

Rows 25-26: Repeat Rows 5-6.

Rows 27-29: Ch 1, turn, dec over first 2 sts, hdc across (29 hdc at end of Row 29). Do not fasten off.

Edging:

Ch 1, turn, hdc in each st across top, down side, across unused loops on bottom, and up the other side with 2 hdc in each corner. Join with sl st. Fasten off leaving 12” length for sewing.

Finished flap measures approximately 10” x 11”.

Assembly:

turtle blanket centers

Mark centers of blanket and turtle. Measure from center, 5” to left and 5” to right and pin blanket to turtle at these spots. Sew center 10” of blanket to turtle using Dark Olive yarn and back stitch. For extra security, sew edges of blanket to turtle with whip st.

Fold blanket into thirds and roll it, then fit it inside the turtle. Pin bottom flap centered over the blanket/turtle seam and sew in place.

turtle bottom flap

Sew buttons to bottom of shell corresponding to buttonholes in bottom flap.

turtle buddy bottom 

Head:

Rnd 1: Ch 2 (or magic circle), 6 sc in 2nd ch. Do not join. Work in continuous rnds throughout head.

Rnd 2: 2 sc in each st (12 sc).

Rnd 3: *Sc in next st, 2 sc in next st,* repeat around (18 sc).

Rnd 4: *Sc in next 2 sts, 2 sc in next st,* repeat around (24 sc).

Rnd 5: *Sc in next 3 sts, 2 sc in next st,* repeat around (30 sc).

Rnds 6-9: Sc in each st.

Rnd 10: *Dec, sc in next 3 sts,* repeat around (24 sc).

Rnd 11: Sc in each st.

Insert eyes at Rnd 4, approximately 1” apart.

Rnd 12: *Dec, sc in next 2 sts,* repeat around (18 sc).

Rnds 13-16: Sc in each st. Join with sl st. Fasten off leaving 12” length.

Stuff head and sew to front of turtle at the top edge of the center hexagon. Weave in all ends.

turtle buddy both small

Part 1 of the CAL can be found at Benjamin Turtle Nap Buddy CAL.

Part 2 of the CAL can be found at Benjamin Turtle Nap Buddy CAL Part 2.

Free Turtle Jewelry Pattern

Four Free Turtle Patterns

Please post your turtle photos to Facebook or Instagram.

Rainbow Nap Buddy

Bunny Nap Buddy Crochet Pattern

Summer Solstice Giveaway

I am thrilled to be a part of this amazing crochet pattern giveaway! There are 25 designers, each offering a different summer pattern. Use coupon code SUMMER2020 on Ravelry through 6/24/2020. These amazing patterns should keep you busy for quite a while this summer!

Summer Solstice Giveaway

My contribution to the roundup is also available at First Day of Summer – easy butterfly flip flop pattern. If you prefer video tutorials, please see YouTube.

National Zoo & Aquarium Month

June 50% off patterns continue with today’s animal being the Polar Bear. We still have over a week to go in June with lots more half price patterns. Thursday’s sale is also still available – Fish Dish Towel. Makes a great Father’s Day gift!

June2020calendar

National Zoo & Aquarium Month 2021 Blog Hop

Turtle Christmas Ornament

For the bargain shoppers among you, this week’s Etsy specials are 20% off yarn and 30% off select finished products.

King Snake crocheted in Bernat blanket yarn

king snake coiled

I spent this week working on a giant snake plushie. Bernat blanket yarn is so soft and squishy, I just love using it to make stuffed animals! The pattern is complete, but I need a couple of people to test it. If you would like to test, please join my Facebook group for the King snake and other testing opportunities. The snake in the photo measures 100″ long, and instructions are also given for a 66″ snake.

Panda Bear Eyeglass Holder

panda

For the Addi knitter, this cute panda pattern is quick and easy.

Panda Eyeglass Holder Addi Pattern

Have a safe and happy summer. Happy crocheting!


Posted on — 3 Comments

Benjamin Turtle Nap Buddy CAL Part 2

Good morning everyone! We had a cool front come in this week with gorgeous morning temps. It will be a hot one in the afternoon, but I’ve been enjoying my morning coffee on the patio enjoying the 70-degree weather.

Benjamin is proving to be as popular with crocheters as I had hoped – he’s just so cute! Please share your color combinations on Instagram or Facebook. This week we’ll be making the African flower motifs for his shell and putting them together. Next week will be making the turtle head and bottom flap, then attaching the blanket to the turtle shell.

Part 1 is available at Benjamin Turtle Nap Buddy CAL.

Part 3 is available at Benjamin Turtle CAL Part 3

Free Turtle Jewelry Pattern

Turtle Directions

African Flower (Make 10):

Rnd 1: With Sungold yarn, Magic Ring (MR), ch 3 (counts as dc), dc, ch 1, *2 dc, ch 1,* repeat 4 times, join with sl st in top of beg ch-3. Fasten off Sungold.

Rnd 2: Attach Mild Green yarn in any ch-1 sp, ch 3 (counts as dc), dc, ch 1, 2 dc in same sp, (2 dc, ch 1, 2 dc) in next 5 ch-1 sps. Join with sl st in top of beg ch-3.

Rnd 3: Sl st into ch-1 sp, ch 3 (counts as dc), 6 dc in same ch-1 sp, 7 dc in remaining 5 ch-1 sps. Join with sl st in top of beg ch-3. Fasten off Mild Green.

Rnd 4: Attach Toasted Almond yarn at first dc of any 7-dc group, ch 1, *sc in each of 7 dc across top of shell, sc in sp between shells two rows below in Rnd 2,* repeat 5 times. Join with sl st in top of first sc. Fasten off Toasted Almond yarn.

Rnd 5: Attach Dark Olive Yarn, ch 1 (does not count as st), *hdc in each of 8 sc across side of hexagon, ch 1,* repeat 5 times. Join with sl st in top of first hdc. Fasten off Dark Olive Yarn. Block squares and sew together in the following configuration.

turtle assembly

Each side of the hexagon is 8 hdc with a ch at each end. Sew these sts together. On the hexagons that form the outer edge (as indicated in photo below by arrows), continue this seam for an additional 4 sts.

turtle hexagon arrows

Edging:

Rnd 1: Attach Dark Olive yarn at any st, ch 3 (counts as dc), dc in next st and each st around. Some hexagons will still have ch-1 sps. Skip these. At seam, work dc dec across both sides of seam. Join with sl st in top of ch-3. Fasten off Dark Olive.

Rnd 2: Attach Sungold yarn, ch 1, sc in same st, *sk 2 sts, 6 dc in next st, sk 2 sts, sc in next st,* repeat around. It may be necessary to manipulate the skipped sts towards the end of the rnd in order to finish with a shell st rather than a sc. Join with sl st in first sc. Fasten off Sungold.

Don’t hesitate to reach out if you have any questions on this pattern. The pattern PDF is available at My Fingers Fly. If you prefer Ravelry, turtles are the featured animal on June 13 – Benjamin Turtle. Each day in June, a different animal pattern is half price.

Rainbow Nap Buddy

Bunny Nap Buddy Crochet Pattern

More Turtle Patterns

World Oceans Day – 4 Free Turtle Patterns

Free Turtle Earrings Pattern

Turtle Christmas Ornament

June2020calendar

National Zoo & Aquarium Month 2021 Blog Hop

Last year I published an Elephant Crochet Pattern ebook, but I just wasn’t satisfied with the amount of patterns, so I added a few more patterns. The ebook PDF is now available on Etsy and My Fingers Fly. Kindle and paperback versions are also available on Amazon. ElephantBookCover

Miles the Jazzy Elephant was so much fun to make; I hope you’ll enjoy him too. Elephant patterns are also available separately on Ravelry, Etsy, Lovecrafts, and My Fingers Fly. Also included in the book is an Elephant Ear Saver Crochet Pattern (free on the blog).

Miles and Benjamin will both be included in my next book, A to Z Animal Crochet. Animal patterns are so much fun!

I still have a few 2020 Crochet Calendars left – just pay shipping. Even though the year is almost half gone, the 12 kitchen crochet patterns can be used forever.

Stay safe and happy crocheting!

Posted on — 2 Comments

St. Patrick’s Day

Since all the events for which I had tickets were cancelled or postponed, today’s blog post is a simple one. I hope everyone has a happy St. Patrick’s Day and stays safe through this crisis. There are over 30 free patterns posted in the past year of this blog to keep your hands busy and your mind occupied. Crochet away!

Pot of Gold Potholder Crochet Pattern

potofgold

Materials:

Peaches & Cream cotton yarn – 1 oz black, ¼ oz gold, few yards green

Size G and J crochet hooks

Yarn needle

Directions:

POT:

Row 1: Holding 2 strands of black yarn together, ch 16, sc in 2nd ch from hook and each ch across (15 sc).

Rows 2-5: Ch 1, turn, inc, sc across (19 sc at end of Row 5).

Rows 6-7: Ch 1, turn, sc in each sc across.

Rows 8-12: Ch 1, turn, dec over 1st 2 sts, sc across (14 sc at the end of Row 12). Ch 1, turn to work down side. Sc down side, across bottom, and up other side making sure right and left sides have the same number of sts. Working across top in front loop only, sc across. Join. Ch 8, sl st in same st (hanging loop).

GOLD:

With double strand of gold or yellow yarn, attach in remaining back loop. *Sl st, sk 1 st, 5 dc next st,* repeat across ending with sl st in 13th st. Fasten off.

SHAMROCK:

With G hook and single strand of green yarn, ch 4, 3 dc, ch 3, sl st in 4th ch from hook, *ch 3, 3 dc, ch 3, sl st,* repeat once. Ch 5, sl st in 2nd ch from hook, sl st in next 3 ch, sl st in beg ch. Fasten off leaving length for sewing. Using photo for placement, sew shamrock onto front of potholder.

More Kitchen Crochet Patterns

Ghost Chair Socks

Mission Inn, Riverside – Bald Eagle Crochet Potholder – Labor Day Sale

National Ice Cream Month

New York Trip, Lion Yarn Studio – Free Father’s Day Pattern – New Unicorn Pattern

Posted on — 11 Comments

Free Polar Bear Pillow Crochet Pattern – Leap Year BOGO Sale – Xtreme Bulls

polar bear pillow

San Antonio Livestock Show & Rodeo

Rodeo is an annual ritual for my family; this year we attended the Xtreme Bulls competition with the concert afterward by Whiskey Myers. I have to admit, I bought the tickets based on the bulls and had never heard of Whiskey Myers. They are a southern rock group from Palestine, Texas, and their concert was amazing! If you like good southern rock and awesome guitarists, definitely check them out. Their sound was obviously influenced by Lynyrd Skynyrd and ZZ Top, but I could also hear hints of CCR and the Beatles, along with a bit of country music. Tony Kent playing cowbell – WOW!

Xtreme Bulls with Whiskey Myers

20200222_151658

Crochet – Texas Style Book

mock up (1)

I am super proud of my latest book containing crochet patterns with a Texas theme. Over 30 patterns cover a wide range of Texas, including travel, industry, symbols, wildlife, and Christmas in Texas. To see a slideshow of pattern photos, visit Crochet – Texas Style Patterns.

The book is available as a PDF download at My Fingers Fly. With over 30 patterns included at only $15.99, that’s less than 50 cents a pattern. Increase your savings this week with my Leap Year Sale through March 2 – Buy 1, Get 3 Free patterns. All these patterns are also available separately from 99 cents to $5.50 each.

Crochet – Texas Style is also available on Amazon as Kindle download or paperback book. Amazon

Polar Bear Pillow Crochet Pattern

February 27 is Polar Bear Day, so I have designed a quick and easy pattern for polar bear fans. PDF Download

polar bear on bed

Materials: 

  • Bernat Beyond super bulky yarn  –  10 oz. white, 10 yards black
  • Size J (6.00 mm) crochet hook
  • Yarn needle
  • Fiberfil (7 oz.)

Gauge: 3 sts = 1”, 3 rows = 1”

Finished bear measures approximately 12” diameter.

DIRECTIONS:
BACK:

Rnd 1: With white yarn, ch 2 (or magic circle), 6 sc in 2nd ch from hook. Do not join. Work in continuous rnds throughout.

Rnd 2: 2 sc in each st (12 sc).

Rnd 3: *Sc in next st, 2 sc in next st,* repeat around (18 sc).

Rnd 4: *Sc in next 2 sts, 2 sc in next st,* repeat around (24 sc).

Rnd 5: *Sc in next 3 sts, 2 sc in next st,* repeat around (30 sc).

Rnd 6: *Sc in next 4 sts, 2 sc in next st,* repeat around (36 sc).

Rnd 7: *Sc in next 5 sts, 2 sc in next st,* repeat around (42 sc).

Rnd 8: *Sc in next 6 sts, 2 sc in next st,* repeat around (48 sc).

Rnd 9: *Sc in next 7 sts, 2 sc in next st,* repeat around (54 sc).

Rnd 10: *Sc in next 8 sts, 2 sc in next st,* repeat around (60 sc).

Rnd 11: *Sc in next 9 sts, 2 sc in next st,* repeat around (66 sc).

Rnd 12: *Sc in next 10 sts, 2 sc in next st,* repeat around (72 sc).

Rnd 13: *Sc in next 11 sts, 2 sc in next st,* repeat around (78 sc).

Rnd 14: *Sc in next 12 sts, 2 sc in next st,* repeat around (84 sc).

Rnd 15: *Sc in next 13 sts, 2 sc in next st,* repeat around (90 sc).

Rnd 16: *Sc in next 14 sts, 2 sc in next st,* repeat around (96 sc).

Rnd 17: *Sc in next 15 sts, 2 sc in next st,* repeat around (102 sc).

Rnd 18: *Sc in next 16 sts, 2 sc in next st,* repeat around (108 sc).

Rnd 19: *Sc in next 17 sts, 2 sc in next st,* repeat around (114 sc).

Rnd 20: *Sc in next 18 sts, 2 sc in next st,* repeat around (120 sc). Join with sl st. Fasten off.

FRONT:

Row 1: With black yarn, ch 2, 1 sc in 2nd ch from hook.

Row 2: Ch 1, turn, 2 sc in sc (2 sc).

Row 3: Ch 1, turn, 2 sc in first st, sc in next st (3 sc).

Rnd 4: Ch 1, turn,  2 sc in first st, sc in next st, 2 sc in last st. Turn to work 3 sc down side, 2 sc in unused loop of starting ch, 3 sc up the other side. Join with sl st (13 sc). Fasten off black yarn.

Rnd 5: Switch to white yarn. Ch 1, working in BLO, sc in next 5 sts, (2 sc, sc, 2 sc) down side, sc in next st, 2 sc in next st, (2 sc, sc, 2 sc) up other side. Join with sl st (18 sc).

Rnd 6: Ch 1, working in both loops, *sc in next 5 sts, 2 sc in next st,* repeat around (21 sc). Do not join. From this point on, work in continuous rnds.

Rnd 7: *Sc in next 6 sts, 2 sc in next st,* repeat around (24 sc).

Rnd 8: *Sc in next 7 sts, 2 sc in next st,* repeat around (27 sc).

Rnd 9: *Sc in next 8 sts, 2 sc in next st,* repeat around (30 sc).

Rnd 10: *Sc in next 9 sts, 2 sc in next st,* repeat around (33 sc).

Rnd 11: *Sc in next 10 sts, 2 sc in next st,* repeat around (36 sc).

Rnd 12: *Sc in next 5 sts, 2 sc in next st,* repeat around (42 sc).

Rnd 13: *Sc in next 6 sts, 2 sc in next st,* repeat around (48 sc).

Rnd 14: *Sc in next 7 sts, 2 sc in next st,* repeat around (54 sc).

Rnd 15: *Sc in next 8 sts, 2 sc in next st,* repeat around (60 sc).

Rnd 16: *Sc in next 9 sts, 2 sc in next st,* repeat around (66 sc).

Rnd 17: *Sc in next 10 sts, 2 sc in next st,* repeat around (72 sc).

Rnd 18: *Sc in next 11 sts, 2 sc in next st,* repeat around (78 sc).

Rnd 19: *Sc in next 12 sts, 2 sc in next st,* repeat around (84 sc).

Rnd 20: *Sc in next 13 sts, 2 sc in next st,* repeat around (90 sc).

Rnd 21: *Sc in next 14 sts, 2 sc in next st,* repeat around (96 sc).

Rnd 22: *Sc in next 15 sts, 2 sc in next st,* repeat around (102 sc).

Rnd 23: *Sc in next 16 sts, 2 sc in next st,* repeat around (108 sc).

Rnd 24: *Sc in next 17 sts, 2 sc in next st,* repeat around (114 sc).

Rnd 25: *Sc in next 18 sts, 2 sc in next st,* repeat around (120 sc). Join with sl st. Do not fasten off.

EYES: (Make 2)

With black yarn, ch 2 (or magic circle), 6 sc in 2nd ch from hook. Join with sl st. Fasten off leaving 6” length for sewing. Sew eyes to face above the snout.

EDGING:

Pick up yarn where you left off on front. Holding front and back together with wrong sides facing, sc through both thicknesses with white yarn, stuffing as you go. Join with sl st. Fasten off.

EARS: (Make 2)

Rnd 1: Ch 2 (or magic circle), 6 sc in 2nd ch from hook. Do not join. Work in continuous rnds throughout.

Rnd 2: 2 sc in each st (12 sc).

Rnds 3-4: Sc in each st. Join with sl st. Fasten off leaving 12” length for sewing.   Sew ears to top of head using photo for placement.

More Pillow Patterns

Axolotl Pillow

Taco Pillow Pattern

Roller Skate Pillow Crochet Pattern

Van Gogh’s Sunflowers in Crochet

More Bear Patterns

Zoo Blog Hop Day 5 – National Black Bear Day

Follow me on Instagram or Facebook for new pattern releases and special offers. Please come back next week when I will be a featured designer for National Crochet Month.