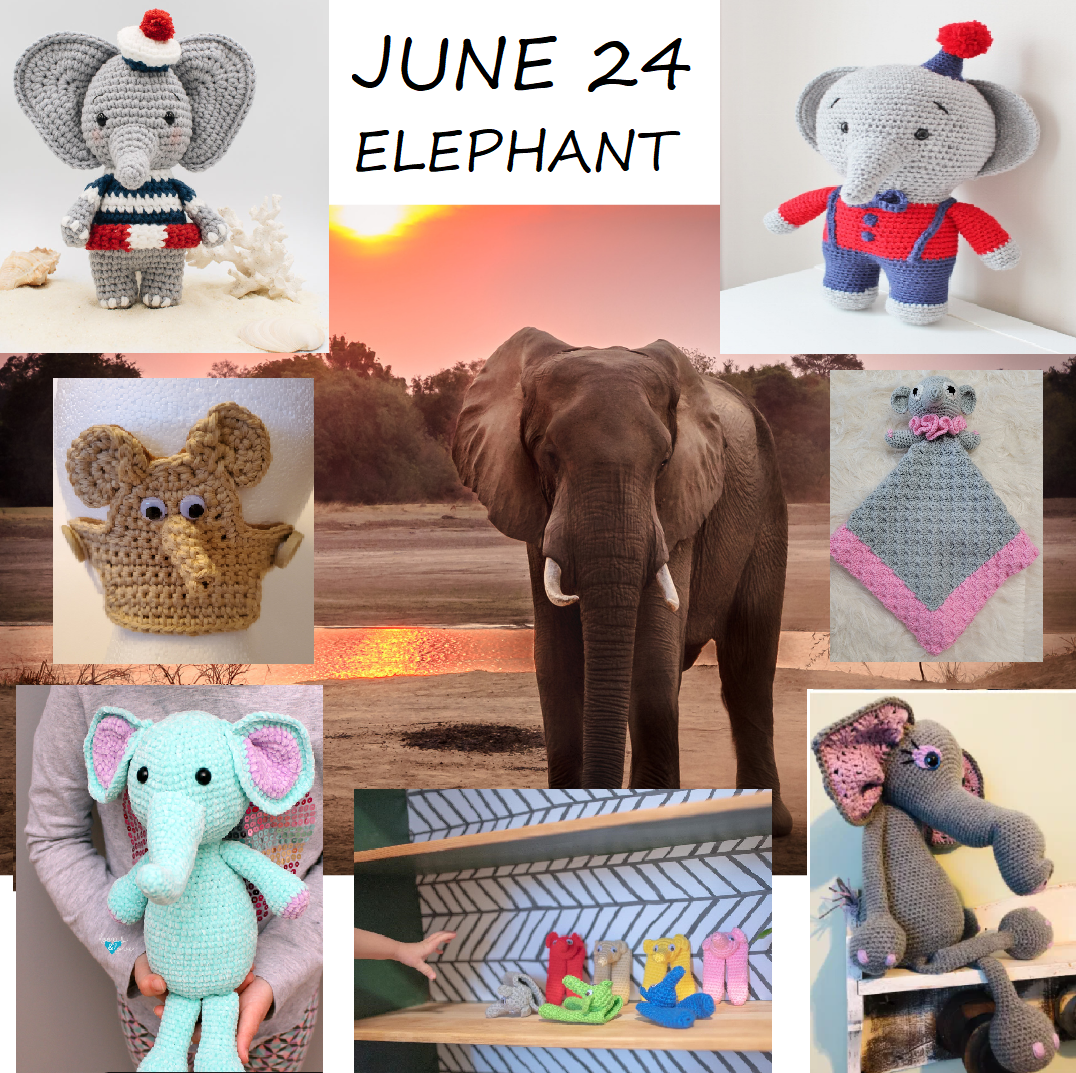
There are many reasons why people love elephants so much. They are intelligent, social, gentle, and have a number of unique features that make them fascinating creatures. It is no wonder that they have captured our hearts for centuries.
Elephants have been used as symbols of peace, wisdom, and strength for centuries. They are often seen as a reminder of the importance of these qualities in the world.
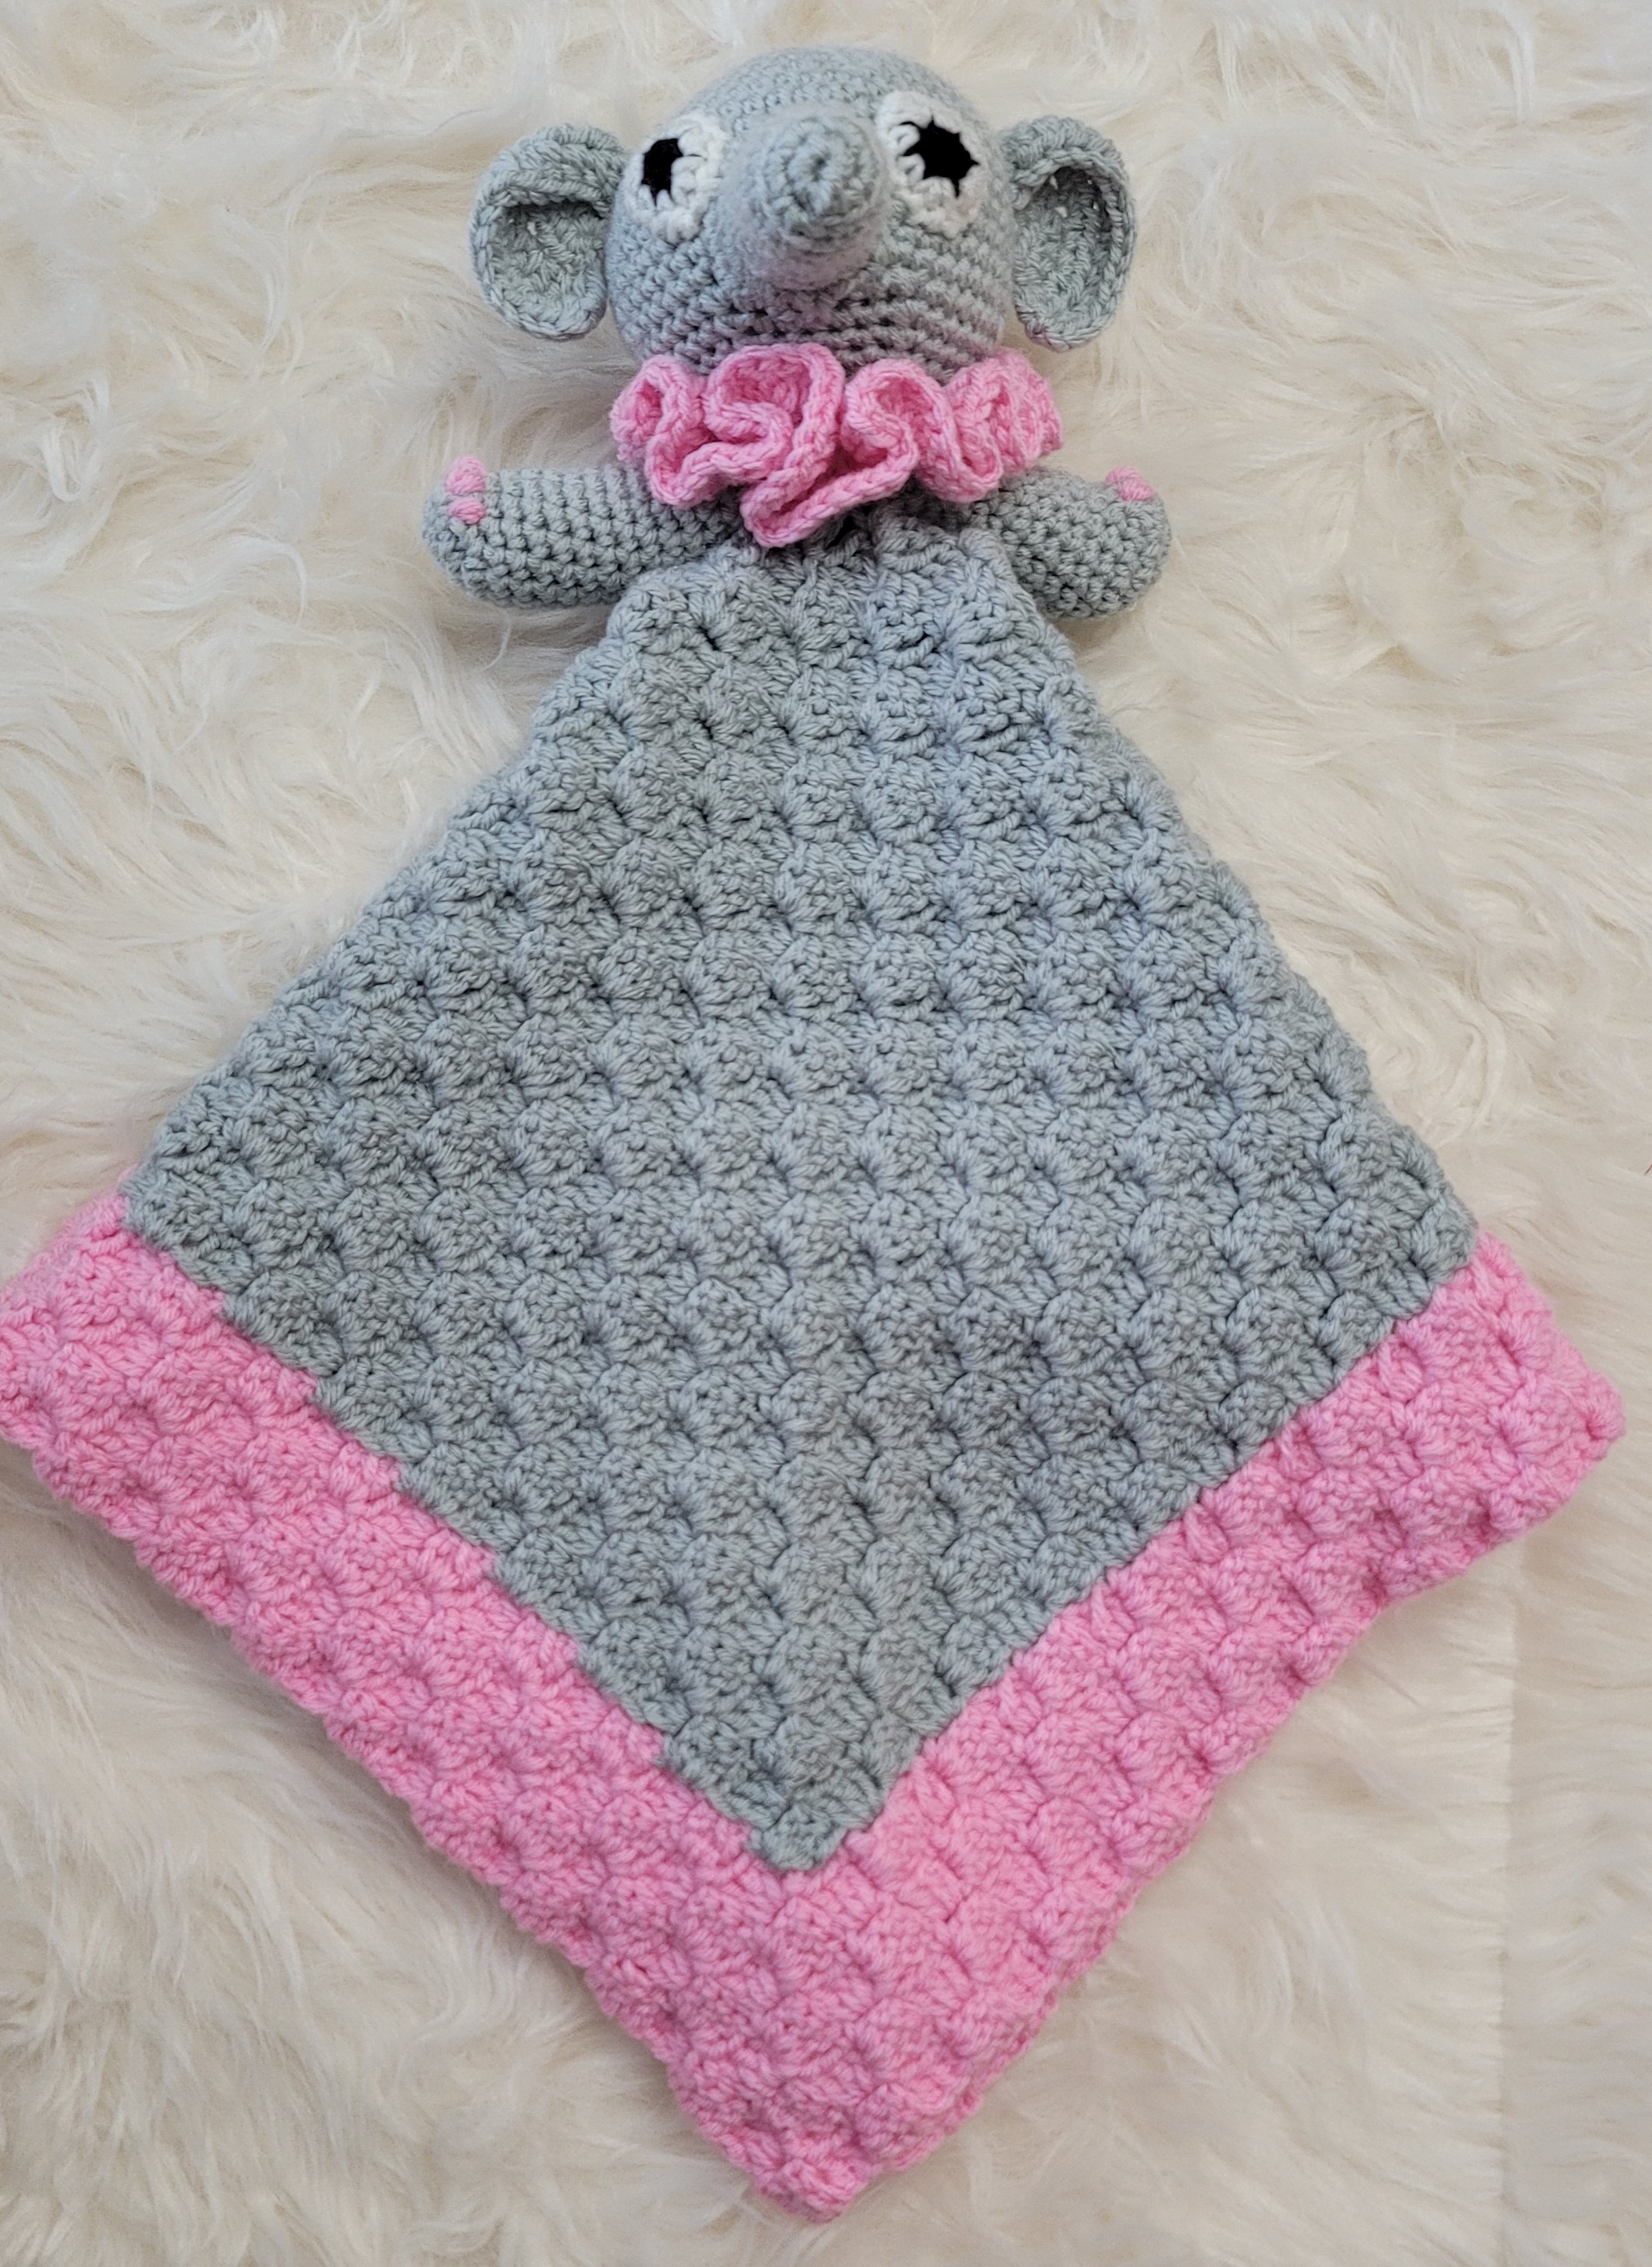
If you’re looking for the perfect handmade gift for a baby shower, look no further than this adorable Elephant Lovey crochet pattern! Combining the softness of a lovey blanket with the charm of an elephant plush, this project is sure to become a treasured keepsake.
Whether you’re an experienced crocheter or just starting out, this pattern is beginner-friendly and works up quickly with basic stitches and simple shaping.
The head is crocheted in the round using single crochet stitches. The ears, trunk, and eyes are worked separately and sewn on.
The blanket portion is crocheted in a square using the corner-to-corner method. Instructions are given in chart format and also line-by-line directions. Choose soft yarn for maximum snuggle!
Pretty in Pink Elephant Lovey
Materials:
Worsted weight yarn
10 oz. gray
5 oz. pink
2 yards white
1 yard black
Size G (4.0 mm) crochet hook
Yarn needle
Fiberfil
Gauge: 4 squares = 2.5”
Finished blanket measures 24” x 24”
Directions:
HEAD:
Rnd 1: With gray yarn, ch 2 (or magic ring), 6 sc in 2nd ch from hook. Do not join. Work in continuous rnds throughout unless otherwise specified.
Rnd 2: 2 sc in each st (12 sc).
Rnd 3: *Sc in next st, 2 sc in next st, repeat around (18 sc).
Rnd 4: *Sc in each of next 2 sts, 2 sc in next st, * repeat around (24 sc).
Rnd 5: *Sc in each of next 3 sc, 2 sc in next st,* repeat around (30 sc).
Rnd 6: *Sc in each of next 4 sts, 2 sc in next st,* repeat around (36 sc).
Rnd 7: *Sc in each of next 5 sc, 2 sc in next st,* repeat around (42 sc).
Rnd 8: *Sc in each of next 6 sts, 2 sc in next st,* repeat around (48 sc).
Rnds 9-16: Sc in each st.
Rnd 17: *Dec, sc in next 6 sts,* repeat around (42 sc).
Rnd 18: *Dec, sc in next 5 sts,* repeat around (36 sc).
Rnd 19: *Dec, sc in next 4 sts,* repeat around (30 sc).
Rnd 20: *Dec, sc in next 3 sts,* repeat around (24 sc). Stuff head with Fiberfil.
Rnd 21: *Dec, sc in next 2 sts,* repeat around (18 sc).
Rnd 22: Sc in each st.
Rnd 23: *Dec, sc in next st,* repeat around (12 sc).
Rnd 24: Sc in each st. Complete stuffing.
Rnd 25: *Dec around (6 sc). Join with sl st. Fasten off leaving 6” length. Thread this length through needle and pull through outer loop of remaining 6 sts. Pull tight to close.
Row 3: Ch 1, turn, *2 hdc in next st, hdc in next st,* repeat 3 times (12 hdc).
Row 4: Ch 1, turn, *2 hdc in next st, hdc in next 2 sts,* repeat 3 times (16 hdc).
Row 5: Ch 1, turn, *2 hdc in next st, hdc in next 3 sts,* repeat 3 times (20 hdc). (For bull elephant, work additional 2 rows with 4 inc evenly spaced across row.)
Sl st in base of 1st st of Row 3 to tuck top of ear down.
Fasten off leaving length for sewing. Sew 1 ear to each side of head with tops of ears at Rnd 9 of head. Leave the bottom half of the ear dangling.
TRUNK:
Rnd 1: With gray yarn, ch 2 (or magic ring), 6 sc in 2nd ch from hook. Do not join. Work in continuous rnds throughout trunk.
Rnd 2: 2 sc in each st (12 sc).
Rnd 3: Working in BLO, sc in each st.
Rnds 4-10: Working in both loops, sc in each st.
Rnd 11: 2 sc in each st (24 sc). Fasten off leaving 12” length for sewing. Sew trunk to front of head at Rnds 11-17.
EYES:
Rnd 1: With black yarn, ch 2 (or magic ring), 6 sc in 2nd ch from hook. Join with sl st. Fasten off black.
Rnd 2: With white yarn, 2 sc in each st (12 sc). Join with sl st. Fasten off white leaving length for sewing. Sew eyes to face at Rnds 7-10.
RUFFLE:
Rnd 1: With pink yarn, ch 20. Join with sl st. Work 3 dc in each ch. (60 dc). Join with sl st.
Rnd 2: Work 3 dc in each st (180 dc). Join with sl st. Fasten off leaving 12” length for sewing. Sew ruffle to bottom of head.
LEGS: (Make 2)
Rnd 1: With gray yarn, ch 2 (or magic ring), 6 sc in 2nd ch from hook. Do not join.
Rnd 2: 2 sc in each st (12 sc).
Rnd 3: *Sc in next st, 2 sc in next st, repeat around (18 sc).
Rnd 4: *Dec 4 times, sc in next 10 sts (14 sc).
Rnds 5-16: Sc in each st. Fasten off leaving length for sewing.
With pink yarn, embroider 4 toes at decs in Rnd 3. Stuff legs leaving last ½” empty. Lay legs flat and sew to bottom of head approximately 1” apart.
C2C BLANKET CHART:
C2C BLANKET DIRECTIONS:
Row 1: With pink yarn, ch 6, dc in 4th, 5th, and 6th chs from hook. This makes your first C2C square.
Row 2: Ch 5, turn, dc in 3rd, 4th, and 5th chs, join with sl st in top of previous square. Ch 2, work 3 dc in ch space of previous row. Working in the same manner for each inc row will create a new square in each row.
Row 3: Ch 5, turn, dc in 3rd, 4th, and 5th chs, join with sl st in top of previous square. *Ch 2, work 3 dc in ch space of previous row, * repeat once.
Row 4: Ch 5, turn, dc in 3rd, 4th, and 5th chs, join with sl st in top of previous square. *Ch 2, work 3 dc in ch space of previous row, * repeat twice.
Working in the same manner of increases through Row 40:
Row 5: 5 pink squares
Row 6: 6 pink squares
Row 7: 7 pink squares
Row 8: 8 pink squares
Row 9: 4 pink, 1 gray, 4 pink squares (9 sq)
Row 10: 4 pink, 2 gray, 4 pink squares (10 sq)
Row 11: 4 pink, 3 gray, 4 pink squares (11 sq)
Row 12: 4 pink, 4 gray, 4 pink squares (12 sq)
Row 13: 4 pink, 5 gray, 4 pink squares (13 sq)
Row 14: 4 pink, 6 gray, 4 pink squares (14 sq)
Row 15: 4 pink, 7 gray, 4 pink squares (15 sq)
Row 16: 4 pink, 8 gray, 4 pink squares (16 sq)
Row 17: 4 pink, 9 gray, 4 pink squares (17 sq)
Row 18: 4 pink, 10 gray, 4 pink squares (18 sq)
Row 19: 4 pink, 11 gray, 4 pink squares (19 sq)
Row 20: 4 pink, 12 gray, 4 pink squares (20 sq)
Row 21: 4 pink, 13 gray, 4 pink squares (21 sq)
Row 22: 4 pink, 14 gray, 4 pink squares (22 sq)
Row 23: 4 pink, 15 gray, 4 pink squares (23 sq)
Row 24: 4 pink, 16 gray, 4 pink squares (24 sq)
Row 25: 4 pink, 17 gray, 4 pink squares (25 sq)
Row 26: 4 pink, 18 gray, 4 pink squares (26 sq)
Row 27: 4 pink, 19 gray, 4 pink squares (27 sq)
Row 28: 4 pink, 20 gray, 4 pink squares (28 sq)
Row 29: 4 pink, 21 gray, 4 pink squares (29 sq)
Row 30: 4 pink, 22 gray, 4 pink squares (30 sq)
Row 31: 4 pink, 23 gray, 4 pink squares (31 sq)
Row 32: 4 pink, 24 gray, 4 pink squares (32 sq)
Row 33: 4 pink, 25 gray, 4 pink squares (334 sq)
Row 34: 4 pink, 26 gray, 4 pink squares (34 sq)
Row 35: 4 pink, 27 gray, 4 pink squares (35 sq)
Row 36: 4 pink, 28 gray, 4 pink squares (36 sq)
Row 37: 4 pink, 29 gray, 4 pink squares (37 sq)
Row 38: 4 pink, 30 gray, 4 pink squares (38 sq)
Row 39: 4 pink, 31 gray, 4 pink squares (39 sq)
Row 40: 4 pink, 32 gray, 4 pink squares (40 sq)
DECREASE ROWS:
Turn, sl st across last square made, sl st into next square, ch 2, work 3 dc in ch space of that square. This will decrease 1 square each row.
Row 41: 4 pink, 31 gray, 4 pink squares (39 sq)
Row 42: 4 pink, 30 gray, 4 pink squares (38 sq)
Row 43: 4 pink, 29 gray, 4 pink squares (37 sq)
Row 44: 4 pink, 28 gray, 4 pink squares (36 sq)
Row 45: 4 pink, 27 gray, 4 pink squares (35 sq)
Row 46: 4 pink, 26 gray, 4 pink squares (34 sq)
Row 47: 4 pink, 25 gray, 4 pink squares (33 sq)
Row 48: 4 pink, 24 gray, 4 pink squares (32 sq)
Row 49: 4 pink, 23 gray, 4 pink squares (31 sq)
Row 50: 4 pink, 22 gray, 4 pink squares (30 sq)
Row 51: 4 pink, 21 gray, 4 pink squares (29 sq)
Row 52: 4 pink, 20 gray, 4 pink squares (28 sq)
Row 53: 4 pink, 19 gray, 4 pink squares (27 sq)
Row 54: 4 pink, 18 gray, 4 pink squares (26 sq)
Row 55: 4 pink, 17 gray, 4 pink squares (25 sq)
Row 56: 4 pink, 16 gray, 4 pink squares (24 sq)
Row 57: 4 pink, 15 gray, 4 pink squares (23 sq)
Row 58: 4 pink, 14 gray, 4 pink squares (22 sq)
Row 59: 4 pink, 13 gray, 4 pink squares (21 sq)
Row 60: 4 pink, 12 gray, 4 pink squares (20 sq)
Row 61: 4 pink, 11 gray, 4 pink squares (19 sq)
Row 62: 4 pink, 10 gray, 4 pink squares (18 sq)
Row 63: 4 pink, 9 gray, 4 pink squares (17 sq)
Row 64: 4 pink, 8 gray, 4 pink squares (16 sq)
Row 65: 4 pink, 7 gray, 4 pink squares (15 sq)
Row 66: 4 pink, 6 gray, 4 pink squares (14 sq)
Row 67: 4 pink, 5 gray, 4 pink squares (13 sq)
Row 68: 4 pink, 4 gray, 4 pink squares (12 sq)
Row 69: 4 pink, 3 gray, 4 pink squares (11 sq)
Row 70: 4 pink, 2 gray, 4 pink squares (10 sq)
Row 71: 4 pink, 1 gray, 4 pink squares (9 sq)
Row 72: 8 pink
Row 73: 7 pink
Row 74: 6 pink
Row 75: 5 pink
Row 76: 4 pink
Row 77: 3 pink
Row 78: 2 pink
Row 79: 1 pink
Fasten off pink and weave in all ends.
Mark center of blanket and sew elephant head to the center. Be sure all parts are firmly sewn to make it baby safe.
This post contains affiliate links. If you use these links to purchase your yarn and supplies, I may earn a commission. Thanks for helping support my crochet blog.
Because so many of us have been sequestered at home over the past few months, there has been a lot of talk in the crochet groups on Facebook about what to do with leftover scraps of yarn. This is also the time of year that crafters begin to look at their Christmas lists and plan for homemade gifts. Amigurumi is always a big hit with the little ones, and this elephant finger puppet pattern takes less than an ounce of worsted yarn, and they’re so quick, you can make a few in one evening. PDF is available at My Fingers Fly on Etsy.
Size G (4.0 mm) crochet hook (size I to fit a man’s fingers, size E or F for children)
Small amount of Fiberfil
Yarn needle
2 googly eyes
Stitch markers
Directions:
Legs (Make 2):
Rnd 1: Ch 2 (or magic circle), 6 sc in 2nd ch from hook (6 sc). Do not join. Work in continuous rnds throughout.
Rnd 2: 2 sc in each st (12 sc). Join with sl st.
Rnd 3: Working in back loops only, sc in each st. Do not join.
Rnd 4: Working in both loops, sc in each st.
Repeat Rnd 4 until leg measures 3” (approximately 15 rows, or desired length). When leg 2 is desired length, do not fasten off.
Joining Rnd: Sc in each of the next 6 sts, sc in next 12 sts of other leg, sc in last 6 sts of first leg (24 sc). Do not join.
Next Rnd: Sc in each st. Repeat this Rnd once. Join with sl st. Fasten off.
Trunk & Head:
Rnd 1: Ch 2 (or magic circle), 6 sc in 2nd ch from hook (6 sc). Do not join. Work in continuous rnds throughout.
Rnd 2: Working in back loops only, sc in each st.
Rnds 3-6: Working in both loops, sc in each st.
Rnd 7: 2 sc in each st (12 sc).
Rnd 8: *Sc in next st, 2 sc in next st,* repeat around (18 sc). Join with sl st.
Rnd 9: Ch 1, turn, skip sl st, sc in each of the next 9 sts.
Rnd 10: Ch 1, turn, dec, sc in next 5 sts, dec (7 sc). Continue to work around in Rnd 9, sc in end of Rnd 9, sc in sl st of Rnd 9, sc in each rem st of Rnd 9, sc in sl st of Rnd 9 (18 sc). Do not join.
Rnd 11: Sc in each st.
Rnd 12: *Dec, sc,* repeat around (12 sc). Stuff trunk and head.
Rnd 13: Dec around (6 sc). Join with sl st. Fasten off. Sew opening closed.
Ears (Make 2):
Row 1: Ch 2 (or magic circle), 3 sc in 2nd ch from hook.
Row 2: Ch 1, turn, 2 sc in each st (6 sc). Fasten off. Sew an ear to each side of head. Sew head to top 3 rnds of legs. Glue on eyes.
How do you feel when you have to frog a project? This little froggy just thinks, “oh well.” My new line of fiber artist gifts is now available on My Fingers Fly and includes t-shirts, tote bag, coffee mug, travel mug, and water bottle.
Coming Soon
I’m still working diligently on Halloween patterns for a new crochet book. So far I’m in love with all the designs. When the book is ready to publish, I will be announcing a Halloween giveaway. Several patterns are already available:
Good morning everyone! We had a cool front come in this week with gorgeous morning temps. It will be a hot one in the afternoon, but I’ve been enjoying my morning coffee on the patio enjoying the 70-degree weather.
Benjamin is proving to be as popular with crocheters as I had hoped – he’s just so cute! Please share your color combinations on Instagram or Facebook. This week we’ll be making the African flower motifs for his shell and putting them together. Next week will be making the turtle head and bottom flap, then attaching the blanket to the turtle shell.
Rnd 1: With Sungold yarn, Magic Ring (MR), ch 3 (counts as dc), dc, ch 1, *2 dc, ch 1,* repeat 4 times, join with sl st in top of beg ch-3. Fasten off Sungold.
Rnd 2: Attach Mild Green yarn in any ch-1 sp, ch 3 (counts as dc), dc, ch 1, 2 dc in same sp, (2 dc, ch 1, 2 dc) in next 5 ch-1 sps. Join with sl st in top of beg ch-3.
Rnd 3: Sl st into ch-1 sp, ch 3 (counts as dc), 6 dc in same ch-1 sp, 7 dc in remaining 5 ch-1 sps. Join with sl st in top of beg ch-3. Fasten off Mild Green.
Rnd 4: Attach Toasted Almond yarn at first dc of any 7-dc group, ch 1, *sc in each of 7 dc across top of shell, sc in sp between shells two rows below in Rnd 2,* repeat 5 times. Join with sl st in top of first sc. Fasten off Toasted Almond yarn.
Rnd 5: Attach Dark Olive Yarn, ch 1 (does not count as st), *hdc in each of 8 sc across side of hexagon, ch 1,* repeat 5 times. Join with sl st in top of first hdc. Fasten off Dark Olive Yarn. Block squares and sew together in the following configuration.
Each side of the hexagon is 8 hdc with a ch at each end. Sew these sts together. On the hexagons that form the outer edge (as indicated in photo below by arrows), continue this seam for an additional 4 sts.
Edging:
Rnd 1: Attach Dark Olive yarn at any st, ch 3 (counts as dc), dc in next st and each st around. Some hexagons will still have ch-1 sps. Skip these. At seam, work dc dec across both sides of seam. Join with sl st in top of ch-3. Fasten off Dark Olive.
Rnd 2: Attach Sungold yarn, ch 1, sc in same st, *sk 2 sts, 6 dc in next st, sk 2 sts, sc in next st,* repeat around. It may be necessary to manipulate the skipped sts towards the end of the rnd in order to finish with a shell st rather than a sc. Join with sl st in first sc. Fasten off Sungold.
Don’t hesitate to reach out if you have any questions on this pattern. The pattern PDF is available at My Fingers Fly. If you prefer Ravelry, turtles are the featured animal on June 13 – Benjamin Turtle. Each day in June, a different animal pattern is half price.
Last year I published an Elephant Crochet Pattern ebook, but I just wasn’t satisfied with the amount of patterns, so I added a few more patterns. The ebook PDF is now available on Etsy and My Fingers Fly. Kindle and paperback versions are also available on Amazon.
Miles the Jazzy Elephant was so much fun to make; I hope you’ll enjoy him too. Elephant patterns are also available separately on Ravelry, Etsy, Lovecrafts, and My Fingers Fly. Also included in the book is an Elephant Ear Saver Crochet Pattern (free on the blog).
Miles and Benjamin will both be included in my next book, A to Z Animal Crochet. Animal patterns are so much fun!
I still have a few 2020 Crochet Calendars left – just pay shipping. Even though the year is almost half gone, the 12 kitchen crochet patterns can be used forever.
ID used to identify users for 24 hours after last activity
24 hours
_gat
Used to monitor number of Google Analytics server requests when using Google Tag Manager
1 minute
_gac_
Contains information related to marketing campaigns of the user. These are shared with Google AdWords / Google Ads when the Google Ads and Google Analytics accounts are linked together.
90 days
__utma
ID used to identify users and sessions
2 years after last activity
__utmt
Used to monitor number of Google Analytics server requests
10 minutes
__utmb
Used to distinguish new sessions and visits. This cookie is set when the GA.js javascript library is loaded and there is no existing __utmb cookie. The cookie is updated every time data is sent to the Google Analytics server.
30 minutes after last activity
__utmc
Used only with old Urchin versions of Google Analytics and not with GA.js. Was used to distinguish between new sessions and visits at the end of a session.
End of session (browser)
__utmz
Contains information about the traffic source or campaign that directed user to the website. The cookie is set when the GA.js javascript is loaded and updated when data is sent to the Google Anaytics server
6 months after last activity
__utmv
Contains custom information set by the web developer via the _setCustomVar method in Google Analytics. This cookie is updated every time new data is sent to the Google Analytics server.
2 years after last activity
__utmx
Used to determine whether a user is included in an A / B or Multivariate test.
18 months
_ga
ID used to identify users
2 years
_gali
Used by Google Analytics to determine which links on a page are being clicked
30 seconds
_ga_
ID used to identify users
2 years
Marketing cookies are used to follow visitors to websites. The intention is to show ads that are relevant and engaging to the individual user.
Pinterest Tag is a web analytics service that tracks and reports website traffic.
Unique value with which users can be identified by X. Collected information is used to be personalize X services, including X trends, stories, ads and suggestions.
2 years
external_referer
Our Website uses X buttons to allow our visitors to follow our promotional X feeds, and sometimes embed feeds on our Website.
2 years
guest_id
This cookie is set by X to identify and track the website visitor. Registers if a users is signed in the X platform and collects information about ad preferences.


