We have been in Laredo for about 5 weeks now, and I have been doing tons of research on my new hometown. There are school mascots, minor league baseball mascots, local wildlife in nearby Casa Blanca State Park, and even a raccoon that my husband found scavenging in our trash can. Then I went to visit my husband’s new office, and it dawned on me! Armadillo is the mascot for his company, so that’s what I focused on for this week’s design. I haven’t ruled out designing something for the Laredo Lemurs baseball team, though.
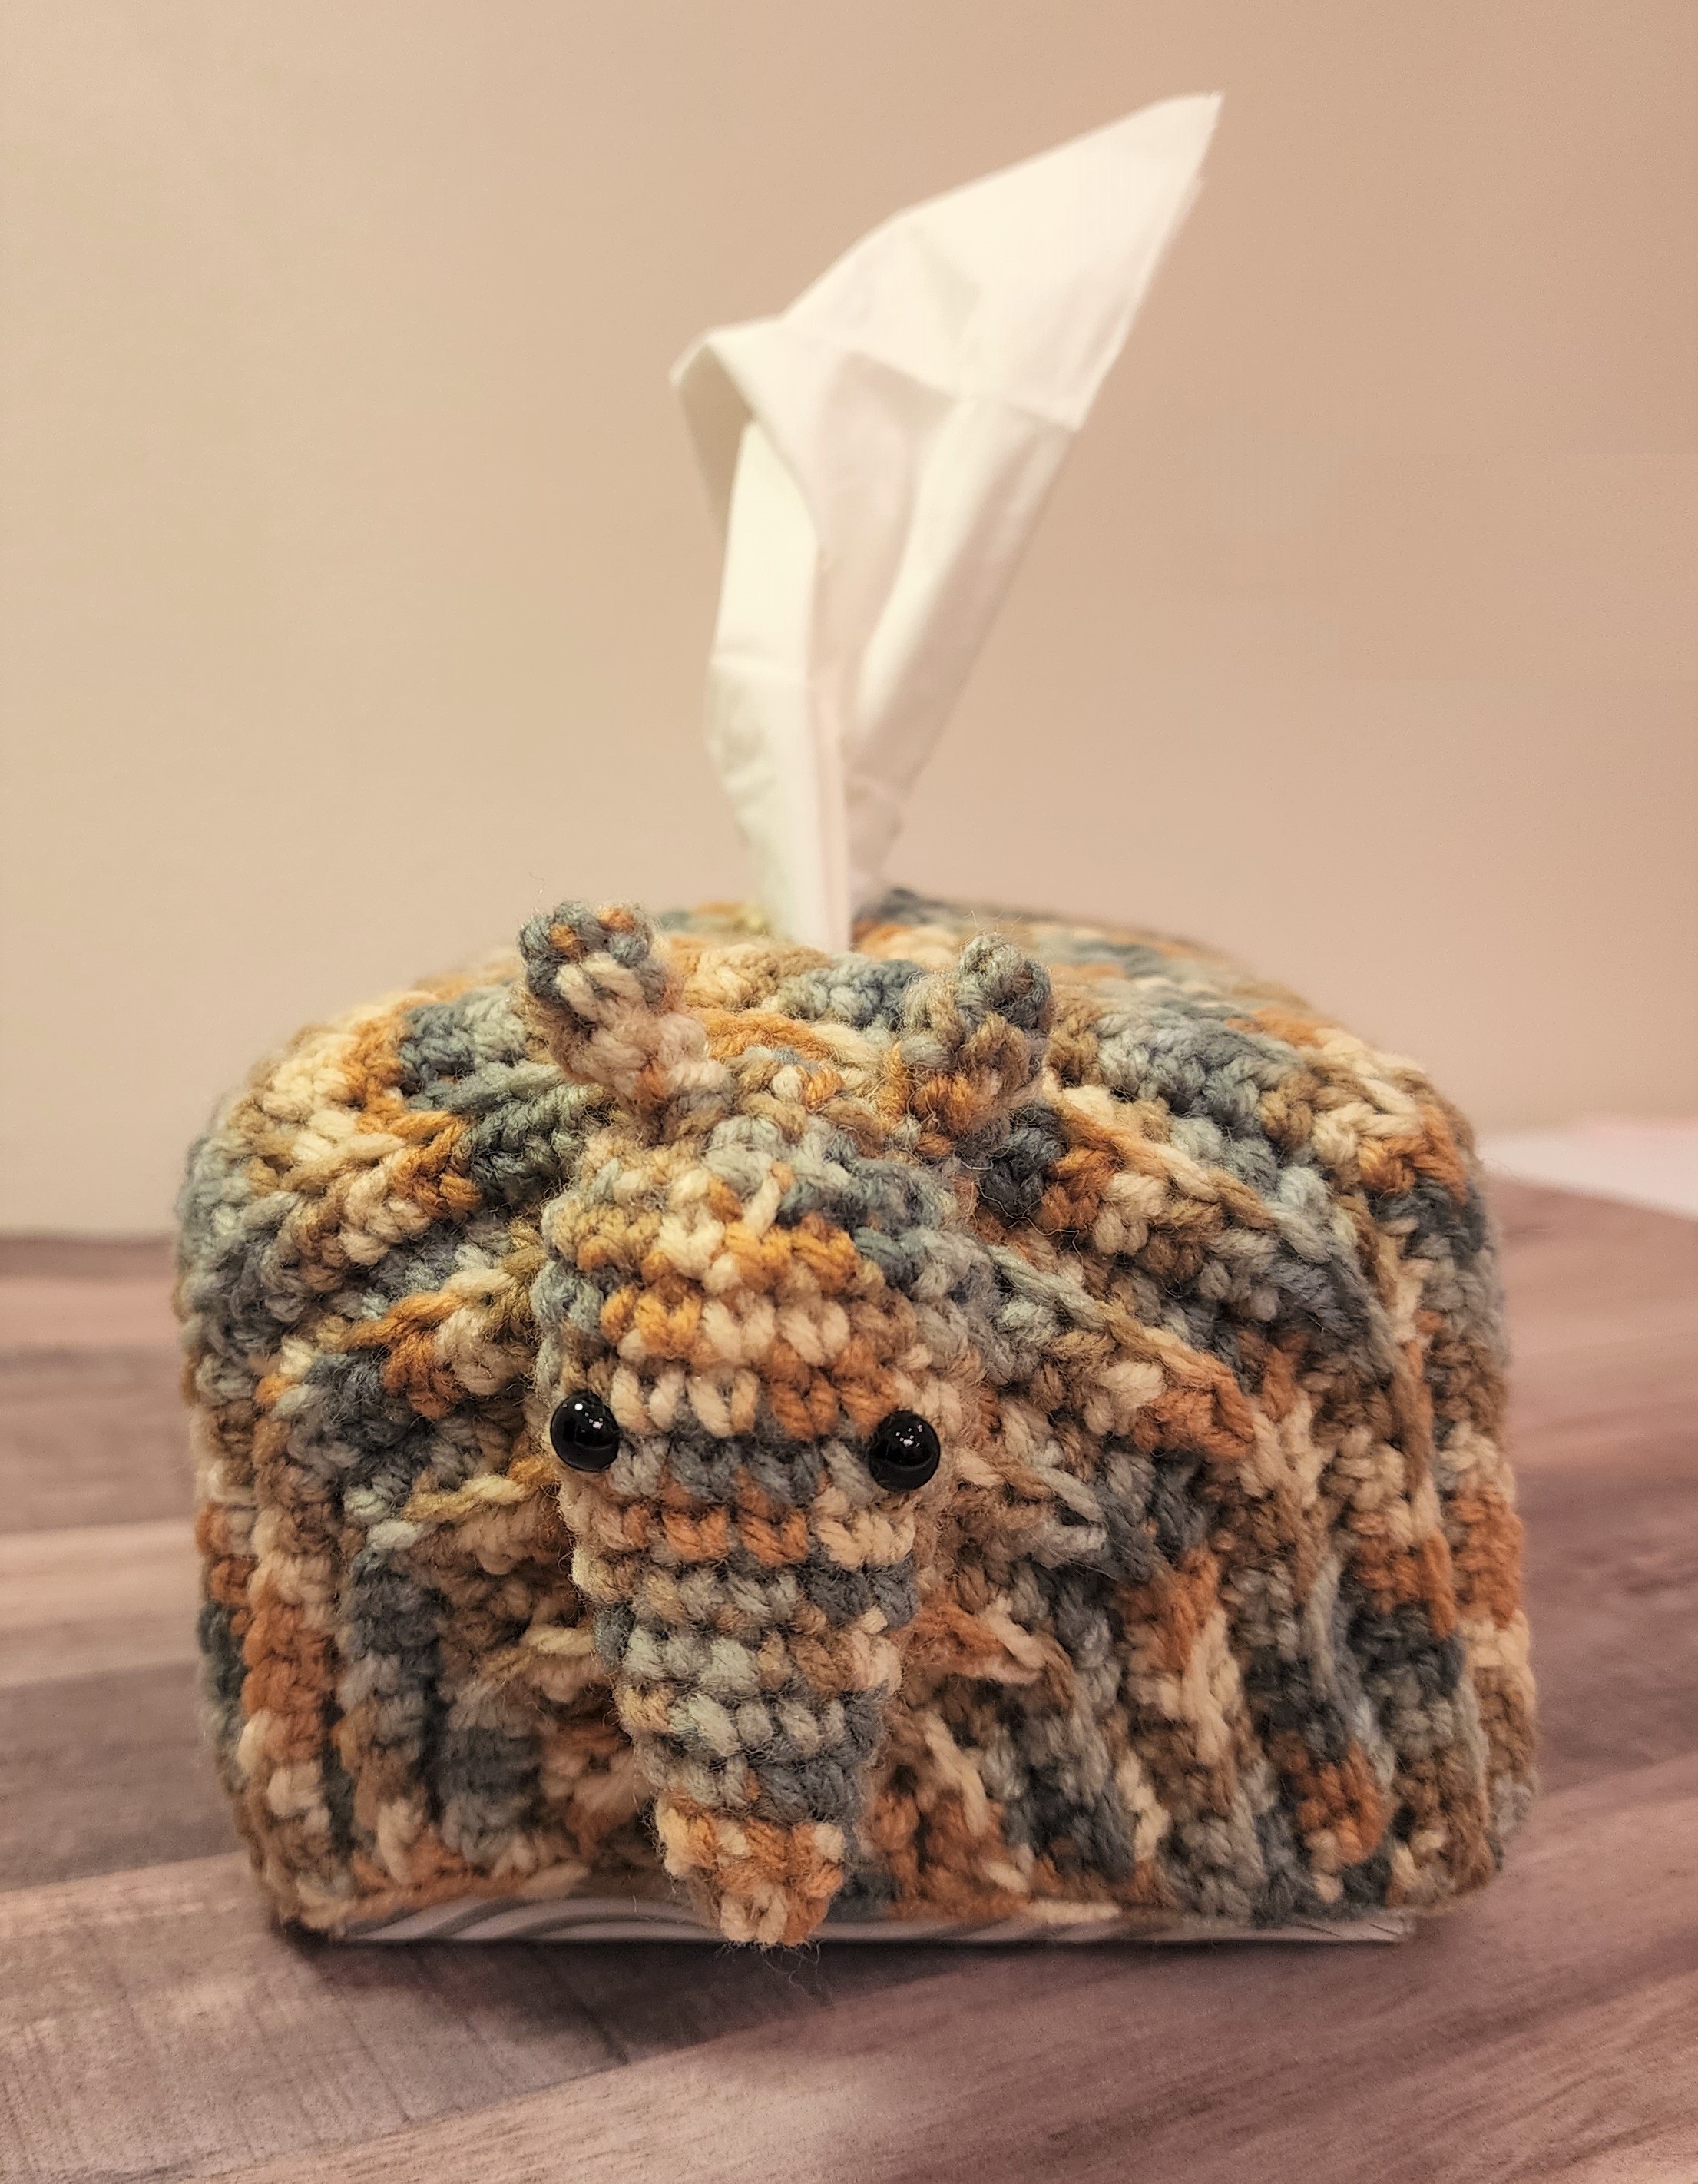
Armadillo Tissue Box Cover
Finished tissue cover measures approximately 10.5″ long by 6” wide (excluding head and tail) and fits over a standard size tissue box.
Materials:
220 yards worsted weight yarn
Size G (4.0 mm) crochet hook
Fiberfil
Yarn needle
Two 6-mm black safety eyes
12” Pipe cleaner
Directions:
Body:
Work in back loop only throughout body.
Row 1: Ch 2, 4 sc in 2nd ch from hook.
Row 2: Ch 1, turn, 2 sc in each st (8 sc).
Row 3: Ch 1, turn, sc in next st, 2 sc in next st, *hdc in next st, 2 hdc in next st,* twice, sc in next st, 2 sc in next st (12 sts).
Row 4: Ch 1, turn, sc in next 2 sts, 2 sc in next st, *hdc in next 2 sts, 2 hdc in next st,* twice, sc in next 2 sts, 2 sc in next st (16 sts).
Row 5: Ch 1, turn, sc in next 3 sts, 2 sc in next st, *hdc in next 3 sts, 2 hdc in next st,* twice, sc in next 3 sts, 2 sc in next st (20 sts).
Row 6: Ch 1, turn, sc in next 4 sts, 2 sc in next st, *hdc in next 4 sts, 2 hdc in next st,* twice, sc in next 4 sts, 2 sc in next st (24 sts).
Row 7: Ch 1, turn, sc in next 5 sts, 2 sc in next st, *hdc in next 5 sts, 2 hdc in next st,* twice, sc in next 5 sts, 2 sc in next st (28 sts).
Row 8: Ch 1, turn, sc in next 6 sts, 2 sc in next st, *hdc in next 6 sts, 2 hdc in next st,* twice, sc in next 6 sts, 2 sc in next st (32 sts).
Row 9: Ch 1, turn, sc in next 7 sts, 2 sc in next st, *hdc in next 7 sts, 2 hdc in next st,* twice, sc in next 7 sts, 2 sc in next st (36 sts).
Row 10: Ch 1, turn, sc in next 8 sts, 2 sc in next st, *hdc in next 8 sts, 2 hdc in next st,* twice, sc in next 8 sts, 2 sc in next st (40 sts).
Row 11: Ch 1, turn, sc in next 9 sts, 2 sc in next st, *hdc in next 9 sts, 2 hdc in next st,* twice, sc in next 9 sts, 2 sc in next st (44 sts).
Row 12: Ch 1, turn, sc in next 10 sts, 2 sc in next st, *hdc in next 10 sts, 2 hdc in next st,* twice, sc in next 10 sts, 2 sc in next st (48 sts).
Row 13: Ch 1, turn, sc in next 11 sts, 2 sc in next st, *hdc in next 11 sts, 2 hdc in next st,* twice, sc in next 11 sts, 2 sc in next st (52 sts).
Rows 14-21: Ch 1, turn, sc in each st.
Right side:
Row 22: Ch 1, turn, sc in next 25 sts. Leave remaining sts unworked.
Rows 23-43: Ch 1, turn, sc in each st (25 sc).
Row 44: Ch 1, turn, sc in each st, ch 2. Fasten off yarn.

Left side:
Row 22: Return to unworked sts of Row 21. Sk 2 sc and attach yarn in 3rd st. Ch 1, sc in same st, sc in next 24 sts (25 sc).
Rows 23-44: Ch 1, turn, sc in each st (25 sc).
Row 45: Ch 1, turn, sc in each st on left side, sc in 2 chs, sc in 25 sc of right side (52 sc).
Rows 46-52: Ch 1, turn, sc in each st.
Row 53: Ch 1, turn, sc in next 11 sts, dec, *hdc in next 11 sts, dec,* twice, sc in next 11 sts, dec (48 sts).
Row 54: Ch 1, turn, sc in next 10 sts, dec, *hdc in next 10 sts, dec,* twice, sc in next 10 sts, dec (44 sts).
Row 55: Ch 1, turn, sc in next 9 sts, dec, *hdc in next 9 sts, dec,* twice, sc in next 9 sts, dec (40 sts).
Row 56: Ch 1, turn, sc in next 8 sts, dec, *hdc in next 8 sts, dec,* twice, sc in next 8 sts, dec (36 sts).
Row 57: Ch 1, turn, sc in next 7 sts, dec, *hdc in next 7 sts, dec,* twice, sc in next 7 sts, dec (32 sts).
Row 58: Ch 1, turn, sc in next 6 sts, dec, *hdc in next 6 sts, dec,* twice, sc in next 6 sts, dec (28 sts).
Row 59: Ch 1, turn, sc in next 5 sts, dec, *hdc in next 5 sts, dec,* twice, sc in next 5 sts, dec (24 sts).
Row 60: Ch 1, turn, sc in next 4 sts, dec, *hdc in next 4 sts, dec,* twice, sc in next 4 sts, dec (20 sts).
Row 61: Ch 1, turn, sc in next 3 sts, dec, *hdc in next 3 sts, dec,* twice, sc in next 3 sts, dec (16 sts).
Row 62: Ch 1, turn, sc in next 2 sts, dec, *hdc in next 2 sts, dec,* twice, sc in next 2 sts, dec (12 sts).
Row 63: Ch 1, turn, *sc in next st, dec,* repeat across (8 sc).
Row 64: Ch 1, turn, sc dec 4 times (4 sc). Fasten off yarn leaving 4” length. Weave length through yarn needle and pick up lp in remaining 4 sts. Pull tight to close.
Edging:
Attach yarn to side, sc along row ends: *sc in 4 sts, dec,* repeat around all four sides of bottom of body. Join with sl st in 1st sc. Fit over tissue box to make sure entire box is covered.
Make another rnd of sc if more length is needed. Sc row should touch the surface. Fasten off. Weave in ends.
Head: (Work in both lps)
Rnd 1: Ch 2 (or magic circle), 6 sc in 2nd ch. Do not join. Work in continuous rnds throughout head.
Rnd 2: Sc in each st (6 sc).
Rnd 3: *Sc in next st, 2 sc in next st,* repeat around (9 sc).
Rnd 4: Sc in each st.
Rnd 5: *Sc in next 2 sts, 2 sc in next st,* repeat around (12 sc).
Rnd 6: Sc in each st.
Rnd 7: *Sc in next 3 sts, 2 sc in next st,* repeat around (15 sc).
Rnd 8: Sc in each st.
Rnd 9: *Sc in next 4 sts, 2 sc in next st,* repeat around (18 sc).
Rnds 10-11: Sc in each st.
Insert eyes at Rnd 8, approximately 4 sts apart. Stuff head.
Rnd 12: *Dec, sc in next st,* repeat around (12 sc).
Invisible Decrease Tutorial
Rnd 13: Repeat around (6 sc). Join with sl st. Fasten off leaving 12” length.
Ultimate finish: Pull length of yarn through outer lps of remaining 6 sts and pull tight to close.
Ultimate Finish Tutorial
Ears: (Make 2)
Rnd 1: Ch 2 (or magic circle), 3 sc in 2nd ch from hook. Do not join. Work in continuous rnds throughout ears.
Rnd 2: Sc in next st, 2 sc in next st, sc in last st (4 sc).
Rnd 3: Sc in each st. Join with sl st. Fasten off leaving 6” length for sewing. Sew ears to top of head at Rnd 12.
Attach head to body by sewing Rnds 7-11 of head to Rnds 8-11 of body with 2 rnds of sts.
Tail: (Work in both lps)
Rnd 1: Ch 2 (or magic circle), 3 sc in 2nd ch from hook. Do not join. Work in continuous rnds throughout tail.
Rnd 2: 2 sc in first st, sc in next 2 sts (4 sc).
Rnd 3: 2 sc in first st, sc in next 3 sts (5 sc).
Rnd 4: 2 sc in first st, sc in next 4 sts (6 sc).
Rnd 5: Sc in each st.
Rnd 6: *2 sc in next st, sc in next st,* repeat around (9 sc).
Rnds 7-9: Sc in each st.
Rnd 10: *2 sc in next st, sc in next 2 sts,* repeat around (12sc).
Rnds 11-13: Sc in each st.
Rnd 14: *2 sc in next st, sc in next st,* repeat
around (18 sc).
Rnds 15-17: Sc in each st. 
Rnd 18: *2 sc in next st, sc in next 2 sts,* repeat around (24 sc).
Rnds 19-20: Sc in each st.
Rnds 21-22: Sc in 12 sts, hdc in next 12 sts. Join with sl st at end of Rnd 22. Fasten off leaving 12” length for sewing.
Fold pipe cleaner in half and insert into tail. Stuff lightly enough that the tail will still bend.
Sew tail to body at Rnds 57-62 with sc sts on top and hdc sts on bottom. Bend tail to desired shape.
Armadillo Tissue Box Cover Crochet Pattern PDF will be 50% off this weekend only (through 8/7/2022).
ICYMI (In Case You Missed It)

Pug Christmas Tree Ornament

Christmas Gift Tag – From My Hooks & Needles

Raccoon and Red Panda Ice Pop Holder Crochet Pattern

Triceratops Baby Rainbow
Affiliate Links
This post contains affiliate links. This means I may earn a commission should you chose to sign up for a program or make a purchase using my link. It’s okay – I love all of these companies anyways, and you will too!
 30% off all Yarn & Kits

Up to 30% off through August 8
Like this:
Like Loading...


 PDF is availabel at:


