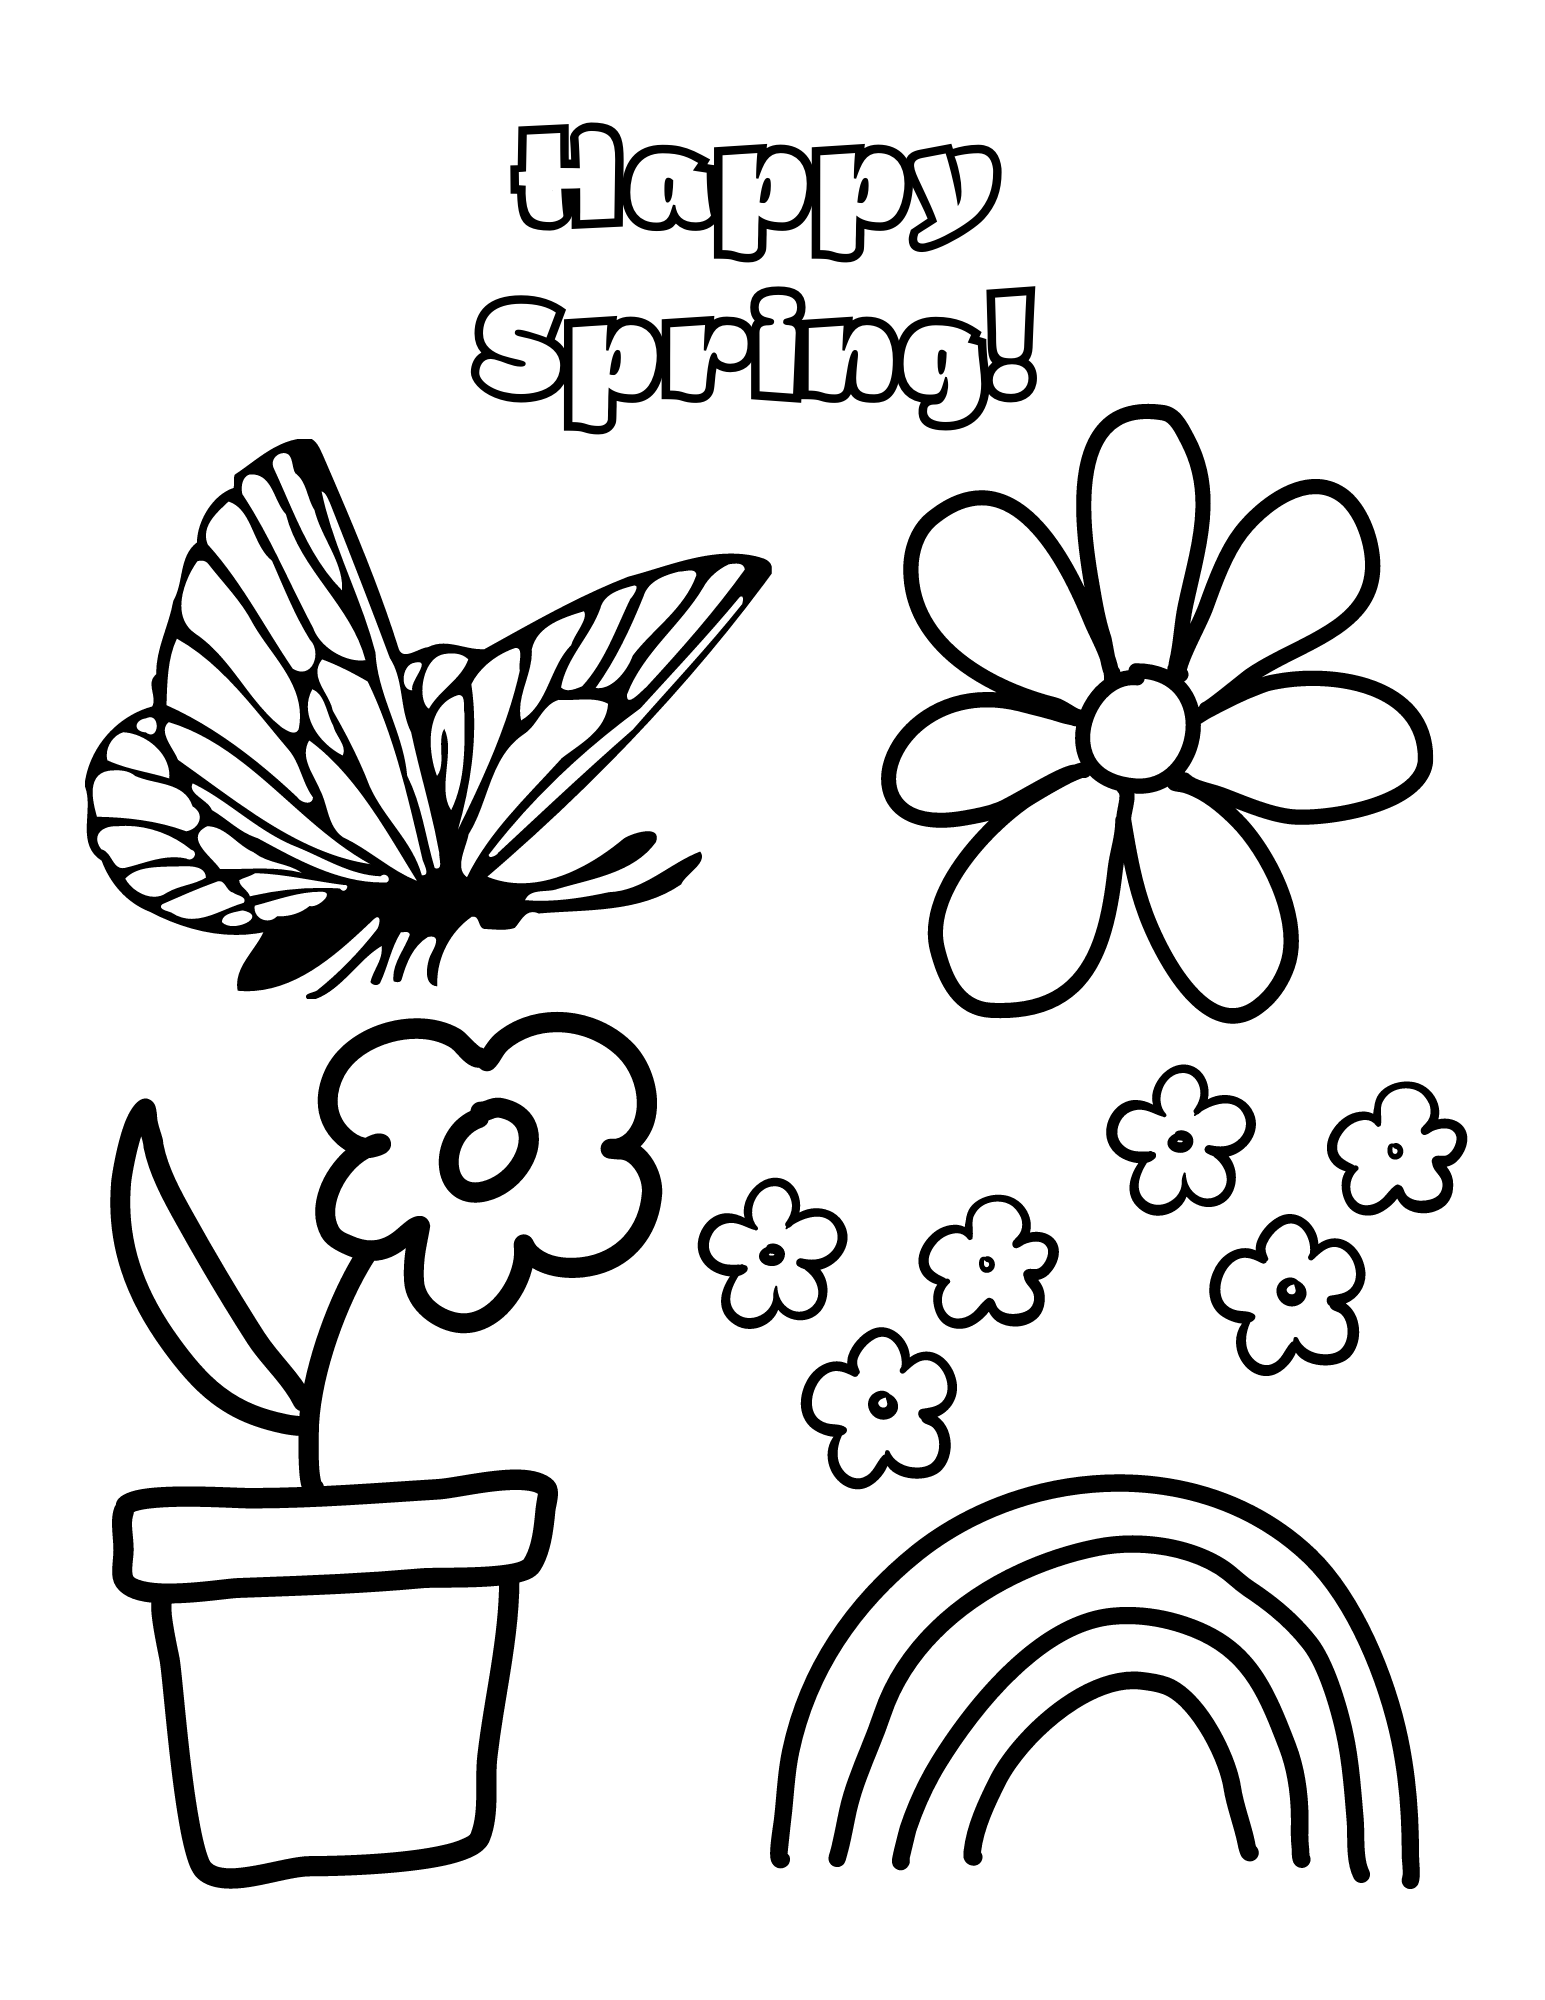
It’s National Picnic Day, and there’s no better way to celebrate springtime than by preparing a basket of food, grabbing a blanket, and going to the park to enjoy the beautiful weather. Here in San Antonio, it’s a lovely spring day, though a little bit breezy. Picnics are very popular here, especially on holiday weekends. People are known to camp out beginning Friday just to save the best spot in their favorite park for Easter Sunday, Memorial Day, and Fourth of July picnics. Here’s a free spring coloring page for your littles (or for yourself) to set the springtime mood.
With gas prices getting higher, we could all use a little cash back.
Check out this free app that gets you cash back on gas and other errands! Click this link or use promo code 46ZCG to get an extra 15¢/gal bonus the first time you make a purchase. https://upside.app.link/46ZCG
Hey! Thought you’d like to try Ibotta, a cash back rewards app that I use to make real money every time I shop for groceries, online purchases, and more! Just use my referral code “eugysjd” at registration. Sign up at → https://ibotta.onelink.me/iUfE/8cc13c64?friend_code=eugysjd
Five-Day Free Trial of Marmalead
Join Rakuten and get $30 cash back. Plus earn money on online purchases.
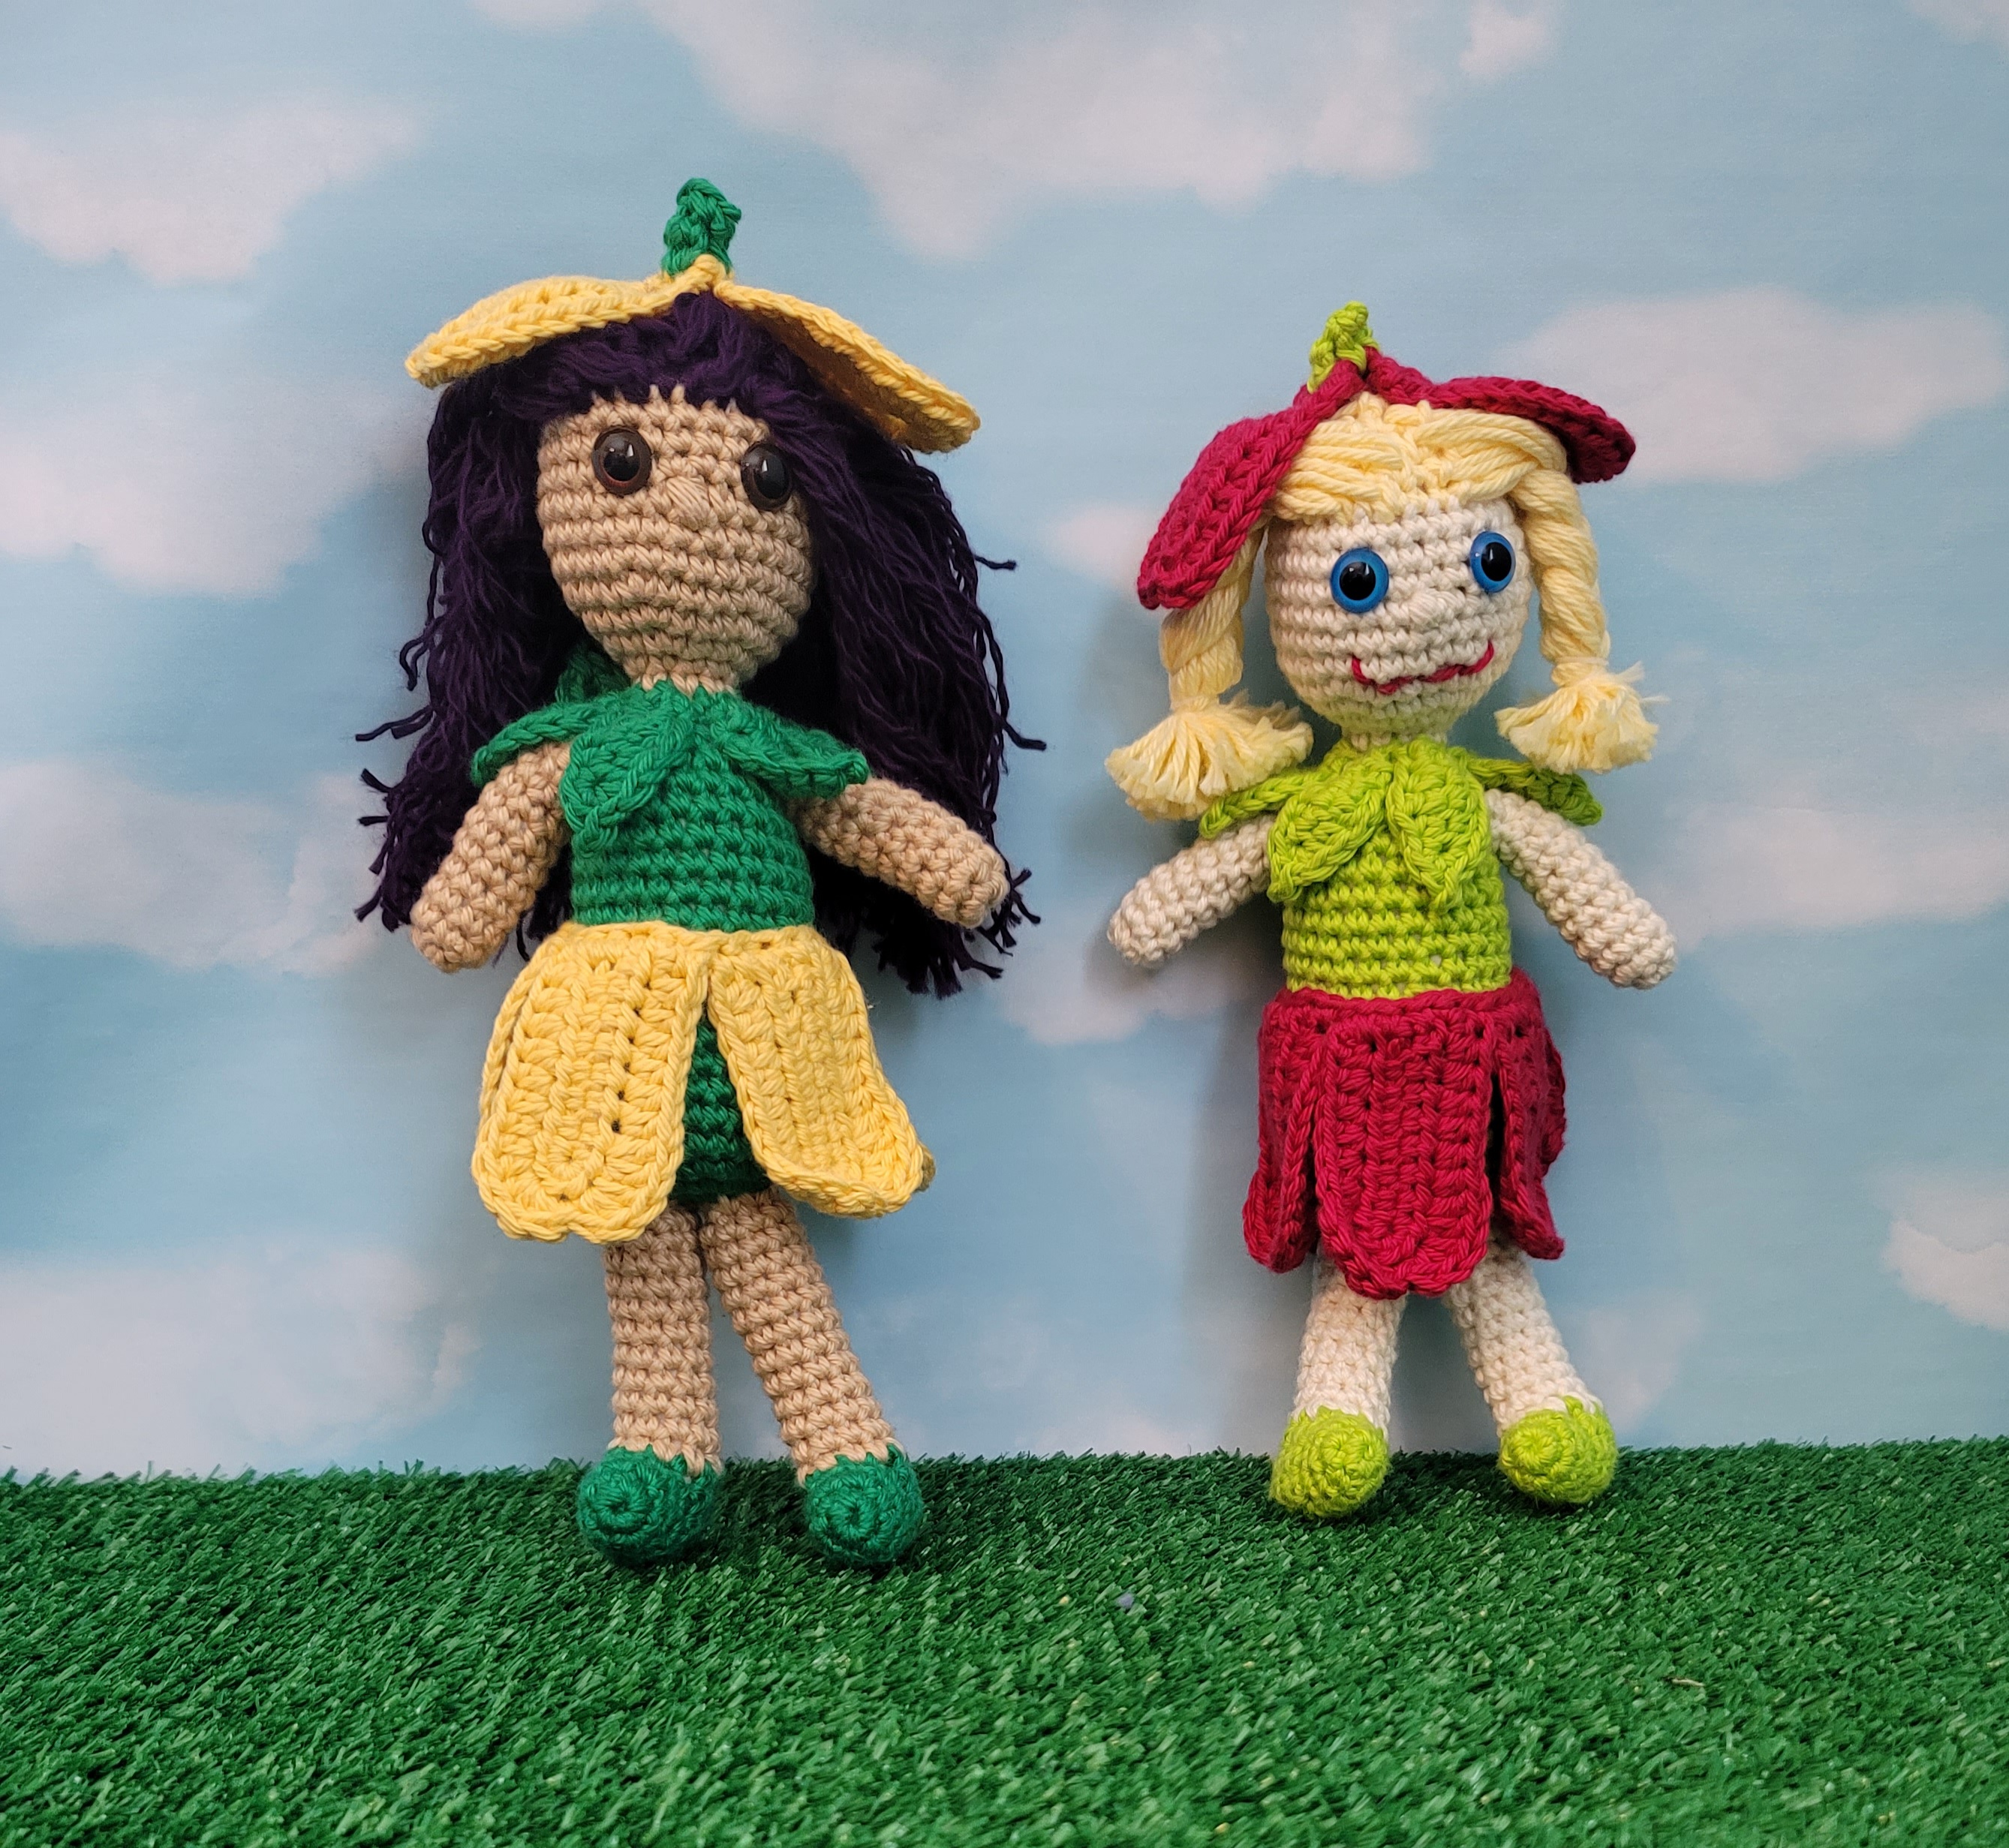
I have always loved springtime! The trees are beginning to get new leaves. Flowers are popping up. Bluebonnets, buttercups and Indian paintbrushes are thick along the Texas highways. I drove out to the hill country for work this week, and the bluebonnets are stunning! My designer brain is working on overload with the constant inspiration from nature. Unfortunately, my fingers can only crochet so fast, so many of these ideas will be relegated to my sketch book for a later time. Last year I published Miss Tulip Amigurumi crochet pattern which can be made in any shade of green you like, along with a multitude of colors for the petals. I hope you enjoy making her as much as I did. There’s also a YouTube video to show how to make amigurumi hair.
Bobble St: All in same st, (Insert hook into st, yo, pull through) 3 times, yo, pull through all loops.
Directions:
BODY:
Rnd 1: With green yarn, ch 2 (or magic ring), 6 sc in 2nd ch from hook. Do not join. Work in continuous rnds throughout unless otherwise specified.
Rnd 2: 2 sc in each st (12 sc).
Rnd 3: *Sc in next st, 2 sc in next st,* repeat around (18 sc).
Rnd 4: *Sc in next 2 sts, 2 sc in next st,* repeat around (24 sc).
Rnd 5: *Sc in next 3 sts, 2 sc in next st,* repeat around (30 sc).
Rnds 6-11: Sc in each st.
Rnd 12: *Sc in next 3 sts, dec,* repeat around (24 sc). Mark Rnd 12 for waistline.
Rnds 13-18: Sc in each st.
Rnd 19: *Sc in next 2 sts, dec,* repeat around (18 sc). Start stuffing body.
Rnd 20: *Sc in next st, dec,* repeat around (12 sc).
Rnd 21: *Sc in next st, dec,* repeat around (9 sc). Fasten off green.
Rnd 22: Attach Ivory yarn, sc in each st.
Rnd 23: *Sc in next 2 sts, 2 sc in next st,* repeat around (12 sc).
Rnd 24: *Sc in next st, 2 sc in next st,* repeat around (18 sc).
Rnd 25: *Sc in next 2 sts, 2 sc in next st,* repeat around (24 sc).
Rnd 26: *Sc in next 3 sts, 2 sc in next st,* repeat around (30 sc).
Rnds 27-28: Sc in each st.
Rnd 29: Sc in next 15 sts, bobble st for nose in next st, sc in next 14 sts.
Rnds 30-32: Sc in each st. Fasten off Ivory. Insert safety eyes at Rnd 30, 4 sts apart. Stuff body and head. Be sure to stuff neck firmly to support head.
Rnd 33: Attach yellow yarn for wig cap. *Sc in next 3 sts, dec,* repeat around (24 sc).
Rnd 34: *Sc in next 2 sts, dec,* repeat around (18 sc).
Rnd 35: *Sc in next st, dec,* repeat around (12 sc). Finish stuffing head.
Rnd 36: Dec around (6 sc). Fasten off yellow yarn leaving 6” length. Close with ultimate finish.
Rnd 1: With green yarn, ch 2 (or magic ring), 6 sc in 2nd ch. Do not join. Work in continuous rnds throughout unless otherwise specified.
Rnd 2: *Sc in next st, 2 sc in next st,* repeat around (9 sc).
Rnds 3-4: Sc in each st.
Rnd 5: Ch 1, turn, sc in next 8 sts.
Rnds 6-9: Ch 1, turn, sc in each st.
Rnd 10: With right sides together, sc through both thicknesses to close heel (4 sc). Fasten off green.
Rnd 11: Attach ivory yarn at heel. Ch 1, work 10 sc evenly spaced around foot. Do not join. Stuff shoe.
Rnds 12-22: Sc in each st. Do not join. Stuff leg as you go. At end of Rnd 22,join with sl st and fasten off ivory. Leave 12” length for sewing. Sew to bottom of body at Rnds 1-3 with toes pointed forward.
ARMS:
Rnd 1: With Ivory yarn, ch 2 (or magic circle), 6 sc in 2nd ch. Do not join.
Rnd 2: *Sc in next 2 sts, 2 sc in next st,* repeat once (8 sc).
Rnds 3-10: Sc in each st. At end of Rnd 10, join with sl st and fasten off Ivory leaving 9” length. Sew to sides of body with top of arm at Rnd 20 of body.
SKIRT PETALS: (Make 5)
Rnd 1: With Rosebud yarn, ch 9, hdc in 2nd ch, hdc in next 6 ch, 6 hdc in last ch. Working on opposite side of starting ch, hdc in 7 ch (19 hdc).
Rnd 2: Ch 1, turn, hdc in 7 sts, 2 dc in next st, 3 dc in next st, sl st in next st, 3 dc in next st, 2 dc in next st, hdc in next 7 sts. Fasten off.
At the end of the fifth petal, do not fasten off. Ch 1, turn to work across end of petal. Work 6 sc evenly spaced across end of petal, continue with 6 sc evenly spaced across each petal until all 5 petals are connected. Fasten off leaving 12” length for sewing. Block petals, then sew skirt onto doll at marked Rnd of body.
NECK LEAVES: (Make 6)
Rnd 1: With green yarn, ch 6, sc in 2nd ch from hook, hdc in next ch, dc in next ch, hdc in next ch, (2 sc, ch 2, sl st in 2nd ch, 2 sc) in last st. Working on opposite side of starting ch, hdc in next ch, dc in next ch, hdc in next ch, sc in next ch. Join with sl st in first sc. Fasten off with 6” length for sewing. Sew leaves evenly spaced around neck.
HAT PETALS: (Make 3)
Rnd 1: With Rosebud yarn, ch 9, sc in 2nd ch, sc in next 2 ch, hdc in next 4 ch, 5 hdc in last ch. Working on opposite side of starting ch, hdc in 4 ch, sc in 3 ch.
Rnd 2: Ch 1, turn, sc in 4 sts, hdc in 3 sts, 2 hdc in next st, 3 hdc in next st, sl st in next st, 3 hdc in next st, 2 hdc in next st, hdc in next 3 sts, sc in next 4 sts. Fasten off yarn. At end of third petal, do not fasten off. Turn to work across ends of petals, ch 1, 2 sc in end of petal. Work across ends of next 2 petals with 2 sc in each petal (6 sc). Join with sl st. Fasten off.
Stamen:
Rnd 1: Attach green yarn, sc in each st. Do not join.
Rnd 2: *Sc, dec,* repeat (4 sc). Join with sl st. Fasten off green.
HAIR:
Cut approximately 70 pieces of yellow yarn 10” long. Fold one strand of yarn in half, insert hook into wig cap, pull yarn through st, pull both pieces of yarn through loop, pull tight. Repeat until wig cap is filled.
With gas prices getting higher, we could all use a little cash back.
Check out this free app that gets you cash back on gas and other errands! Click this link or use promo code 46ZCG to get an extra 15¢/gal bonus the first time you make a purchase. https://upside.app.link/46ZCG
Hey! Thought you’d like to try Ibotta, a cash back rewards app that I use to make real money every time I shop for groceries, online purchases, and more! Just use my referral code “eugysjd” at registration. Sign up at → https://ibotta.onelink.me/iUfE/8cc13c64?friend_code=eugysjd
Five-Day Free Trial of Marmalead
Join Rakuten and get $30 cash back. Plus earn money on online purchases.
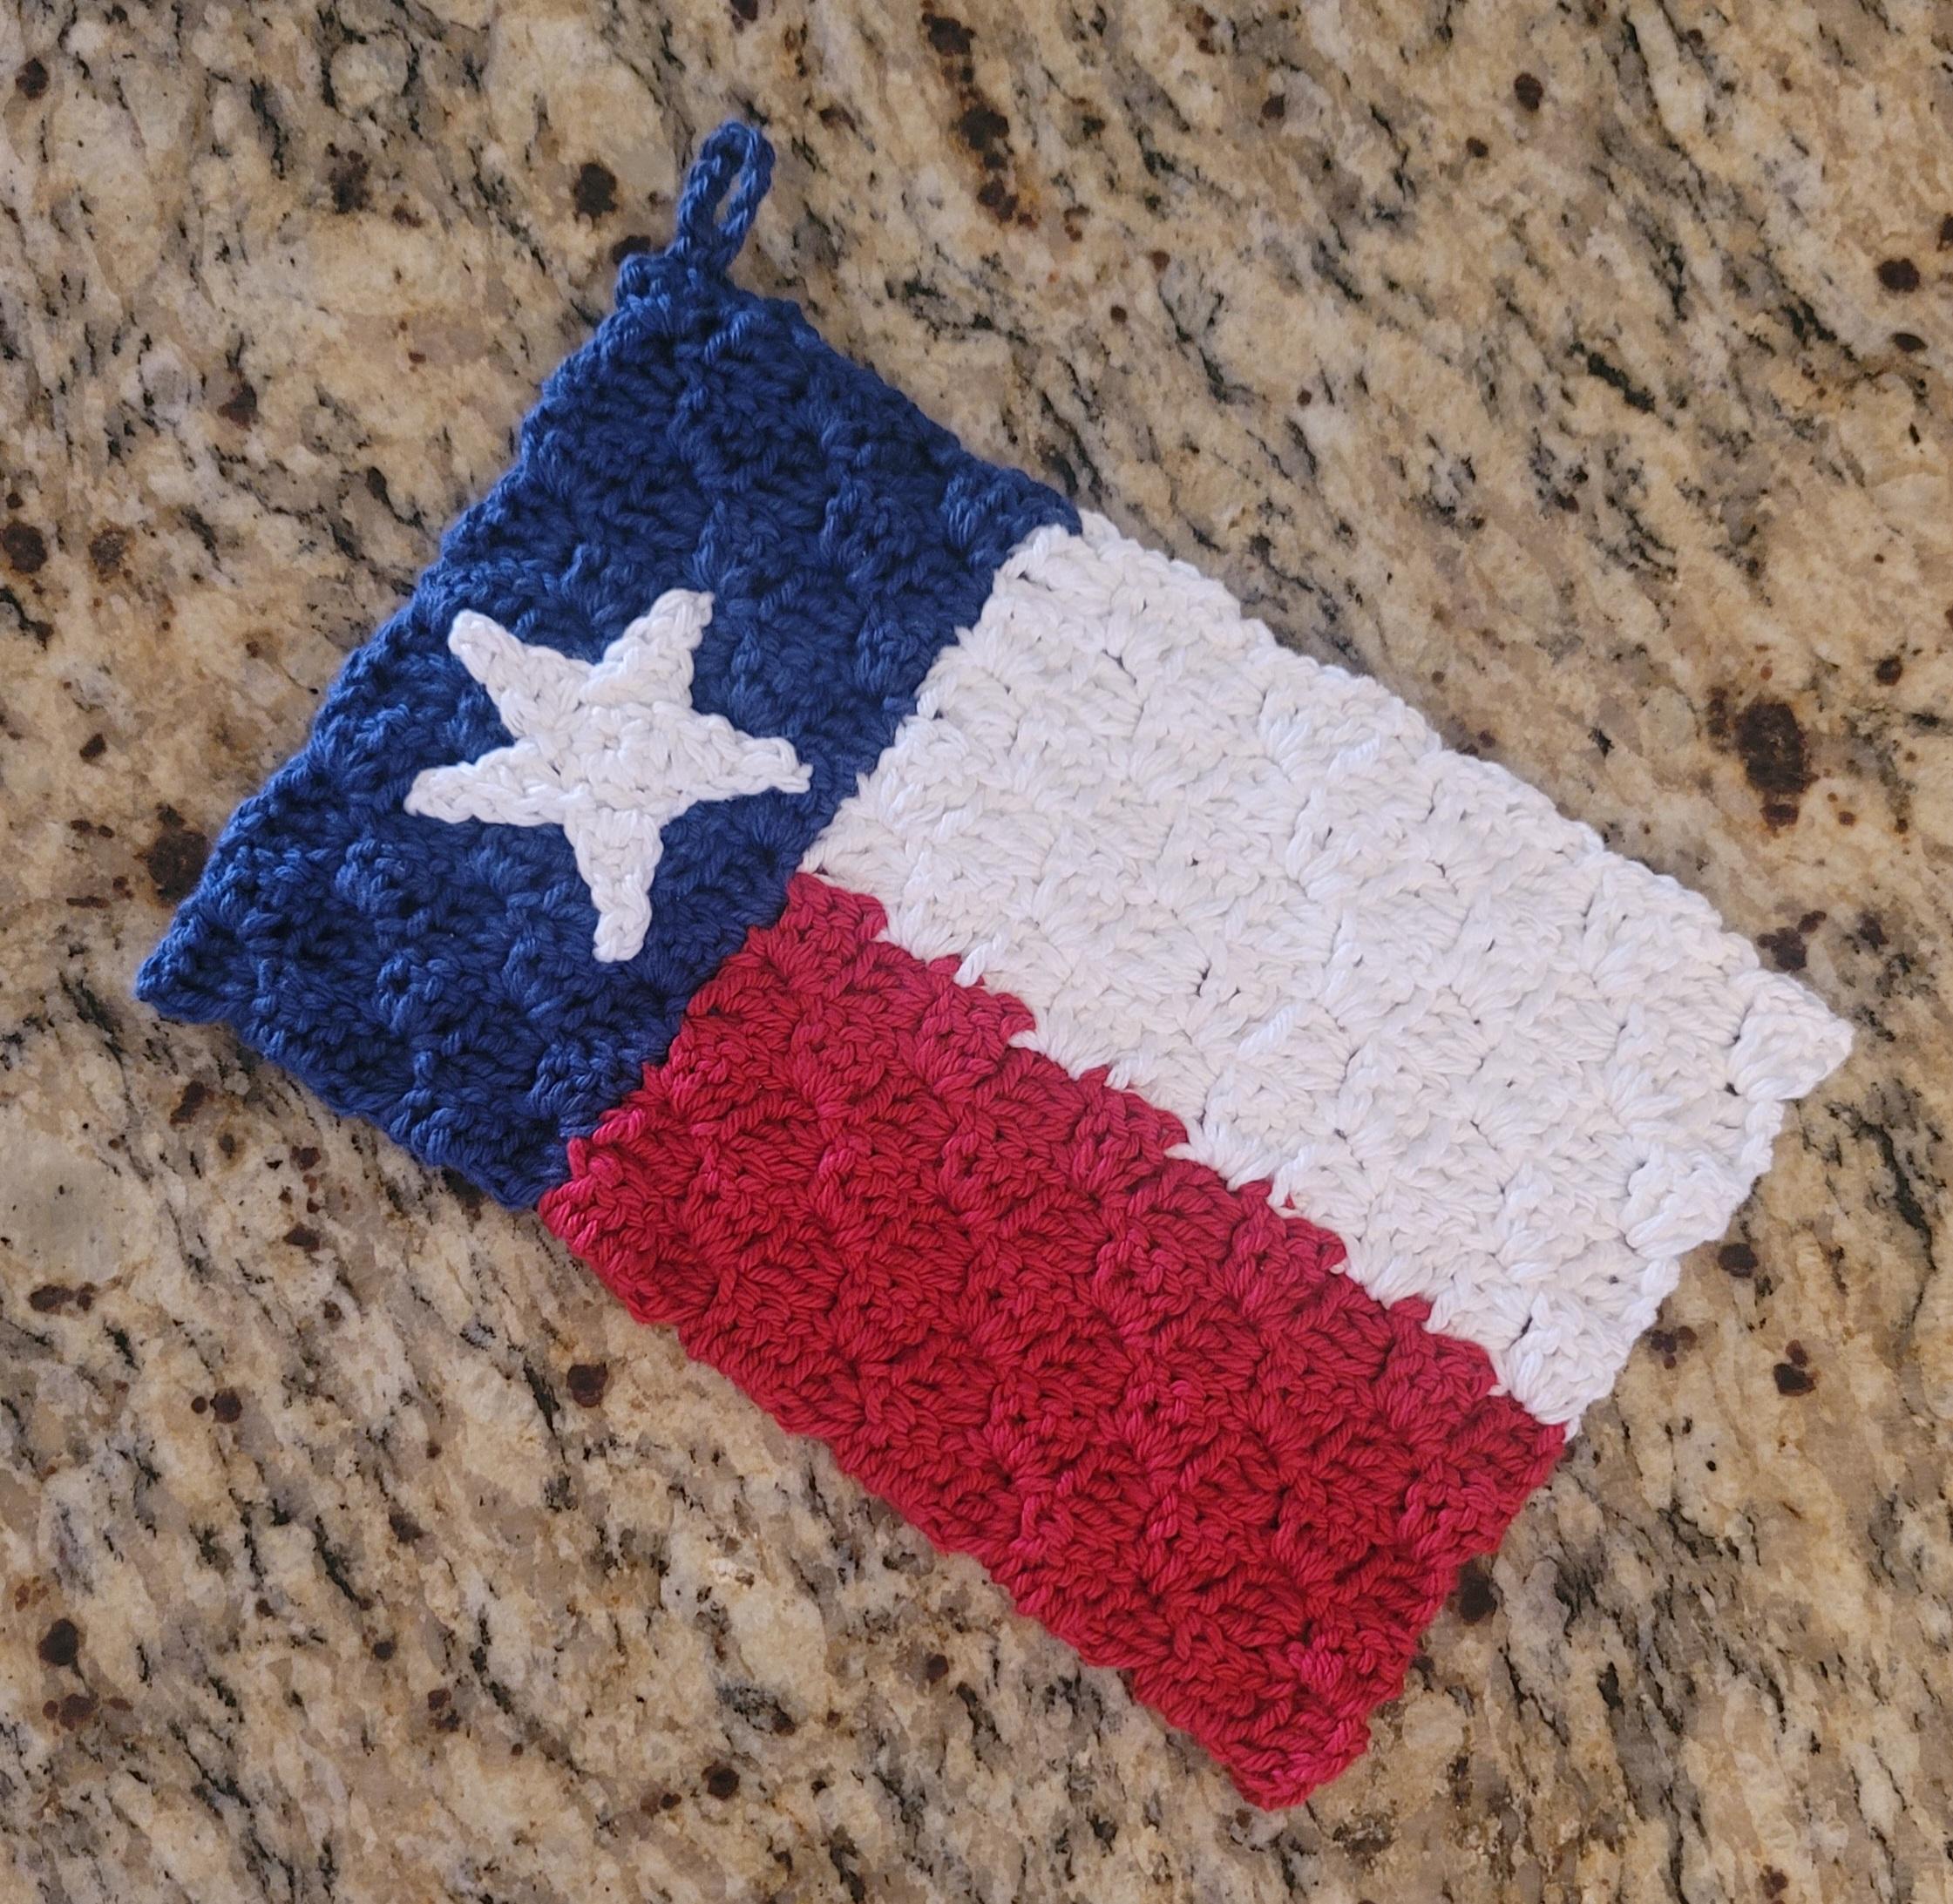
On February 28, 1836, a group of Texians came together at Washington-on-the-Brazos to declare independence from Mexico and declare Texas as a Republic. The Texas Declaration of Independence was signed on March 2, 1836. Sixty men signed the document, 57 of whom had moved from the United States to Texas after the Mexican government had promised them a republican government. War had begun several months before and ended with the capture of Santa Anna at the Battle of San Jacinto on April 21, 1936. The signing of the declaration took place while the Battle of the Alamo was raging in San Antonio.
To celebrate my favorite state, this year I’ve made an easy C2C potholder using the Texas flag as inspiration.
Materials:
Dishie cotton worsted yarn – 1/2 oz. each red, white, blue
Size G (4.0 mm) crochet hook
Directions:
Working in C2C format:
Row 1: 1 red square
Row 2: 2 red squares
Row 3: 3 red squares
Row 4: 4 red squares
Row 5: 5 red squares
Row 6: 5 red squares, 1 white square (wrong side)
Row 7: 2 white squares, 5 red squares
Row 8: 5 red squares, 3 white squares
Row 9: 4 white squares, 5 red squares
Row 10: 5 red squares, 5 white squares
Begin to decrease on top of flag (white side), increase on bottom of flag (red side)
Row 11: 5 white squares, 4 red squares, 1 blue square (right side)
Row 12: 2 blue squares, 3 red squares, 5 white squares
Row 13: 5 white squares, 2 red squares, 3 blue squares
Row 14: 4 blue squares, 1 red square, 5 blue squares. Fasten off red.
Row 15: 5 white squares, 5 blue squares
Begin to decrease both sides
Row 16: 5 blue, 4 white
Row 17: 3 white, 5 blue
Row 18: 5 blue, 2 white
Row 19: 1 white, 5 blue. Fasten off white.
Row 20: 5 blue
Row 21: 4 blue
Row 22: 3 blue
Row 23: 2 blue
Row 24: 1 blue
If you would like to put a hanging lp on the corner of your potholder, make the last square of Row 24: ch 3, dc, ch 10, sl st in 10th ch, 2 dc, sl st in next square.
Fasten off blue. Weave in all ends.
Star:
With white yarn, ch 2 (or magic circle), 5 sc in 2nd ch. Join with sl st. *ch 4, sl st in 2nd ch, sc in next ch, hdc in next ch, sl st in next sc,* 5 times. Fasten off white leaving 12″ length. Sew star to center of blue portion of potholder.
My Fingers Fly is currently #24 in my group for the DIY Hero by Make Magazine. Please vote! While you’re there, you can also make a donation to the American Lung Association.
How will you celebrate? Learn a new stitch? Crochet for charity? Buy a new set of crochet hooks? I’m celebrating by offering 10% off my entire shop with any $5.00 (or more) purchase. No coupon code required. Get an ebook to try out something new. Buy yourself a graphic t-shirt or coffee mug with a crochet theme. Order a tote bag to carry all your WIPs.
With gas prices getting higher, we could all use a little cash back.
Check out this free app that gets you cash back on gas and other errands! Click this link or use promo code 46ZCG to get an extra 15¢/gal bonus the first time you make a purchase. https://upside.app.link/46ZCG
Hey! Thought you’d like to try Ibotta, a cash back rewards app that I use to make real money every time I shop for groceries, online purchases, and more! Just use my referral code “eugysjd” at registration. Sign up at → https://ibotta.onelink.me/iUfE/8cc13c64?friend_code=eugysjd
Five-Day Free Trial of Marmalead
Join Rakuten and get $30 cash back. Plus earn money on online purchases.
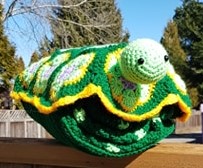
TGIF! I hope everyone is enjoying the Benjamin Turtle pattern. Today’s post is the final one for this crochet-along. You will be making the bottom flap and assembling the nap buddy.
Directions:
Bottom:
Row 1: With Dark Olive yarn, ch 30, hdc in 2nd ch and in each ch across (29 hdc).
Rows 2-4: Ch 1, turn, 2 hdc in first st, hdc across (32 hdc at end of Row 4).
Row 5: Ch 1, turn, 1 hdc, ch 1, sk next st, 30 hdc.
Row 6: Ch 1, turn, hdc in each hdc and ch-1 sp.
Rows 7-14: Ch 1, turn, hdc in each st.
Rows 15-24: Repeat Rows 5-14.
Rows 25-26: Repeat Rows 5-6.
Rows 27-29: Ch 1, turn, dec over first 2 sts, hdc across (29 hdc at end of Row 29). Do not fasten off.
Edging:
Ch 1, turn, hdc in each st across top, down side, across unused loops on bottom, and up the other side with 2 hdc in each corner. Join with sl st. Fasten off leaving 12” length for sewing.
Finished flap measures approximately 10” x 11”.
Assembly:
Mark centers of blanket and turtle. Measure from center, 5” to left and 5” to right and pin blanket to turtle at these spots. Sew center 10” of blanket to turtle using Dark Olive yarn and back stitch. For extra security, sew edges of blanket to turtle with whip st.
Fold blanket into thirds and roll it, then fit it inside the turtle. Pin bottom flap centered over the blanket/turtle seam and sew in place.
Sew buttons to bottom of shell corresponding to buttonholes in bottom flap.
Head:
Rnd 1: Ch 2 (or magic circle), 6 sc in 2nd ch. Do not join. Work in continuous rnds throughout head.
Rnd 2: 2 sc in each st (12 sc).
Rnd 3: *Sc in next st, 2 sc in next st,* repeat around (18 sc).
Rnd 4: *Sc in next 2 sts, 2 sc in next st,* repeat around (24 sc).
Rnd 5: *Sc in next 3 sts, 2 sc in next st,* repeat around (30 sc).
Rnds 6-9: Sc in each st.
Rnd 10: *Dec, sc in next 3 sts,* repeat around (24 sc).
Rnd 11: Sc in each st.
Insert eyes at Rnd 4, approximately 1” apart.
Rnd 12: *Dec, sc in next 2 sts,* repeat around (18 sc).
Rnds 13-16: Sc in each st. Join with sl st. Fasten off leaving 12” length.
Stuff head and sew to front of turtle at the top edge of the center hexagon. Weave in all ends.
I am thrilled to be a part of this amazing crochet pattern giveaway! There are 25 designers, each offering a different summer pattern. Use coupon code SUMMER2020 on Ravelry through 6/24/2020. These amazing patterns should keep you busy for quite a while this summer!
My contribution to the roundup is also available at First Day of Summer – easy butterfly flip flop pattern. If you prefer video tutorials, please see YouTube.
National Zoo & Aquarium Month
June 50% off patterns continue with today’s animal being the Polar Bear. We still have over a week to go in June with lots more half price patterns. Thursday’s sale is also still available – Fish Dish Towel. Makes a great Father’s Day gift!
I spent this week working on a giant snake plushie. Bernat blanket yarn is so soft and squishy, I just love using it to make stuffed animals! The pattern is complete, but I need a couple of people to test it. If you would like to test, please join my Facebook group for the King snake and other testing opportunities. The snake in the photo measures 100″ long, and instructions are also given for a 66″ snake.
Panda Bear Eyeglass Holder
For the Addi knitter, this cute panda pattern is quick and easy.
Good morning everyone! We had a cool front come in this week with gorgeous morning temps. It will be a hot one in the afternoon, but I’ve been enjoying my morning coffee on the patio enjoying the 70-degree weather.
Benjamin is proving to be as popular with crocheters as I had hoped – he’s just so cute! Please share your color combinations on Instagram or Facebook. This week we’ll be making the African flower motifs for his shell and putting them together. Next week will be making the turtle head and bottom flap, then attaching the blanket to the turtle shell.
Rnd 1: With Sungold yarn, Magic Ring (MR), ch 3 (counts as dc), dc, ch 1, *2 dc, ch 1,* repeat 4 times, join with sl st in top of beg ch-3. Fasten off Sungold.
Rnd 2: Attach Mild Green yarn in any ch-1 sp, ch 3 (counts as dc), dc, ch 1, 2 dc in same sp, (2 dc, ch 1, 2 dc) in next 5 ch-1 sps. Join with sl st in top of beg ch-3.
Rnd 3: Sl st into ch-1 sp, ch 3 (counts as dc), 6 dc in same ch-1 sp, 7 dc in remaining 5 ch-1 sps. Join with sl st in top of beg ch-3. Fasten off Mild Green.
Rnd 4: Attach Toasted Almond yarn at first dc of any 7-dc group, ch 1, *sc in each of 7 dc across top of shell, sc in sp between shells two rows below in Rnd 2,* repeat 5 times. Join with sl st in top of first sc. Fasten off Toasted Almond yarn.
Rnd 5: Attach Dark Olive Yarn, ch 1 (does not count as st), *hdc in each of 8 sc across side of hexagon, ch 1,* repeat 5 times. Join with sl st in top of first hdc. Fasten off Dark Olive Yarn. Block squares and sew together in the following configuration.
Each side of the hexagon is 8 hdc with a ch at each end. Sew these sts together. On the hexagons that form the outer edge (as indicated in photo below by arrows), continue this seam for an additional 4 sts.
Edging:
Rnd 1: Attach Dark Olive yarn at any st, ch 3 (counts as dc), dc in next st and each st around. Some hexagons will still have ch-1 sps. Skip these. At seam, work dc dec across both sides of seam. Join with sl st in top of ch-3. Fasten off Dark Olive.
Rnd 2: Attach Sungold yarn, ch 1, sc in same st, *sk 2 sts, 6 dc in next st, sk 2 sts, sc in next st,* repeat around. It may be necessary to manipulate the skipped sts towards the end of the rnd in order to finish with a shell st rather than a sc. Join with sl st in first sc. Fasten off Sungold.
Don’t hesitate to reach out if you have any questions on this pattern. The pattern PDF is available at My Fingers Fly. If you prefer Ravelry, turtles are the featured animal on June 13 – Benjamin Turtle. Each day in June, a different animal pattern is half price.
Last year I published an Elephant Crochet Pattern ebook, but I just wasn’t satisfied with the amount of patterns, so I added a few more patterns. The ebook PDF is now available on Etsy and My Fingers Fly. Kindle and paperback versions are also available on Amazon.
Miles the Jazzy Elephant was so much fun to make; I hope you’ll enjoy him too. Elephant patterns are also available separately on Ravelry, Etsy, Lovecrafts, and My Fingers Fly. Also included in the book is an Elephant Ear Saver Crochet Pattern (free on the blog).
Miles and Benjamin will both be included in my next book, A to Z Animal Crochet. Animal patterns are so much fun!
I still have a few 2020 Crochet Calendars left – just pay shipping. Even though the year is almost half gone, the 12 kitchen crochet patterns can be used forever.


 On February 28, 1836, a group of Texians came together at Washington-on-the-Brazos to declare independence from Mexico and declare Texas as a Republic. The Texas Declaration of Independence was signed on March 2, 1836. Sixty men signed the document, 57 of whom had moved from the United States to Texas after the Mexican government had promised them a republican government. War had begun several months before and ended with the capture of Santa Anna at the Battle of San Jacinto on April 21, 1936. The signing of the declaration took place while the Battle of the Alamo was raging in San Antonio.